ProxySQL--基础--7.2--基于SQL的读写分离(推荐)
·
ProxySQL–基础–7.2–基于SQL的读写分离(推荐)
1、介绍
1.1、准备环境
mysql1主2从
ProxySQL--基础--2.3--部署--准备测试环境--mysql1主2从
1.1.1、机器信息
| 名称 | Ip | Port | server_id |
|---|---|---|---|
| M1 | 192.168.187.88 | 3307 | 110 |
| M1S1 | 192.168.187.88 | 3308 | 120 |
| M1S2 | 192.168.187.88 | 3309 | 130 |
| Proxysql | 192.168.187.88 | 6032,6033 | null |
1.1.2、架构图
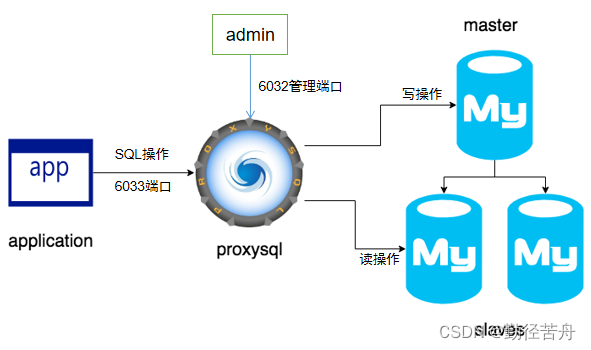
1.2、操作步骤
- ProxySQL 添加MySQL节点
- 具体细节:ProxySQL–基础–2.4–部署–管理MSYQL节点
- 添加 普通用户
- 具体细节:ProxySQL–基础–2.4–部署–管理MSYQL节点
- 配置读写分离 路由规则
1.2.1、配置
mysql_servers:
+--------------+----------+------+--------+--------+
| hostgroup_id | hostname | port | status | weight |
+--------------+----------+------+--------+--------+
| 10           | host1    | 3307 | ONLINE | 1      |
| 20           | host2    | 3308 | ONLINE | 1      |
| 20           | host3    | 3309 | ONLINE | 1      |
+--------------+----------+------+--------+--------+

mysql_users:
+----------+-------------------+
| username | default_hostgroup |
+----------+-------------------+
| root     | 10                |
+----------+-------------------+

mysql_query_rules:
+---------+-----------------------+----------------------+
| rule_id | destination_hostgroup | match_digest         |
+---------+-----------------------+----------------------+
| 1       | 10                    | ^SELECT.*FOR UPDATE$ |
| 2       | 20                    | ^SELECT   			 |
+---------+-----------------------+----------------------+
2、操作
2.1、添加MySQL节点
# 连接到ProxySQL的管理接口
mysql -uadmin -padmin -P6032 -h127.0.0.1;


insert into mysql_servers(hostgroup_id,hostname,port)values(10,'192.168.187.88',3307);
insert into mysql_servers(hostgroup_id,hostname,port)values(20,'192.168.187.88',3308);
insert into mysql_servers(hostgroup_id,hostname,port)values(20,'192.168.187.88',3309);


# 将配置加载到RUNTIME,使其可以立马生效,并保存到disk。
load mysql servers to runtime;
save mysql servers to disk;


# 查看下各节点是否都是 ONLINE
select * from mysql_servers\G
2.2、添加 普通用户
# msyql 添加用户(只需master执行即可,会复制给两个slave)
# 创建用户
create user sqlsender@'192.168.187.%' identified by '123456';

# 授权
grant all on *.* to root@'192.168.187.%' identified by '123456';
grant all on *.* to sqlsender@'192.168.187.%' identified by '123456';


# ProxySQL 添加用户

insert into mysql_users(username,password,default_hostgroup)values('root','123456',10);
insert into mysql_users(username,password,default_hostgroup)values('sqlsender','123456',10);


# 将配置加载到RUNTIME,使其可以立马生效,并保存到disk。
load mysql users to runtime;
save mysql users to disk;


# 保证transaction_persistent=1
update mysql_users set transaction_persistent=1 where username='root';
# 将配置加载到RUNTIME,使其可以立马生效,并保存到disk。
load mysql users to runtime;
save mysql users to disk;
2.3、配置读写分离 路由规则
和查询规则有关的表有两个:
mysql_query_rules:路由规则表,本文只介绍这个表。mysql_query_rules_fast_routing:是mysql_query_rules的扩展表
# 插入两个规则,目的是将select语句分离到hostgroup_id=20的读组,但由于select语句中有一个特殊语句`SELECT...FOR UPDATE`它会申请写锁,所以应该路由到hostgroup_id=10的写组。


insert into mysql_query_rules(rule_id,active,match_digest,destination_hostgroup,apply)
VALUES
(1,1,'^SELECT.*FOR UPDATE$',10,1),
(2,1,'^SELECT',20,1);


# 将配置加载到RUNTIME,使其可以立马生效,并保存到disk。
load mysql query rules to runtime;
save mysql query rules to disk;
select ... for update规则的rule_id必须要小于普通的select规则的rule_id,因为ProxySQL是根据rule_id的顺序进行规则匹配的。
3、测试
3.1、读操作
3.1.1、select 查询
SELECT * FROM test1.t1;
SELECT * FROM test1.t2;
SELECT * FROM test2.t1;
SELECT * FROM test2.t2;
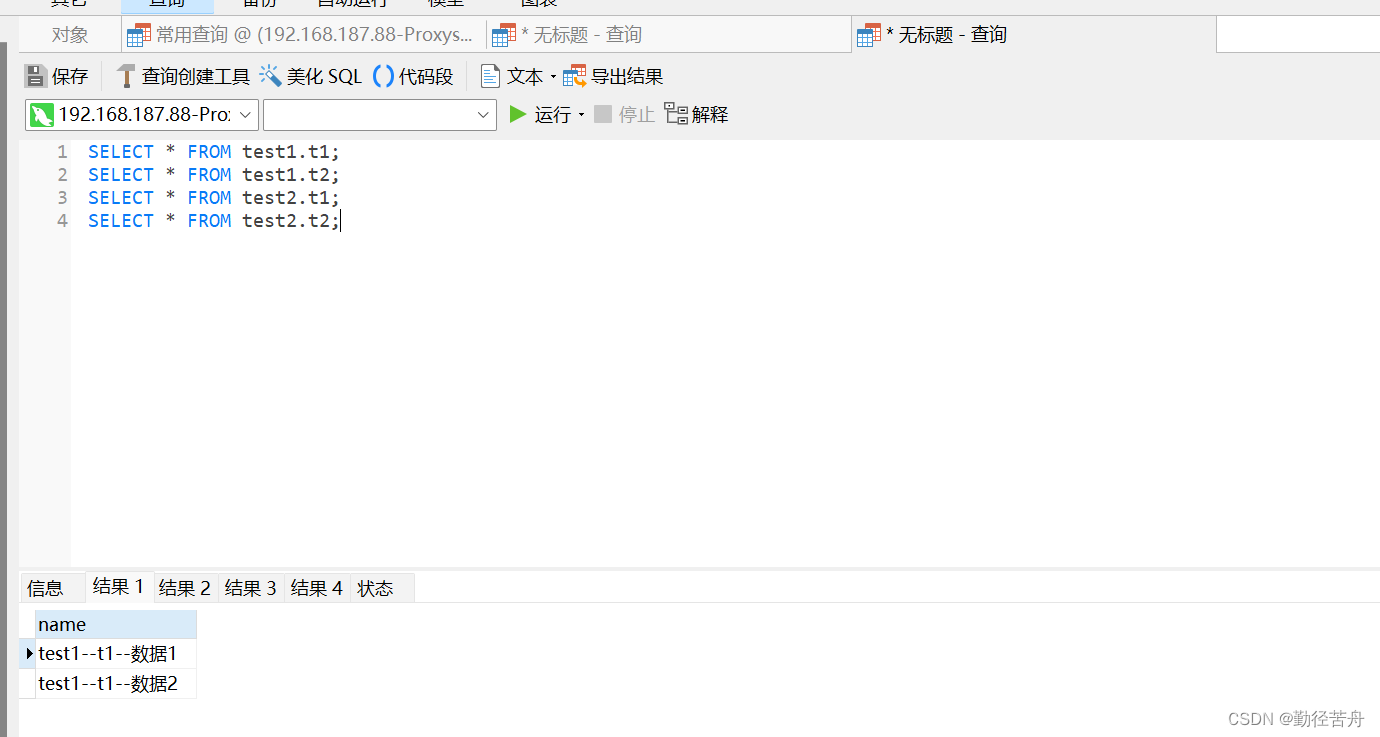
3.1.2、查看规则的路由命中情况
-- 查看规则的路由命中情况
select * from stats_mysql_query_rules;
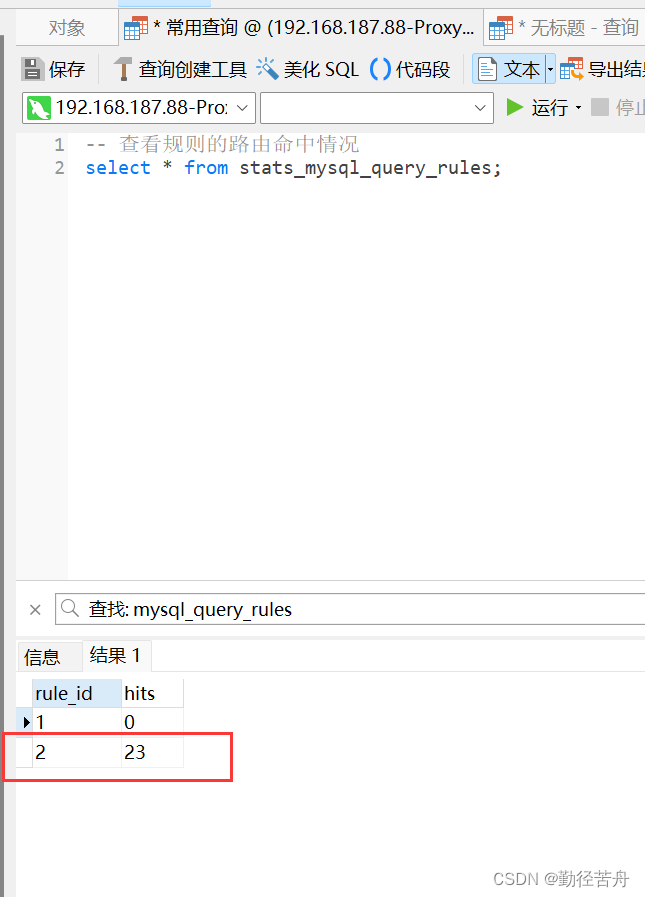
3.2、写操作
3.2.1、更新
INSERT INTO `test1`.`t1`(`name`) VALUES ('test1--t1--数据3');
SELECT * FROM test1.t1;
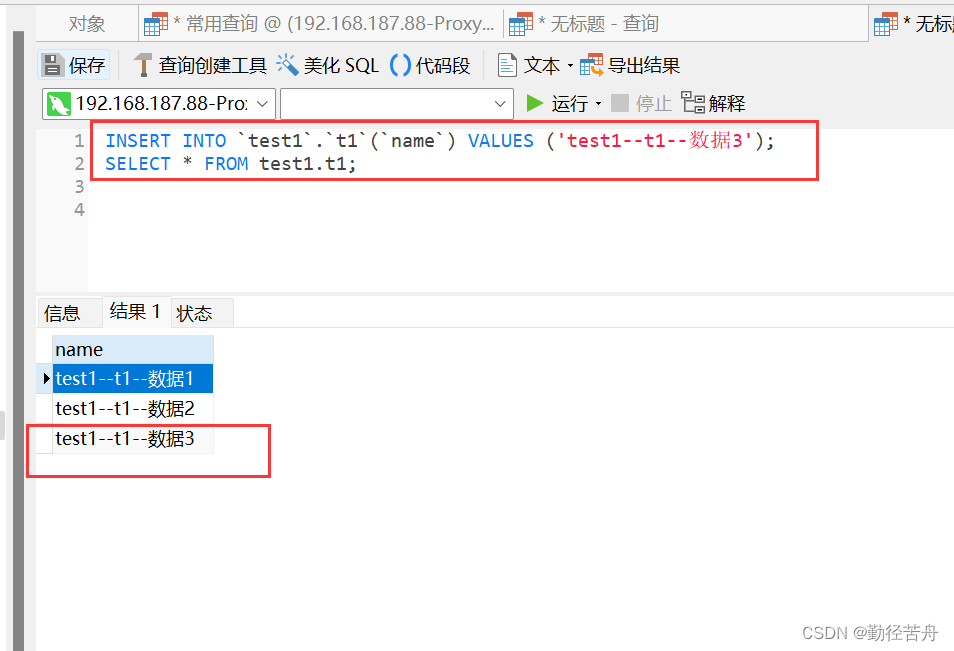

北京人形旗下天工造物具身智能开源社区,聚焦具身天工与慧思开物两大平台
更多推荐
 0
0 0
0- 0


 已为社区贡献21条内容

所有评论(0)