oauth2.0 高性能服务器,【最简OAuth 2.0 教程】开发认证中心及资源服务器接入
背景: 网上很多讲配置 oauth2 ,配置方法 复杂纷繁对于初学者很不友好,让人望而却步
欢迎关注本系列博客 基于 spring cloud 最新版本 hoxton 完成oauth2 的实践
基于 Spring Cloud OAuth,用简洁的方式搭建oauth的认证中心,
项目版本核心说明
名称
版本
Spring Boot
2.2.0.M5
Spring Cloud
Hoxton.M2
Spring Cloud OAuth2
2.2.0.M2
开始配置认证服务器
maven 依赖引入
这里只需要引入web、 cloud-oauth 即可,暂不引入spring cloud 其他组件
org.springframework.boot
spring-boot-starter-web
org.springframework.cloud
spring-cloud-starter-oauth2
配置web安全,拦截全部的请求
获取web 上下文AuthenticationManager 注入到spring中,方便后边oauth server注入
创建UserDetailsService的内存实现,注入一个测试用户
@Configuration
@EnableWebSecurity
@EnableGlobalMethodSecurity(prePostEnabled = true)
public class WebSecurityConfiguration extends WebSecurityConfigurerAdapter {
/**
* 必须注入 AuthenticationManager,不然oauth 无法处理四种授权方式
*
* @return
* @throws Exception
*/
@Bean
@Override
public AuthenticationManager authenticationManagerBean() throws Exception {
return super.authenticationManagerBean();
}
/**
* 必须注入UserDetailsService ,不然oauth 密码模式等死循环问题
*
* @return
*/
@Bean
@Override
protected UserDetailsService userDetailsService() {
InMemoryUserDetailsManager userDetailsManager = new InMemoryUserDetailsManager();
userDetailsManager.createUser(User.withUsername("lengleng").password("{noop}lengleng").authorities("USER").build());
return userDetailsManager;
}
}
配置oauth2 认证服务器
配置clientId 信息,及其支持的授权模式,特别注意这里是五种包含一个刷新操作
@Configuration
@EnableAuthorizationServer
public class BigAuthServerConfiguration extends AuthorizationServerConfigurerAdapter {
@Autowired
private AuthenticationManager authenticationManager;
@Autowired
private UserDetailsService userDetailsService;
@Override
public void configure(ClientDetailsServiceConfigurer clients) throws Exception {
clients.inMemory()
.withClient("appid")
.secret("{noop}secret")
.authorizedGrantTypes("password", "authorization_code", "client_credentials", "implicit", "refresh_token")
.scopes("all");
}
@Override
public void configure(AuthorizationServerEndpointsConfigurer endpoints) {
endpoints.authenticationManager(authenticationManager)
.userDetailsService(userDetailsService);
}
}
以上完成了认证服务器的功能
测试密码模式
curl -X POST -H "Content-Type: application/x-www-form-urlencoded" -d 'grant_type=password&username=lengleng&password=lengleng&scope=all' "http://appid:secret@localhost:8764/oauth/token"
开始配置资源服务器
maven 依赖引入
这里只需要引入web、 cloud-oauth 即可,暂不引入spring cloud 其他组件
org.springframework.boot
spring-boot-starter-web
org.springframework.cloud
spring-cloud-starter-oauth2
配置客户端信息
security:
oauth2:
client:
client-id: appid
client-secret: secret
scope: all
resource: # 认证中心的check_token 接口地址
token-info-uri: http://127.0.0.1:8764/oauth/check_token
应用声明资源服务器
@EnableResourceServer 即可完成接入
// 接入oauth2 ,声明为资源服务器
@EnableResourceServer
@EnableDiscoveryClient
@SpringBootApplication
public class BigUpmsServerApplication {
public static void main(String[] args) {
SpringApplication.run(BigUpmsServerApplication.class, args);
}
}
上文配置的认证服务器暴露check_token
若不处理接口check_token 403
public class BigAuthServerConfiguration extends AuthorizationServerConfigurerAdapter {
/**
* checkTokenAccess 权限设置为isAuthenticated,不然资源服务器 来请求403
* @param oauthServer
*/
@Override
public void configure(AuthorizationServerSecurityConfigurer oauthServer) {
oauthServer
.allowFormAuthenticationForClients()
.checkTokenAccess("isAuthenticated()");
}
}
资源服务器demo 接口
@RestController
public class DemoController {
@GetMapping("/info")
public Authentication authentication(Authentication authentication) {
return authentication;
}
}
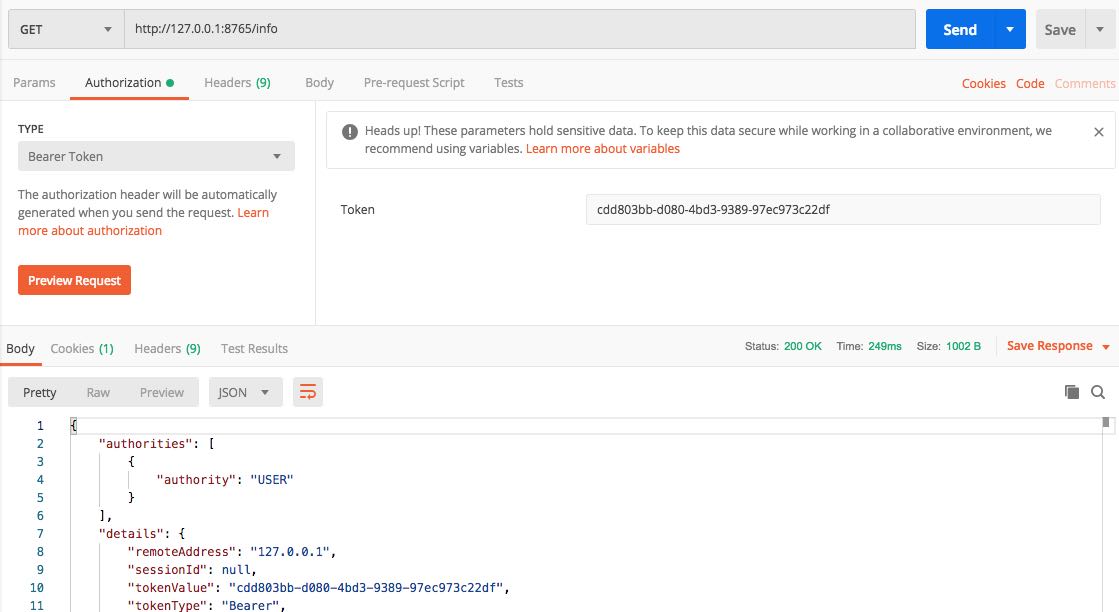
通过上文获取的token 访问测试接口
获取token

通过token 请求测试接口获取当前用户信息
总结

北京人形旗下天工造物具身智能开源社区,聚焦具身天工与慧思开物两大平台
更多推荐
 0
0 0
0- 0


 已为社区贡献6条内容

所有评论(0)