SpringBoot项目实战(32)--使用Beetl模板实现Mybatis-plus代码生成器(一)
在进行项目的实际开发之前,我们需要准备好一些开发工具,这样可以提高我们的开发效率,因为目前绝大部分SpringBoot项目都在使用mybatis或mybatis-plus开发,就现在而言,mybatis-plus使用起来可能更加方便(比如mybatis-plus封装了分页器)。但是如果我们没有一个开发工具的话,基于一个数据库表实现mybatis-plus增删改查需要写不少类,包括实体类、Service类、Mapper类、参数类、结果类等等。本文介绍如何使用Beetl模板,结合我们的一个Mybatis-plus代码示例,来实现一个生成Mybatis-plus的后端Java程序代码的代码生成器(后端页面代码+前端VUE页面)。
Beetl作为模板的作用是,我们不需要在Java程序中拼写生成器的程序代码,我们仅需要把模板文件需要替换的变量传递给Beetl模板即可。那么本节首先介绍如何使用Beetl模版文件的示例。
在上节介绍了使用自定义文件路径的模板文件展示ModelView视图,本节介绍读取模板文件,替换变量后,保存为一个新的Java文件。
一、建立openjweb-dev低代码开发模块
我们规划使用openjweb-dev这个新的模块作为低代码开发模块。所有跟低代码开发的实现都写在这个模块里。所以现在我们需要在IDEA里创建一个子模块,groupID使用org.openjweb,模块ID为openjweb-dev,包路径为org.openjweb.dev。
注意在创建子模块的第二步,选择依赖的时候,需要勾选Spring-Web:
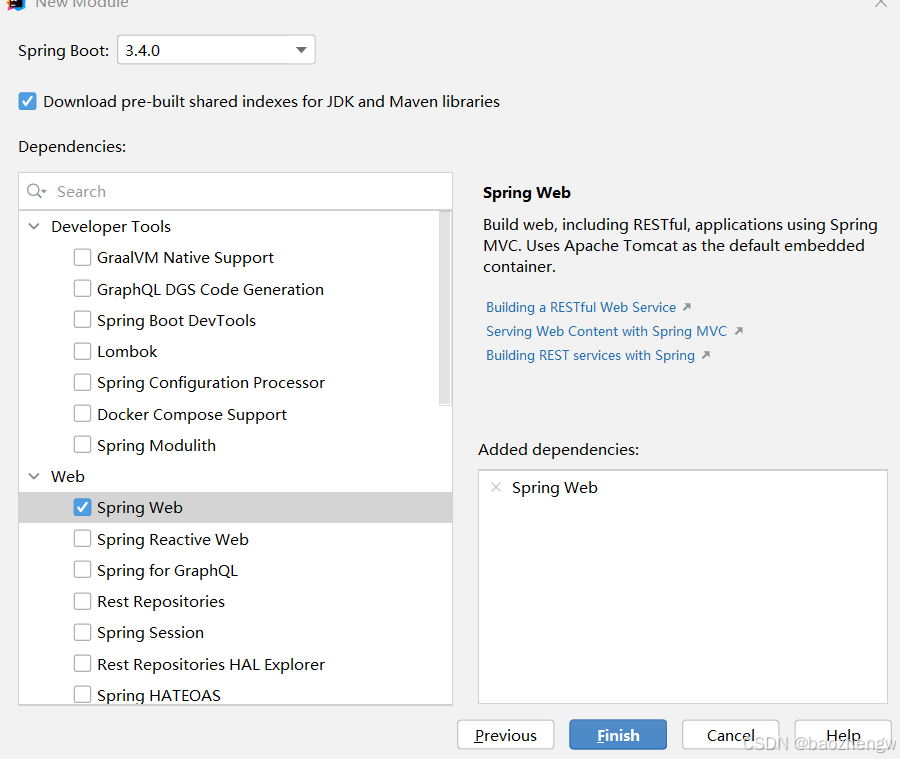
感觉不在这里勾选的话,有时不能在openjweb-sys模块中跨模块执行openjweb-dev此模块里的@RestController。点Finish后,openjweb-dev的pom.xml会出现下面的依赖:
        <dependency>
            <groupId>org.springframework.boot</groupId>
            <artifactId>spring-boot-starter-web</artifactId>
        </dependency>
在创建了openjweb-dev模块后,需要把此模块的parent修改为总工程,下面是openjweb-dev的pom.xml:
<?xml version="1.0" encoding="UTF-8"?>
<project xmlns="http://maven.apache.org/POM/4.0.0" xmlns:xsi="http://www.w3.org/2001/XMLSchema-instance"
         xsi:schemaLocation="http://maven.apache.org/POM/4.0.0 https://maven.apache.org/xsd/maven-4.0.0.xsd">
    <modelVersion>4.0.0</modelVersion>
    <parent>
        <groupId>org.openjweb</groupId>
        <artifactId>openjweb-cloud</artifactId>
        <version>0.0.1-SNAPSHOT</version>
    </parent>
    <groupId>org.openjweb</groupId>
    <artifactId>openjweb-dev</artifactId>
    <version>0.0.1-SNAPSHOT</version>
    <name>openjweb-dev</name>
    <description>openjweb-dev</description>
    <url/>
    <licenses>
        <license/>
    </licenses>
    <developers>
        <developer/>
    </developers>
    <scm>
        <connection/>
        <developerConnection/>
        <tag/>
        <url/>
    </scm>
    <properties>
        <java.version>${java.version}</java.version>
    </properties>
    <dependencies>
        <dependency>
            <groupId>org.springframework.boot</groupId>
            <artifactId>spring-boot-starter-web</artifactId>
        </dependency>

        <dependency>
            <groupId>org.openjweb</groupId>
            <artifactId>openjweb-core</artifactId>
            <version>0.0.1-SNAPSHOT</version>
            <scope>compile</scope>
        </dependency>
    </dependencies>

</project>
另外总工程openjweb-cloud需要把openjweb-dev加到module中:
<module>openjweb-dev</module>另外openjweb-sys作为一个运行环境为主的模块。需要依赖所有需要运行的子系统,所以openjweb-sys中需要加入openjweb-dev的依赖:
        <dependency>
            <groupId>org.openjweb</groupId>
            <artifactId>openjweb-dev</artifactId>
            <version>0.0.1-SNAPSHOT</version>
            <scope>compile</scope>
        </dependency>
手工做上面的修改配置后,需要刷新右侧的maven,确保openjweb-dev在openjweb-cloud里面。

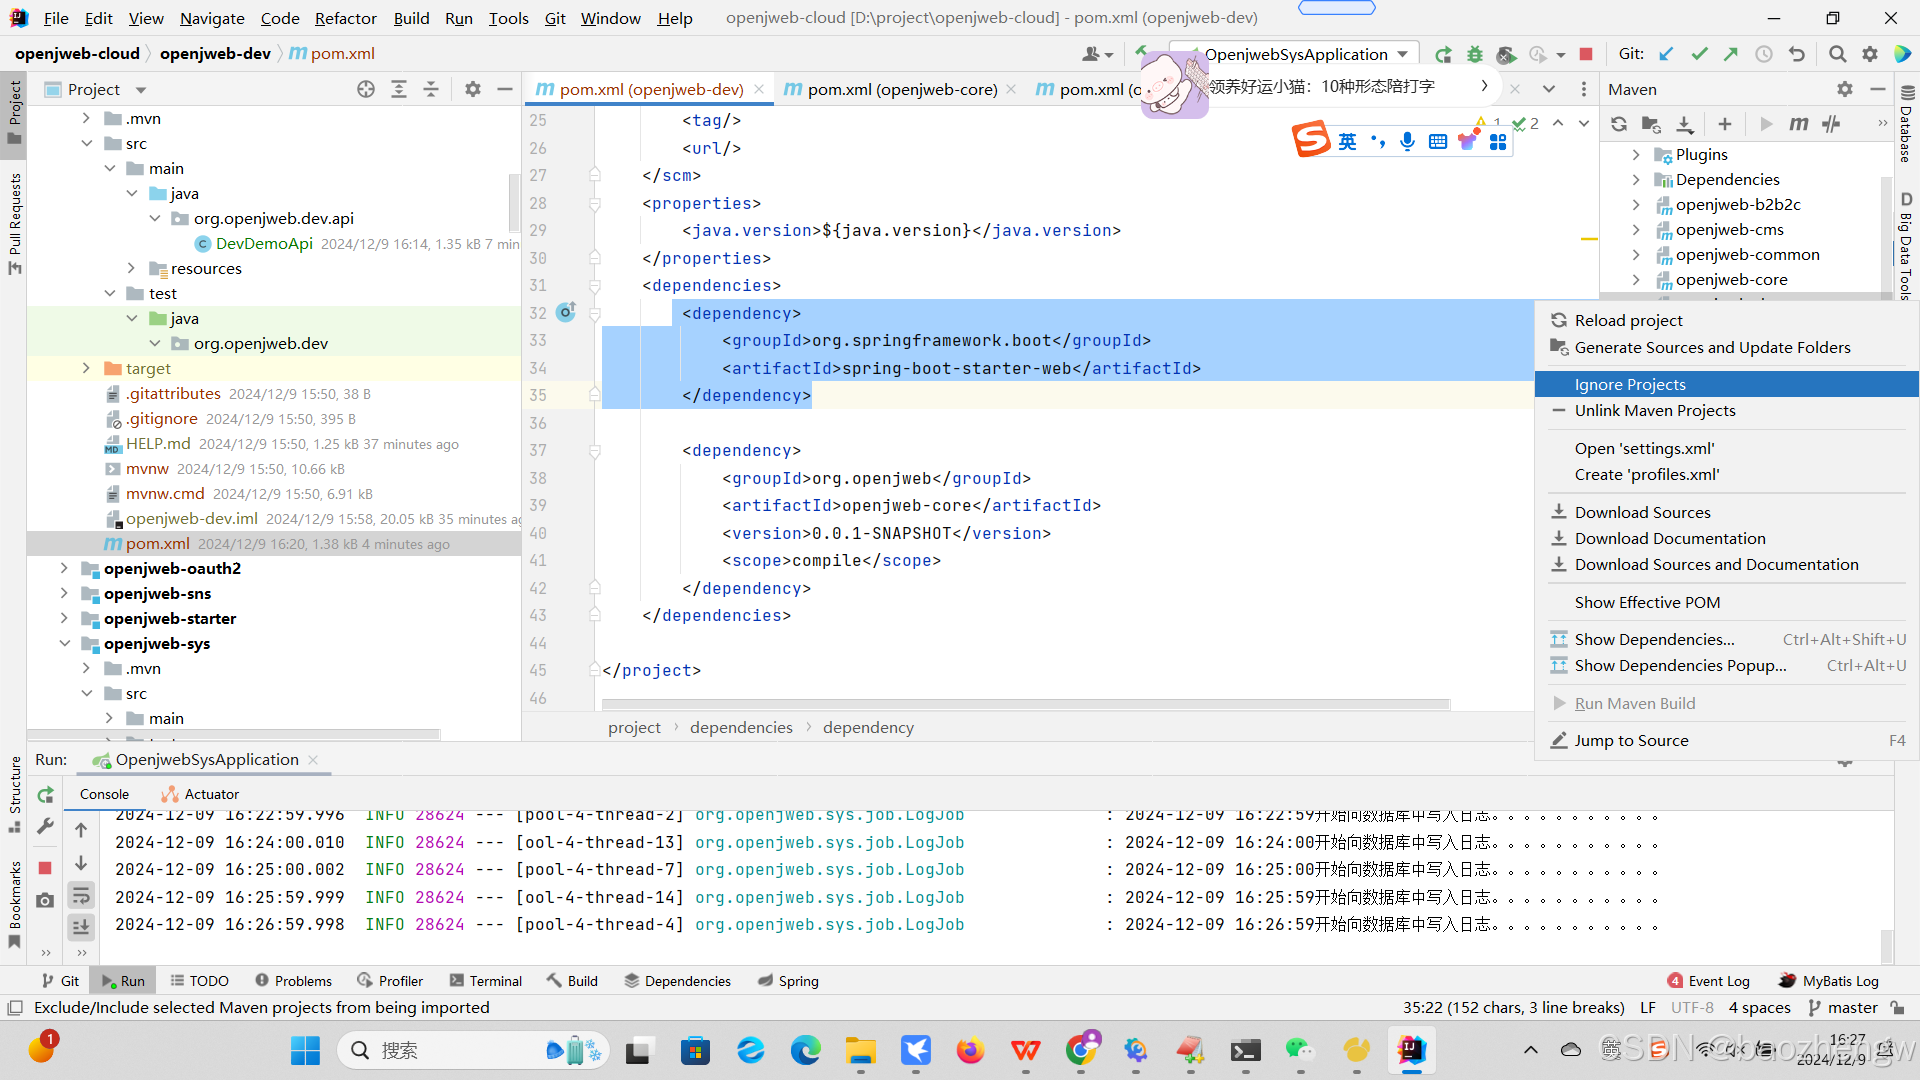
另外因为手工进行了pom.xml的修改配置,openjweb-dev里的pom.xml的图标可能显示是灰色加下划线的, openjweb-dev显示灰色的。这是可以选择右侧的openjweb-dev,把项目加到工程里,具体菜单名忘记了,下面是我加好之后的菜单,和加之前的是相反的显示:
二、创建一个模板类文件
本文我们先实现一个简单的示例,主要是让Beetl模板能正常工作,在后面的文章里会进一步深入介绍基于Mybatis-plus+Beetl的低代码开发。
在上一篇文章里介绍了Beetl读取自定义文件路径里的模板文件,路径设置的是D:\tmp\beetl\templates,现在我们在这个目录里建一个dev子目录,用来存放模板文件,然后在这个dev目录里创建一个ApiTemplate.java文件,作为生成@RestController接口文件的模板。
package ${packageName};

import org.springframework.web.bind.annotation.RequestMapping;
import org.springframework.web.bind.annotation.RestController;

/***
 * @author ${authorName}
 */

@RestController
@RequestMapping("${classRequestMapping}")
public class ${className} {

	private String ${varName};

}
在上面的模板文件中${packageName}为包路径,${authorName}为作者名,${classRequestMapping}为类的请求路径, ${className}为类名,${varName}为一个类属性名。注意创建完文件的时候,检查下此文件的字符集,例如用edit-plus打开一下,save as 中选择utf-8,否则后面保存文件可能会出现中文乱码。
然后我们创建一个测试接口类,文件放在openjweb-dev的org.openjweb.dev.api包路径下:
package org.openjweb.dev.api;

import lombok.extern.slf4j.Slf4j;
import org.beetl.core.Configuration;
import org.beetl.core.GroupTemplate;
import org.beetl.core.Template;
import org.beetl.core.resource.FileResourceLoader;
import org.openjweb.common.util.FileUtil;
import org.springframework.beans.factory.annotation.Value;
import org.springframework.web.bind.annotation.RequestMapping;
import org.springframework.web.bind.annotation.RestController;

import java.io.IOException;

/***
 * @author abao
 */
//localhost:8001/demo/dev/code
@Slf4j
@RestController
@RequestMapping("/demo/dev")
public class DevDemoApi {

    @Value("${beetl.fileTemplatesPath:}") String fileTemplatesPath;
    @RequestMapping("code")
    private String createBeetlCode(){
        log.info("调用/demo/dev/createCode接口................");
        FileResourceLoader resourceLoader = new FileResourceLoader(fileTemplatesPath,"utf-8");
        Configuration cfg = null;
        try {

            cfg = Configuration.defaultConfiguration();
            cfg.setCharset("utf-8");//设置文件的字符集

        } catch (IOException e) {
            e.printStackTrace();
        }
        GroupTemplate gt = new GroupTemplate(resourceLoader, cfg);
        Template t = gt.getTemplate("dev/ApiTemplate.java");


        t.binding("authorName","阿宝11");
        t.binding("packageName","org.openjweb.dev.demo");
        t.binding("classRequestMapping","/demo/dev/hello");
        t.binding("className","MyDemo");
        t.binding("varName","filePath");
        String str = null;
        try{
            str = t.render();
        }
        catch(Exception ex){
            ex.printStackTrace();
            return "运行错误:"+ex.toString();
        }
        log.info("生成的文件内容:"+str);
        //生成到文件
        try {
            FileUtil.str2file(str,"d:/tmp/beetl/templates/dev/MyDemo.java","utf-8");
        } catch (Exception e) {

            e.printStackTrace();
            return "文件生成异常:"+e.toString();

        }
        //System.out.println(str);
        return str;
    }
}
在上面的代码中,模板文件为自定义模版路径下的模版文件ApiTemplate.java,通过t.binding设置模版中的变量,r.render()渲染之后,通过FileUtil.str2file保存到本地文件中。注意在上面的文件中,需要通过cfg.setCharset("utf-8"); 设置下生成文件的字符集,因为目前不清楚defaultConfiguration()用的默认字符集是什么。
然后我们启动SpringBoot,访问测试链接:http://localhost:8001/demo/dev/code,界面显示生成的文件内容:

然后打开本地电脑的D:\tmp\beetl\templates\dev目录,会看到我们定义的生成的类文件名MyDemo.java,打开文件,生成的代码:
package org.openjweb.dev.demo;

import org.springframework.web.bind.annotation.RequestMapping;
import org.springframework.web.bind.annotation.RestController;

/***
 * @author 阿宝11
 */

@RestController
@RequestMapping("/demo/dev/hello")
public class MyDemo {

	private String filePath;

}
这样基于beetl模板生成java源码的Demo就实现了,当然目前仅是一个示例,走通了代码生成,后面的文章会继续介绍真正的mybatis-plus的代码生成。
本文示例代码可从github下载:
https://github.com/openjweb/cloud/tree/master https://github.com/openjweb/cloud/tree/master

北京人形旗下天工造物具身智能开源社区,聚焦具身天工与慧思开物两大平台
更多推荐
 14
 0
- 0


 已为社区贡献6条内容

所有评论(0)