uniapp自定义tabBar,实现不同角色展示不同tabBar
效果图
教师角色登录
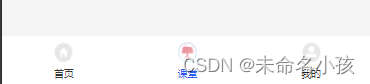
学生角色登录
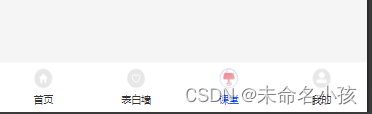
方法
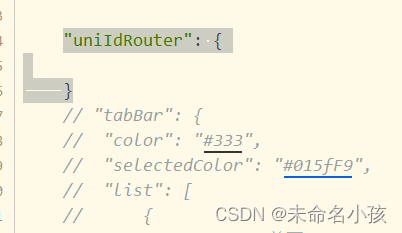
步骤一:pages.json :
删除原有的tabBar配置,添加"uniIdRouter": { }
如图所示:
步骤二:getConfig.js :
添加用于用户身份类型的
var identityIsStudent = "student";
var identityIsTeacher = "teacher";
var setLoginIdentity = function(identity) {
api.setLoginIdentity(identity);}
var getLoginIdentity = function() {
return api.getLoginIdentity();}
const teacherTabBarList = [{
"text": "首页",
"pagePath": " ",
"iconPath": " ",
"selectedIconPath": " "
}, {
"text": "课堂",
"pagePath": " ",
"iconPath": " ",
"selectedIconPath": " "
}, {
"text": "我的",
"pagePath": " ",
"iconPath": " ",
"selectedIconPath": " "
}];
const stuTabBarList = [{
"text": "首页",
"pagePath": " ",
"iconPath": " ",
"selectedIconPath": " "
}, {
"text": "表白墙",
"pagePath": " ",
"iconPath": " ",
"selectedIconPath": " "
}, {
"text": "课堂",
"pagePath": " ",
"iconPath": " ",
"selectedIconPath": " "
}, {
"text": "我的",
"pagePath": " ",
"iconPath": " ",
"selectedIconPath": " "
}];
在export default 里面加入 identityIsStudent, identityIsTeacher, teacherTabBarList, stuTabBarList, setLoginIdentity, getLoginIdentity
步骤三:http.js :
加入获取角色 userIdentityKey: "userIdentity", _config["header"][this.userIdentityKey] = this.getLoginIdentity();
步骤四:新建tabBar组件,并在main.js中引入
import tabBar from "@/components/tabBar/tabBar"
Vue.component('tabBar', tabBar);
<template>
<view class="tab-bar">
<view v-for="(item,index) in list" :key="index" class="tab-bar-item" @click="switchTab(item, index)">
<image class="tab_img" :src="currentIndex == index ? item.selectedIconPath : item.iconPath"></image>
<view class="tab_text" :style="{color: currentIndex == index ? selectedColor : color}">{{item.text}}</view>
</view>
</view>
</template><script>
export default {
props: {
selectedIndex: { // 当前选中的tab index
default: 0
},
},
data() {
return {
color: "#333",
selectedColor: "#015fF9",
list: [],
currentIndex: 0,}
},
created() {
this.currentIndex = this.selectedIndex;
var _this = this;
var identify = _this.$config.getLoginIdentity();
if (identify == this.$config.identityIsStudent) {
_this.list = _this.$config.stuTabBarList;
} else {
this.list = _this.$config.teacherTabBarList;
}
},
methods: {
switchTab(item, index) {
this.currentIndex = index;let url = item.pagePath;
uni.redirectTo({
url: "/" + url
})
}
}
}
</script><style lang="scss">
.tab-bar {
position: fixed;
bottom: 0;
width: 100%;
height: 100rpx;
background: white;
display: flex;
justify-content: center;
align-items: center;
padding-bottom: env(safe-area-inset-bottom); // 适配iphoneX的底部.tab-bar-item {
flex: 1;
text-align: center;
display: flex;
justify-content: center;
align-items: center;
flex-direction: column;.tab_img {
width: 37rpx;
height: 41rpx;
}.tab_text {
font-size: 20rpx;
margin-top: 9rpx;
}
}
}
</style>
步骤五:页面引入组件
<tabBar :selectedIndex="1"></tabBar>
<tabBar :selectedIndex="currentIndex"></tabBar>
如果页面相同,但是展示的下标不同,可以使用计算属性(例如currentIndex),动态改变下标
computed: {
currentIndex() {
if (this.$config.getLoginIdentity() === 'student') {
return 3;
} else if (this.$config.getLoginIdentity() === 'teacher') {
return 2;
}
return 0;
}
},

北京人形旗下天工造物具身智能开源社区,聚焦具身天工与慧思开物两大平台
更多推荐
 49
49 0
0- 0


 已为社区贡献1条内容

所有评论(0)