Azure DevOps Test Plans 对接 DotNet Core NUnit单元测试
背景介绍
我有一个场景,需要使用DotNet代码,和Azure DevOps的Test Plans做单元测试
但是网上各种知识碎片 零零散散,不胜其烦。故作整合,与君共勉。
本篇图文纯手打,点赞收藏发大财!!!
操作步骤
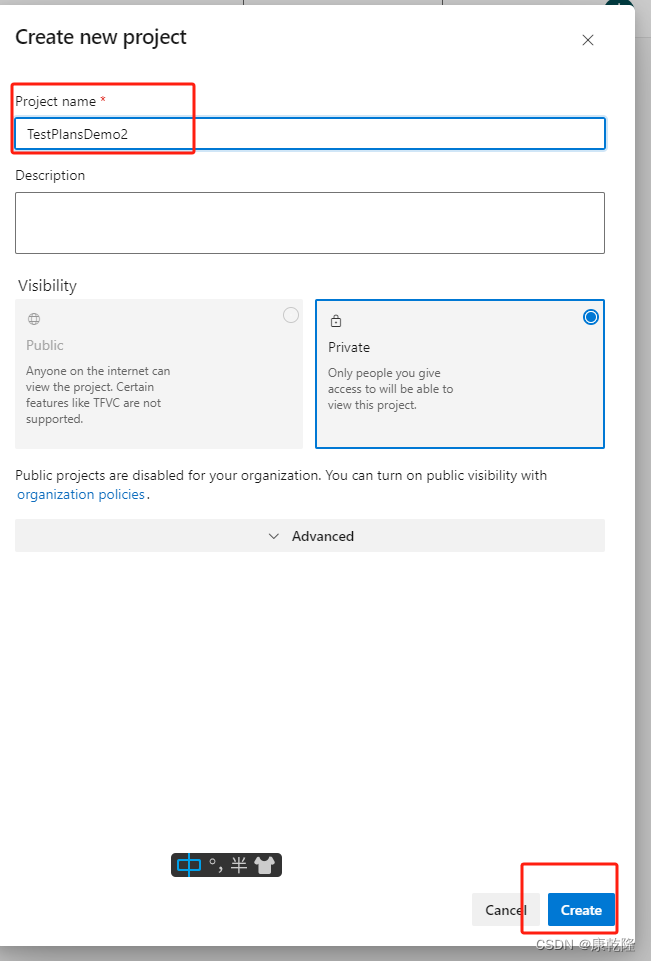
新建项目

输入你要创建的项目的名字
选择源代码管理,可以选择使用Git,但这里为了方便,我们先试用微软的Repos源代码管理
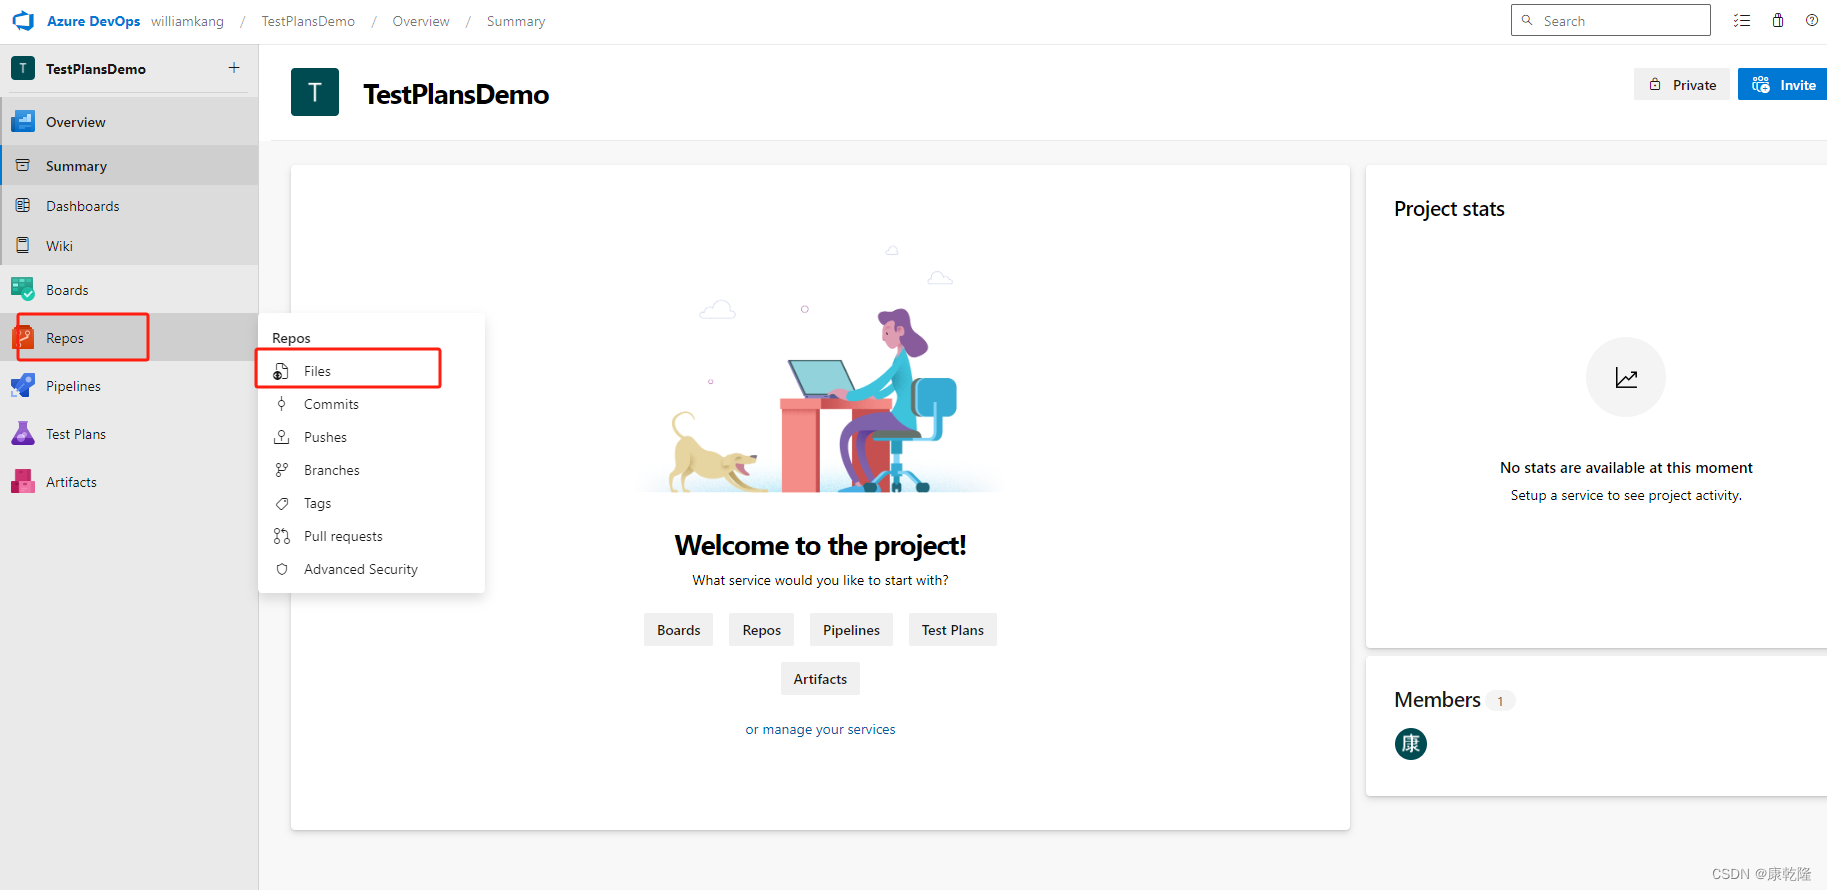
把这个项目的Https url copy使用Git工具拉下来
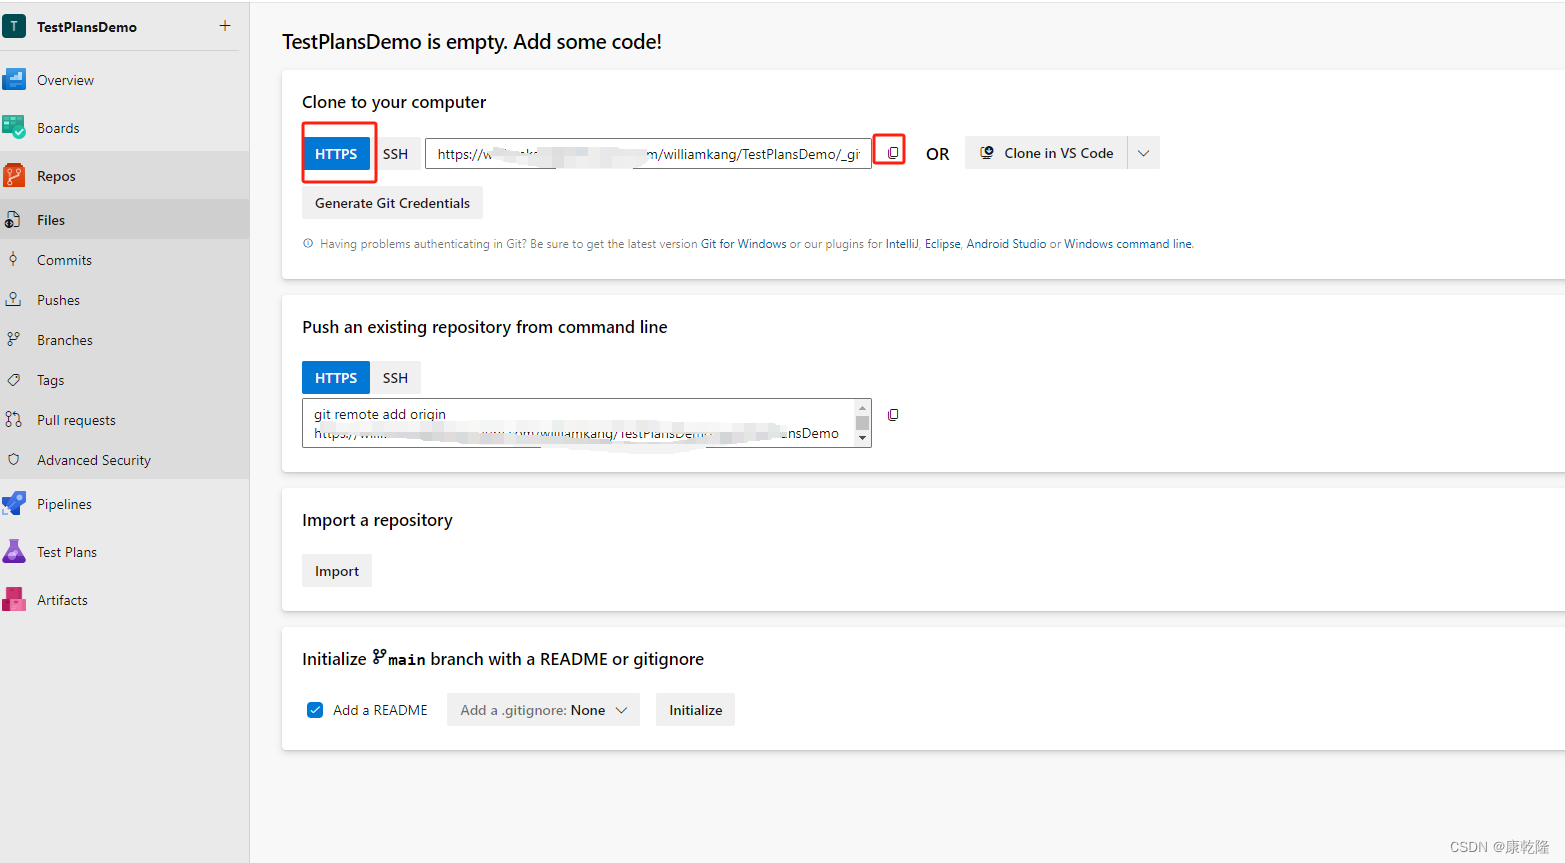
拉下来之后会有一个只有.git的空文件夹

使用VS2022创建一个NUnit单元项目
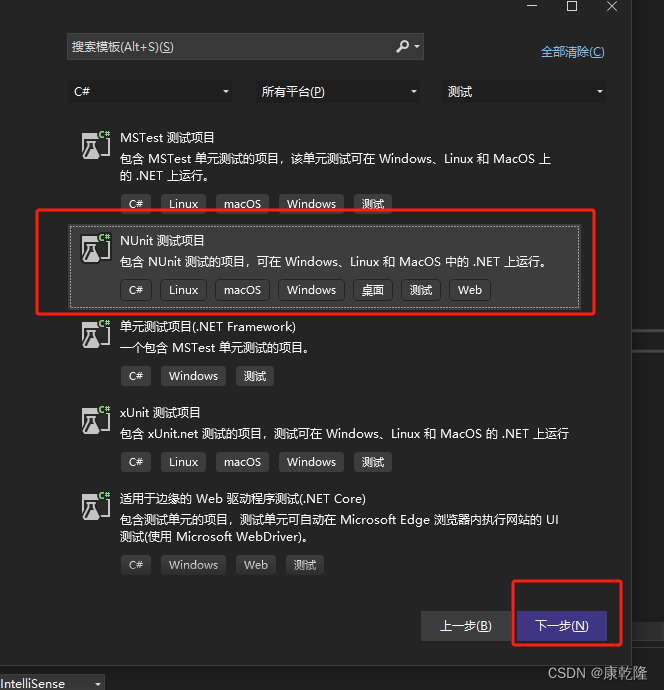
填写名称和位置
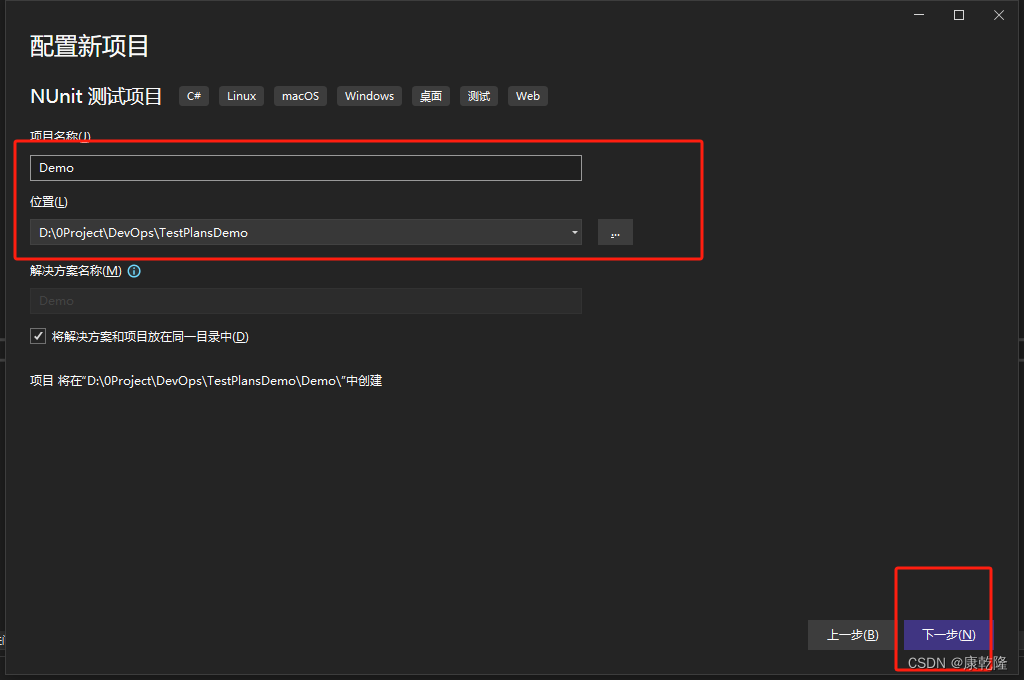
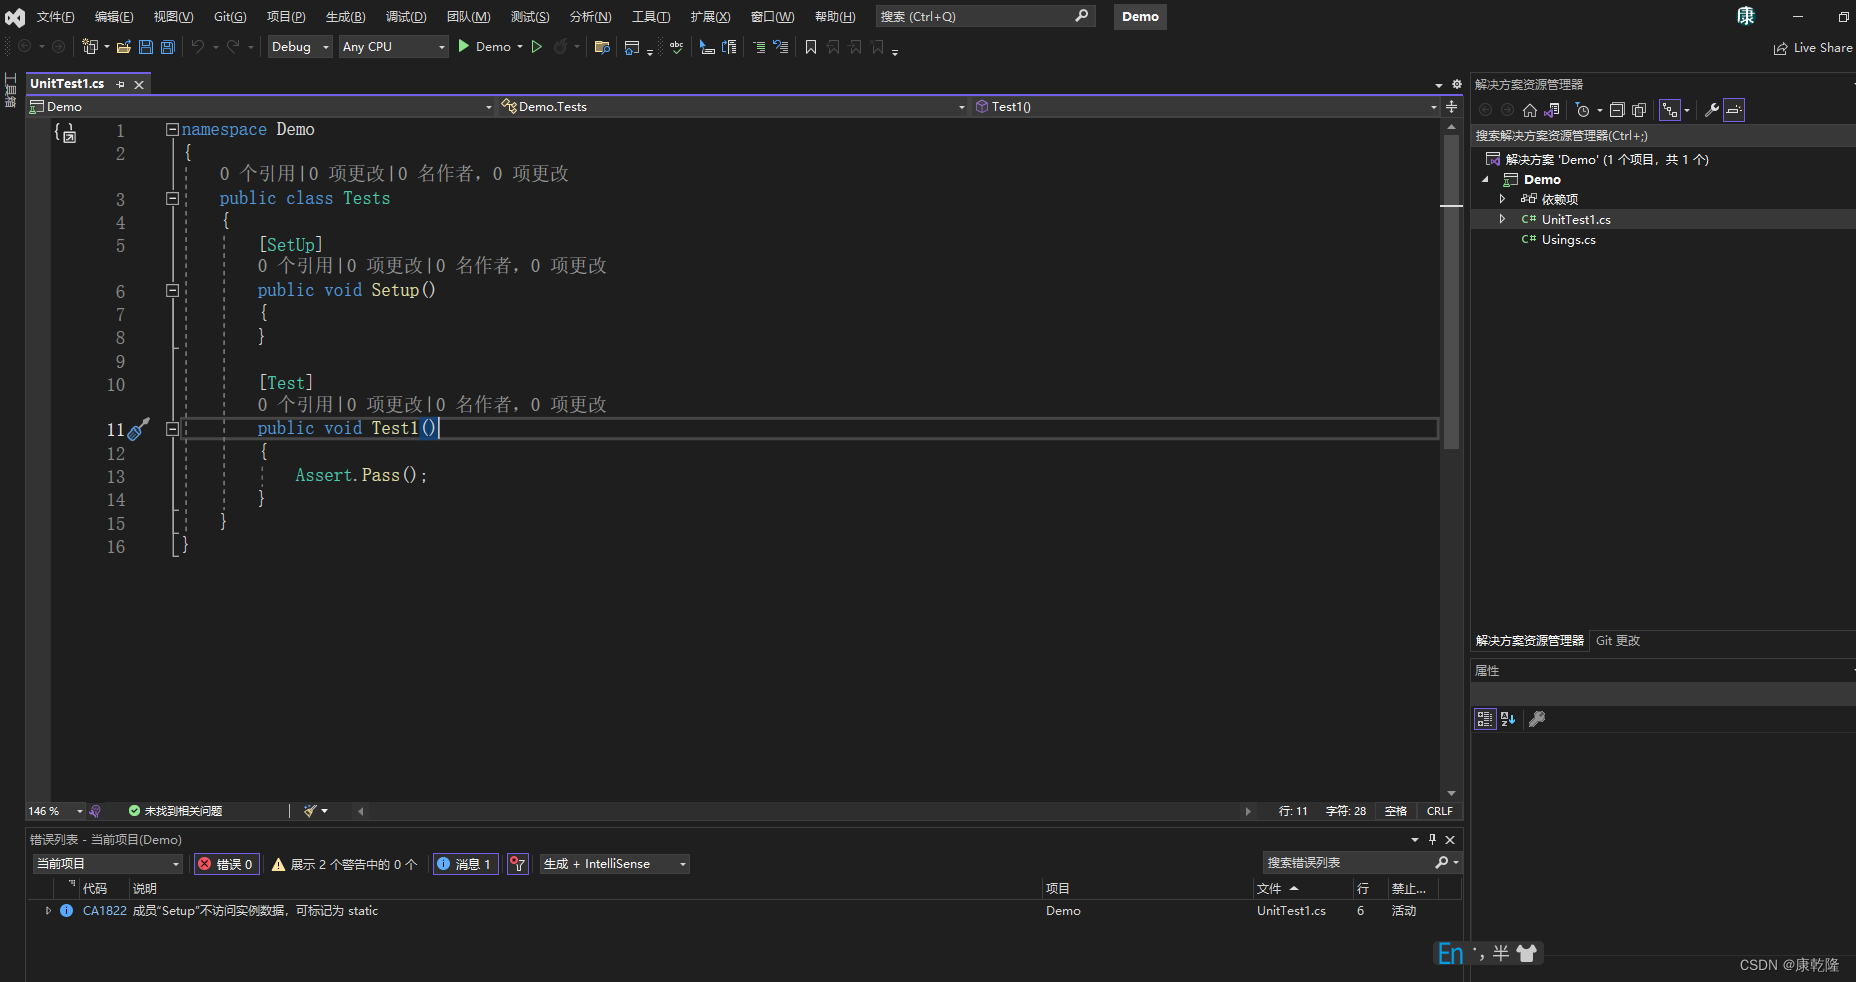
得到一个项目
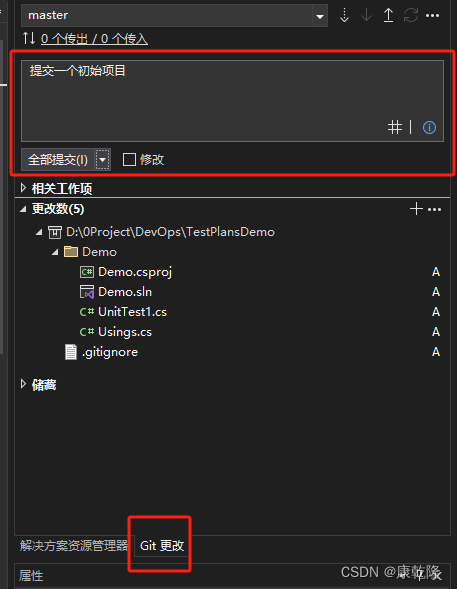
我们先把这个初始项目提交到Repos
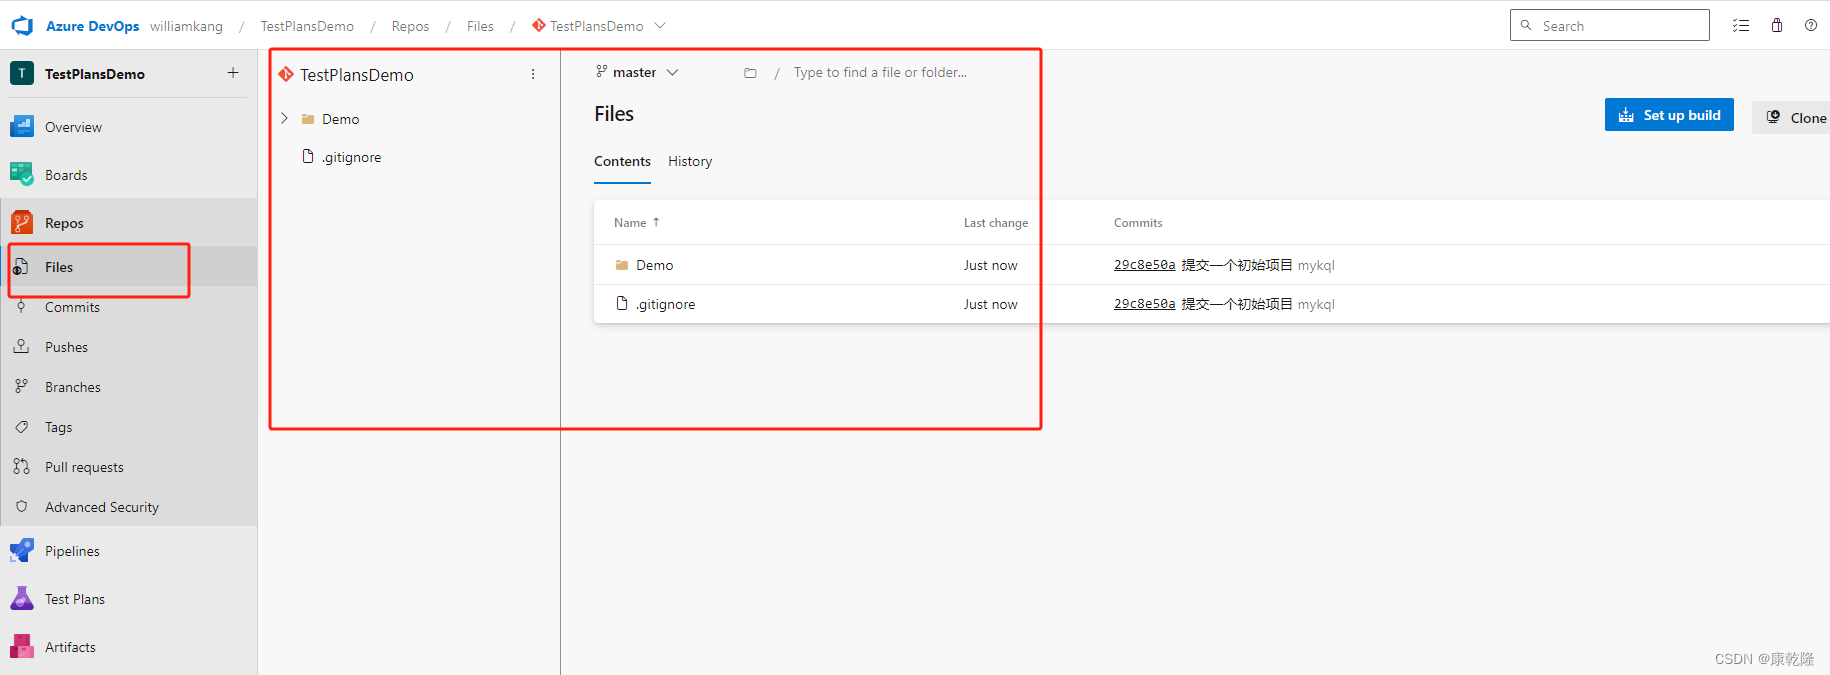
这个时候Repos就会出现你的项目代码
我们建一个Boards
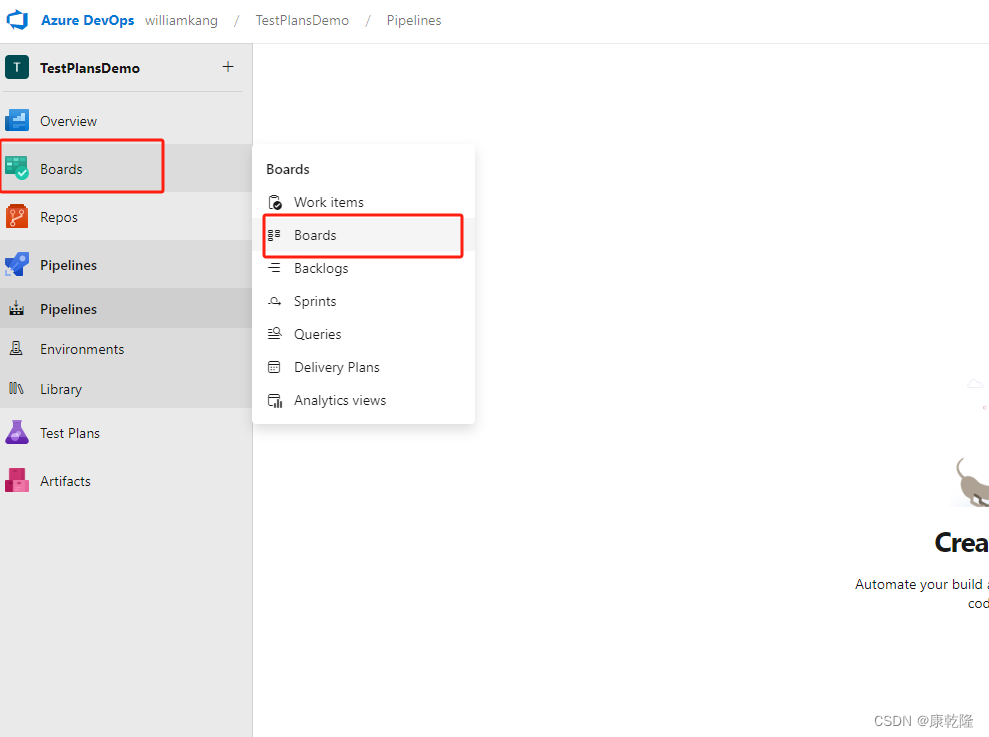
建一个开发任务
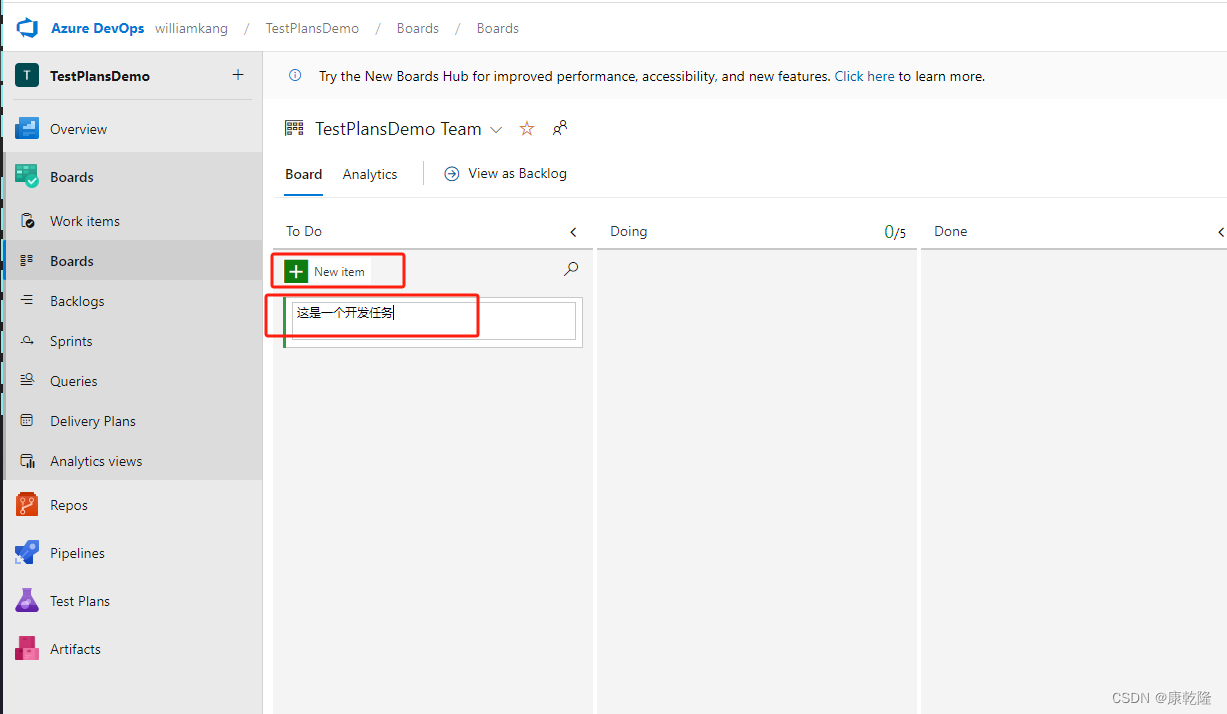
点击Add Test
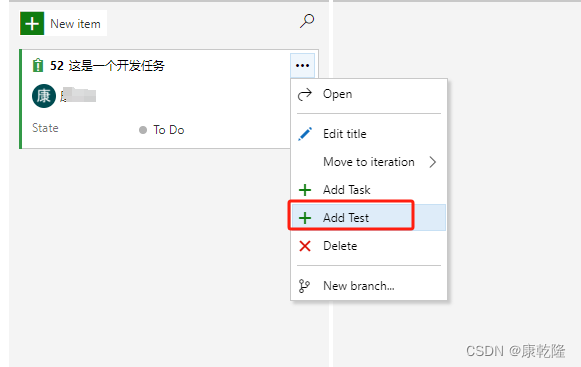
再建一个测试任务
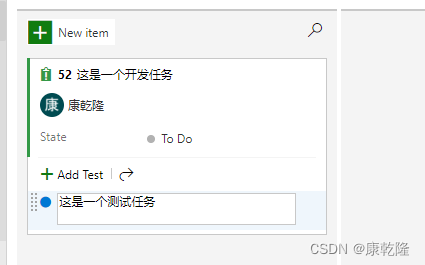
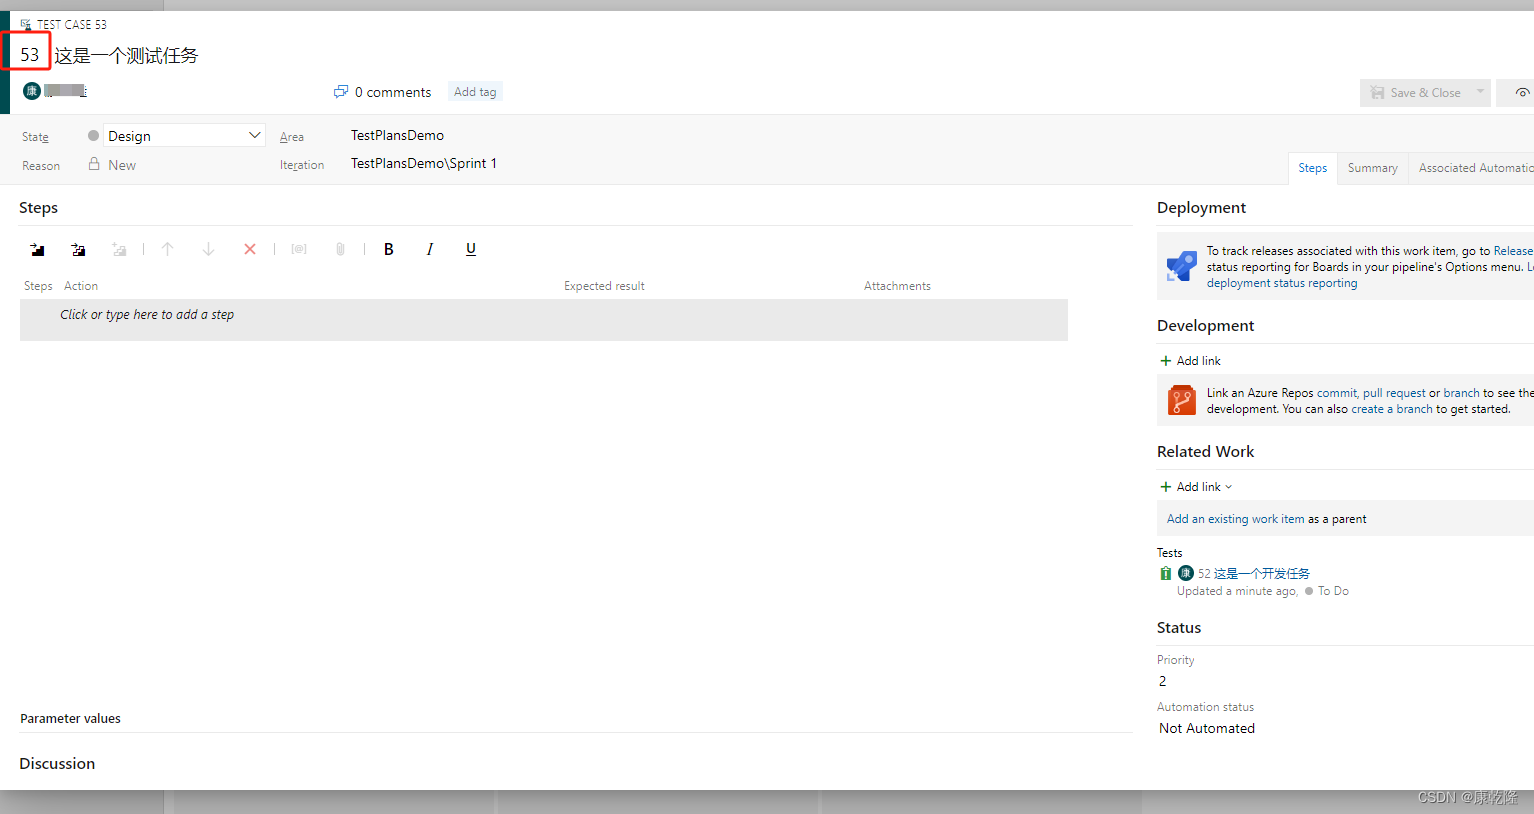
选中测试任务点击edit,进入编辑页面,记住这个ID
回到VS界面
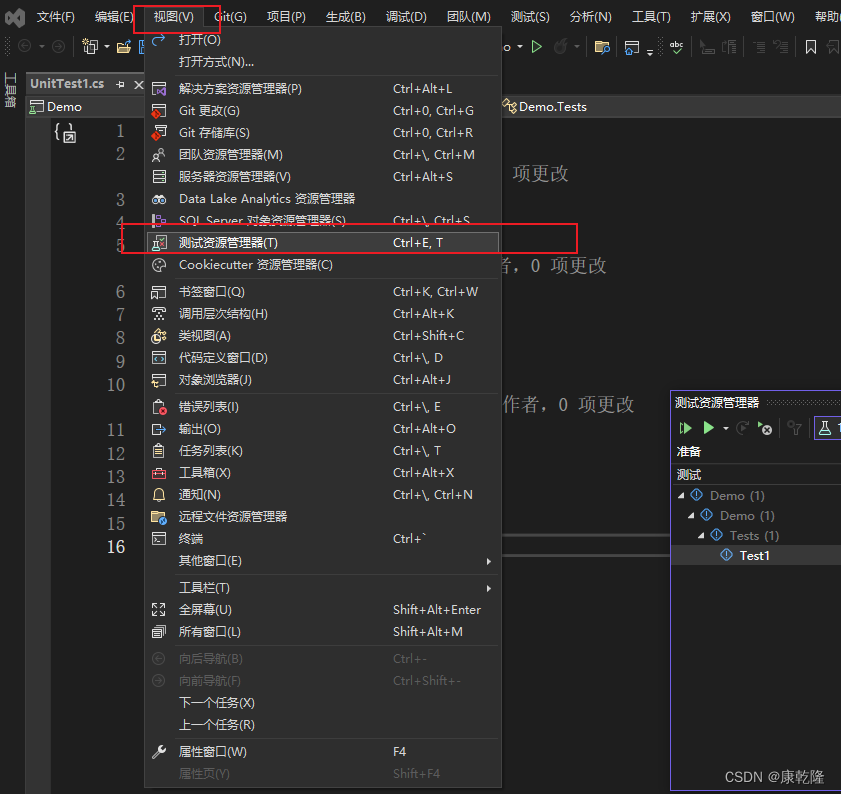
输入Ctrl+E,T键唤出测试资源管理器,有也可以直接在导航》视图 中唤出 测试资源管理器
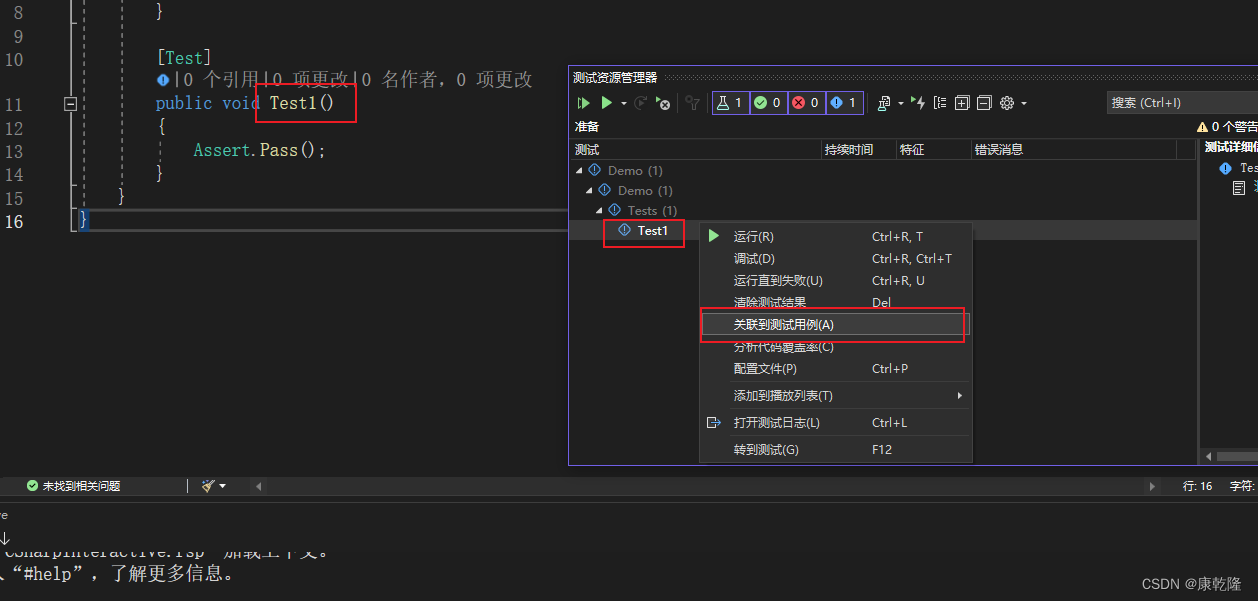
在测试资源管理器中找到你要关联的方法,右键关联到测试用例
输入 刚才的ID 53
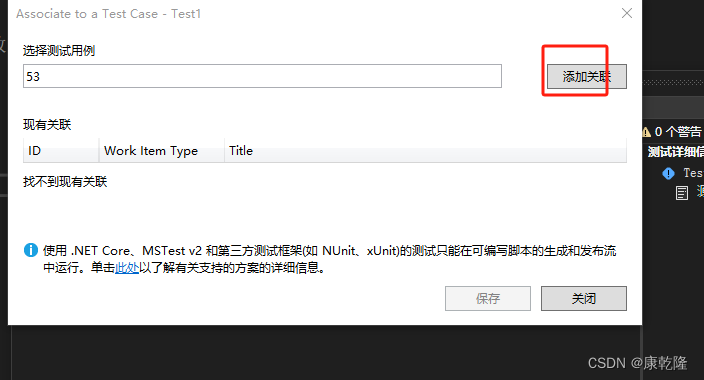
搜索后会看到我们刚才建的测试任务,然后点击保存建立关联
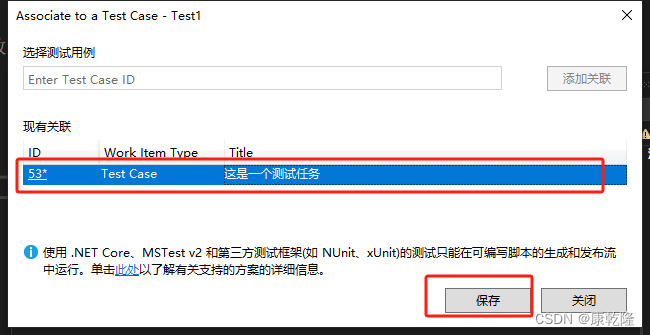
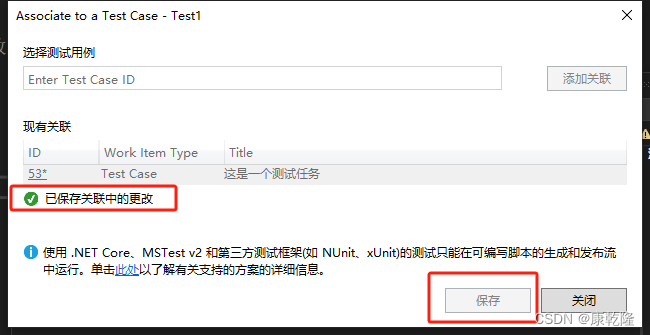
保存会出现一个成功的标识
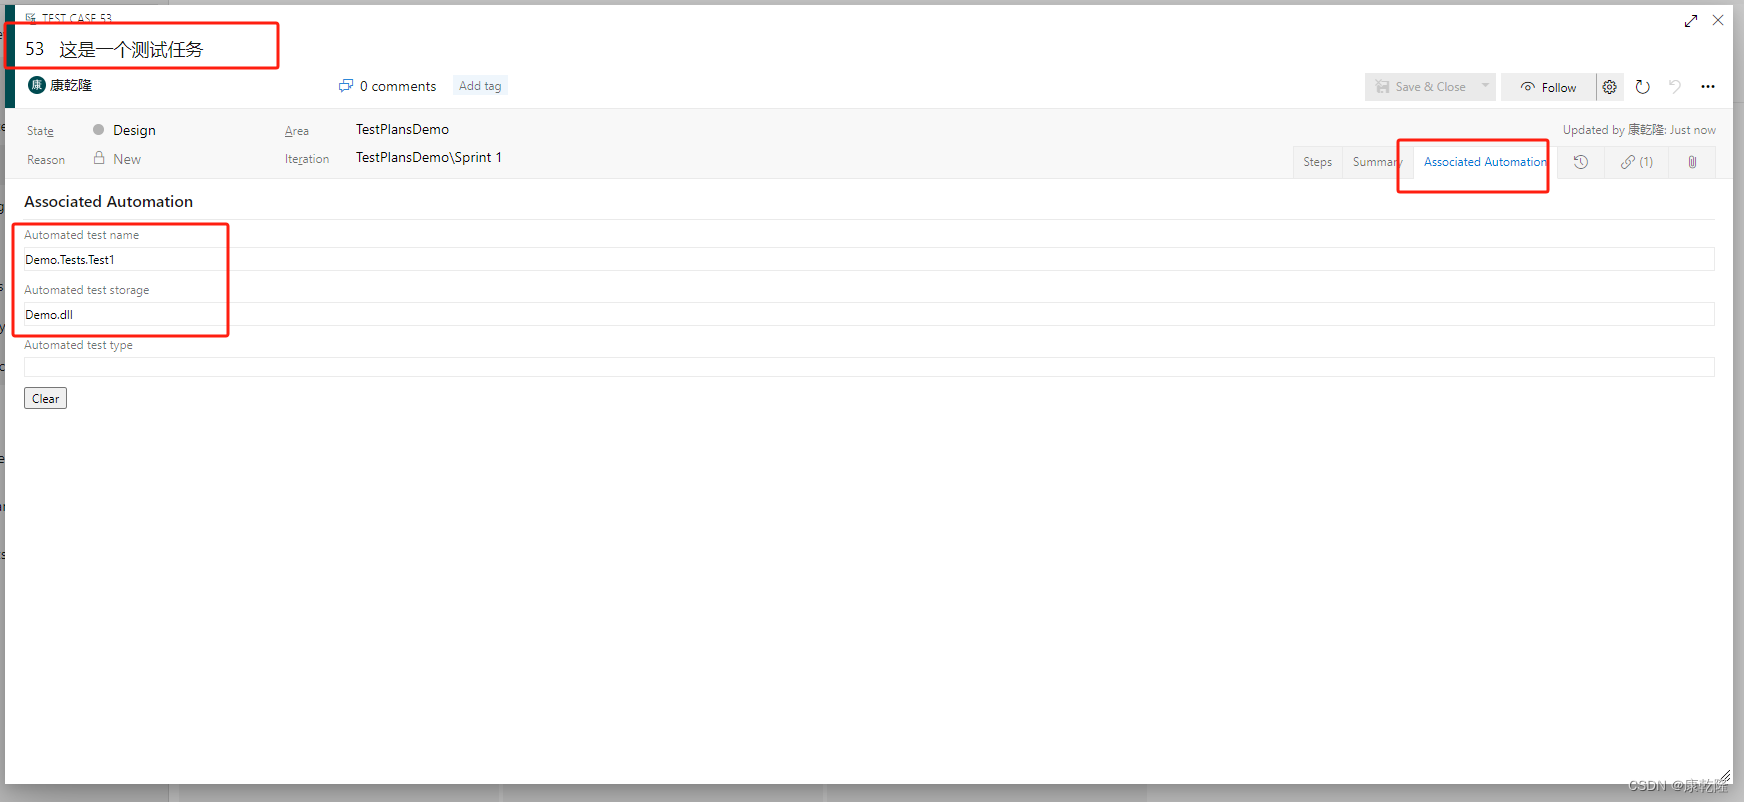
这个时候在Azure的测试任务上就会看到关联的方法名称
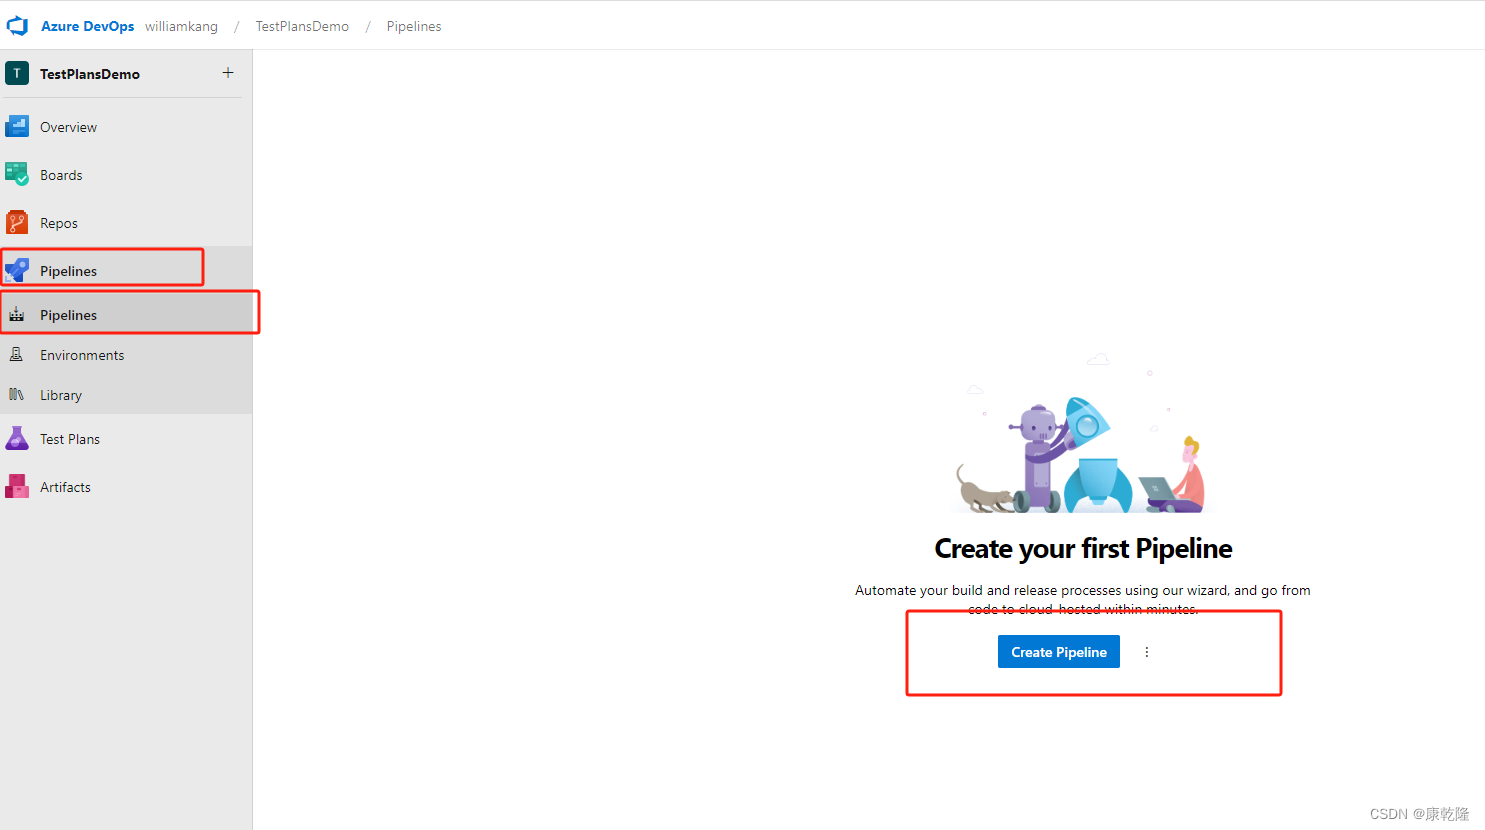
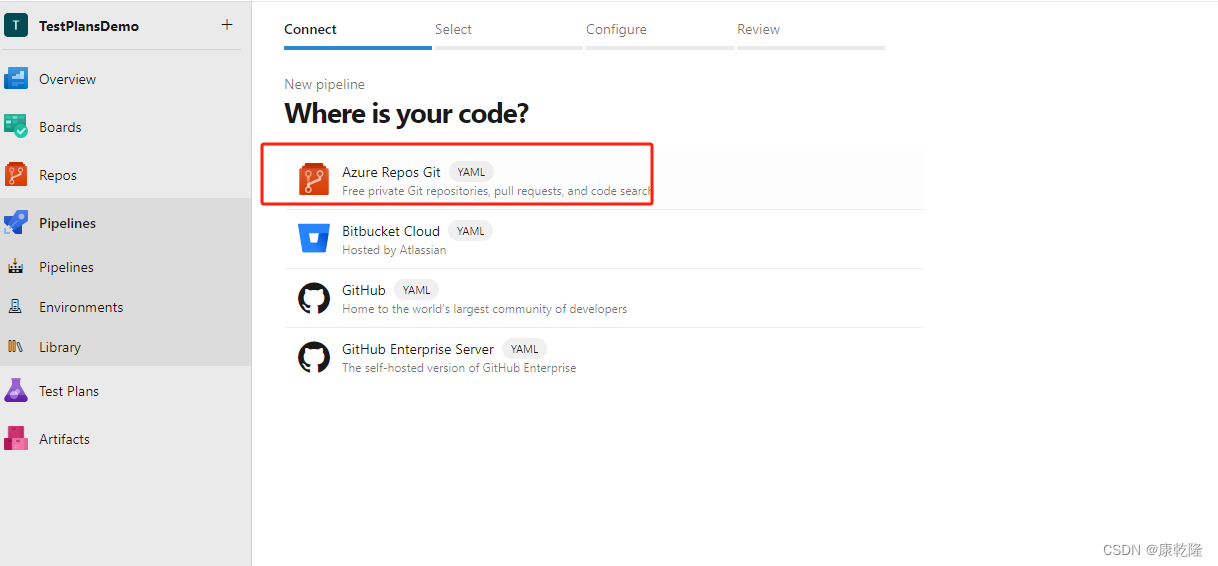
这个时候我们开始创建一个Azure Pipelines管道
选择源代码管理,这里我们使用刚才的Repos
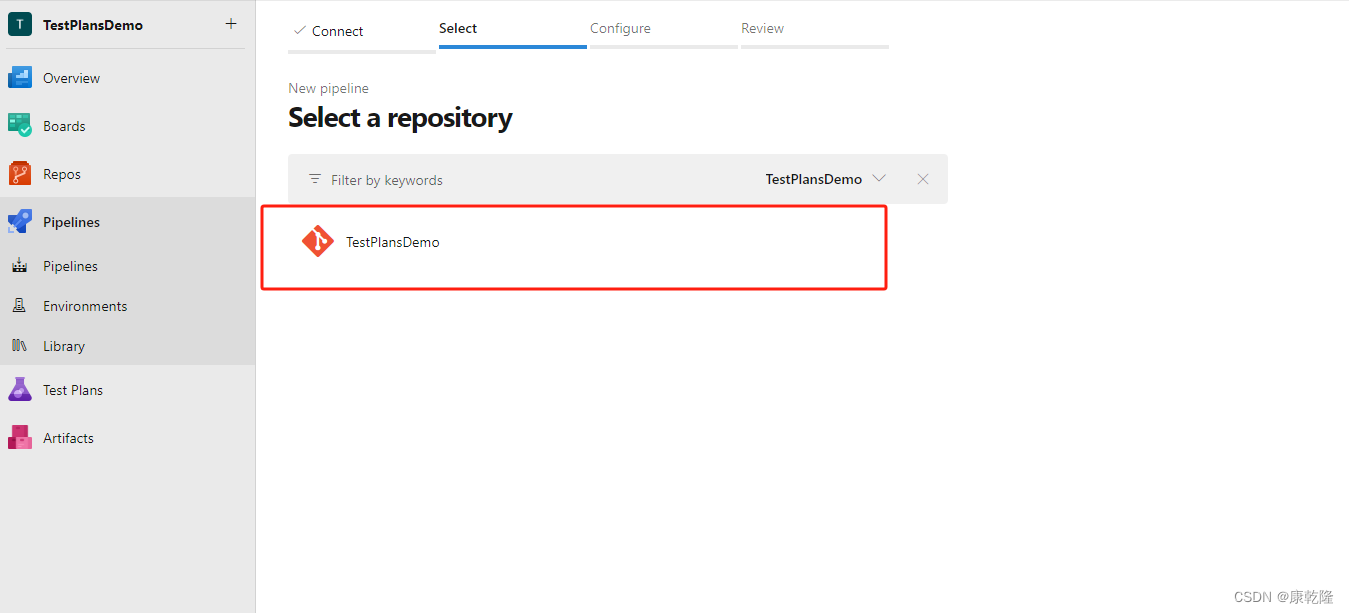
选中项目
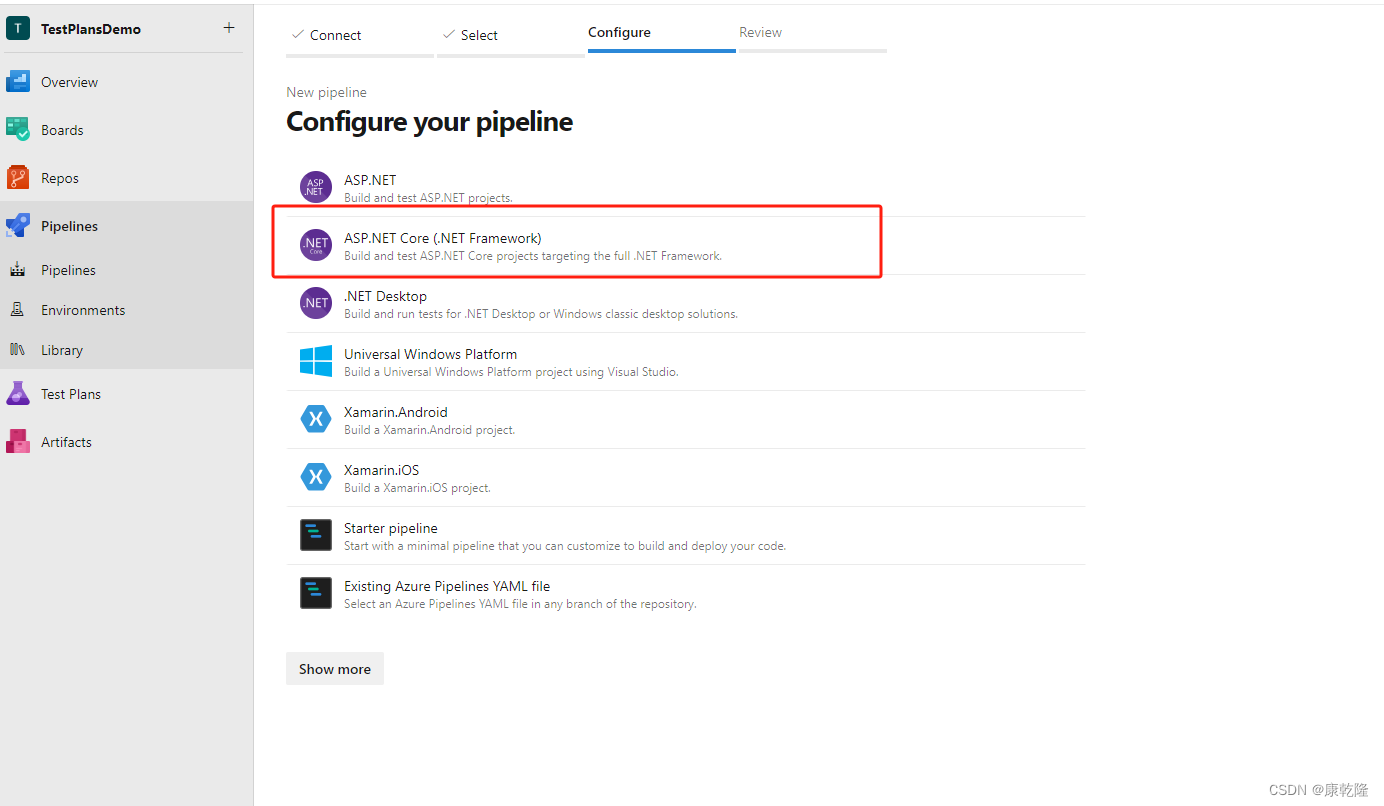
选择框架
这里我们清空原有yaml
贴一个新的脚本
trigger:
- main

pool:
  name: Default


variables:
  buildConfiguration: 'Release'


steps:
- task: UseDotNet@2
  displayName: 'Use .NET SDK 6.x'
  inputs:
    packageType: sdk
    version: '6.x'


# 还原
- task: DotNetCoreCLI@2
  displayName: 'Restore project dependencies'
  inputs:
    command: 'restore'
    projects: '**/*.csproj'
    feedsToUse: 'select'
    noCache: true

- task: DotNetCoreCLI@2
  displayName: 'Build the project - $(buildConfiguration)'
  inputs:
    command: 'build'
    arguments: '--no-restore --configuration $(buildConfiguration)'
    projects: '**/*.csproj'

- task: DotNetCoreCLI@2
  displayName: 'Run unit tests - $(buildConfiguration)'
  inputs:
    command: 'test'
    arguments: '--no-build --configuration $(buildConfiguration)'
    publishTestResults: true
    projects: '**/*.csproj'

- task: DotNetCoreCLI@2
  displayName: 'Publish the project - $(buildConfiguration)'
  inputs:
    command: 'publish'
    publishWebProjects: false
    projects: '**/*.csproj'
    arguments: '--no-build --configuration $(buildConfiguration) --output $(Build.ArtifactStagingDirectory)/$(buildConfiguration)'

- task: VisualStudioTestPlatformInstaller@1
  inputs:
    packageFeedSelector: 'nugetOrg'
    versionSelector: 'latestStable'


- task: VSTest@3
  inputs:
    testSelector: 'testPlan'
    testPlan: '54'
    testSuite: '55'
    testConfiguration: '6'
    searchFolder: '$(System.DefaultWorkingDirectory)'
    vsTestVersion: 'toolsInstaller'

- task: PublishBuildArtifacts@1
  displayName: 'Publish Artifact: drop'
  condition: succeeded()
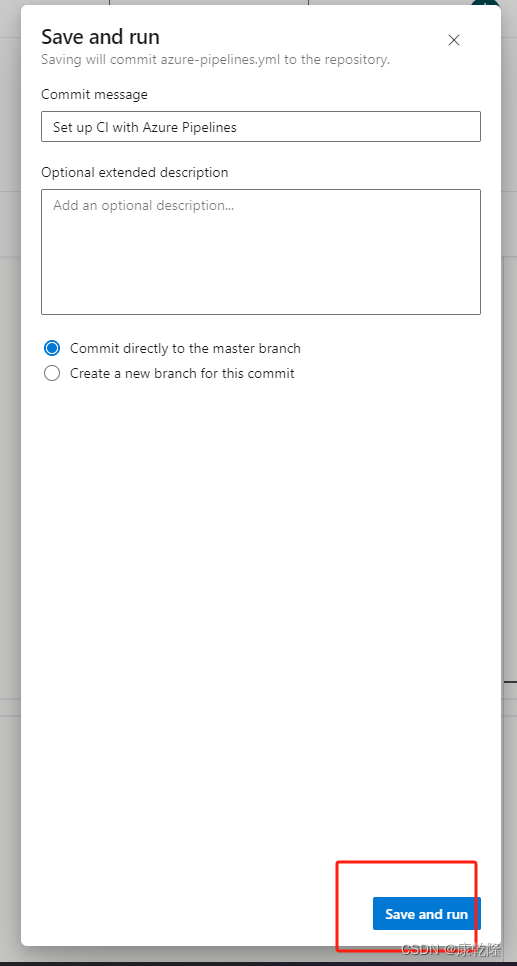
保存并运行
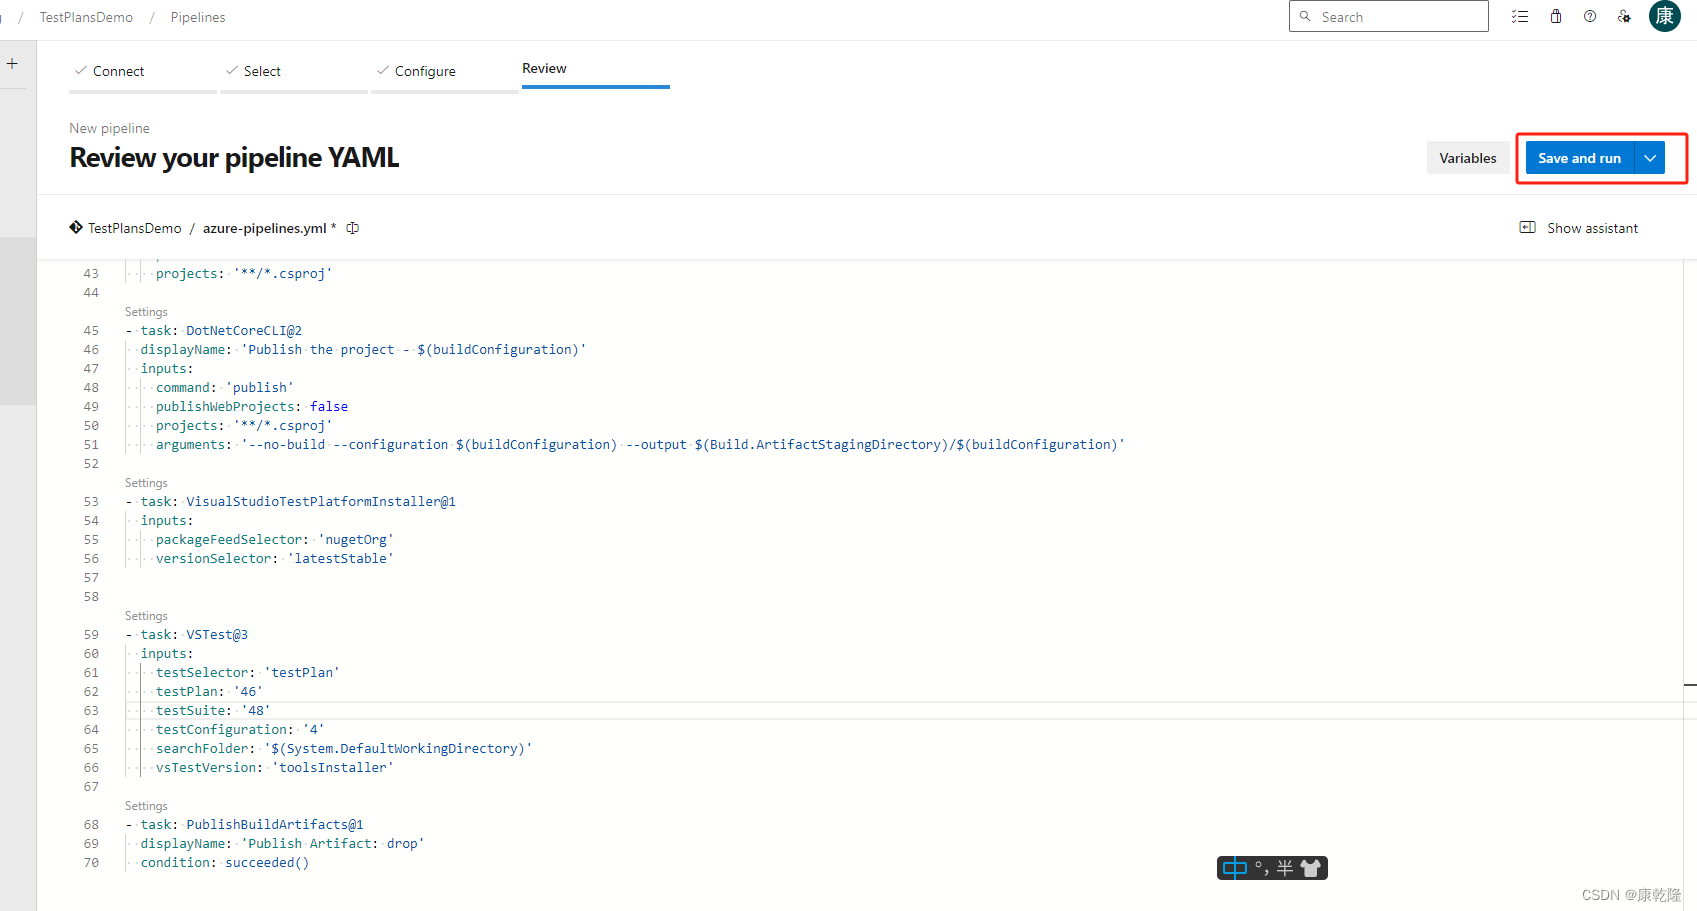
直接运行
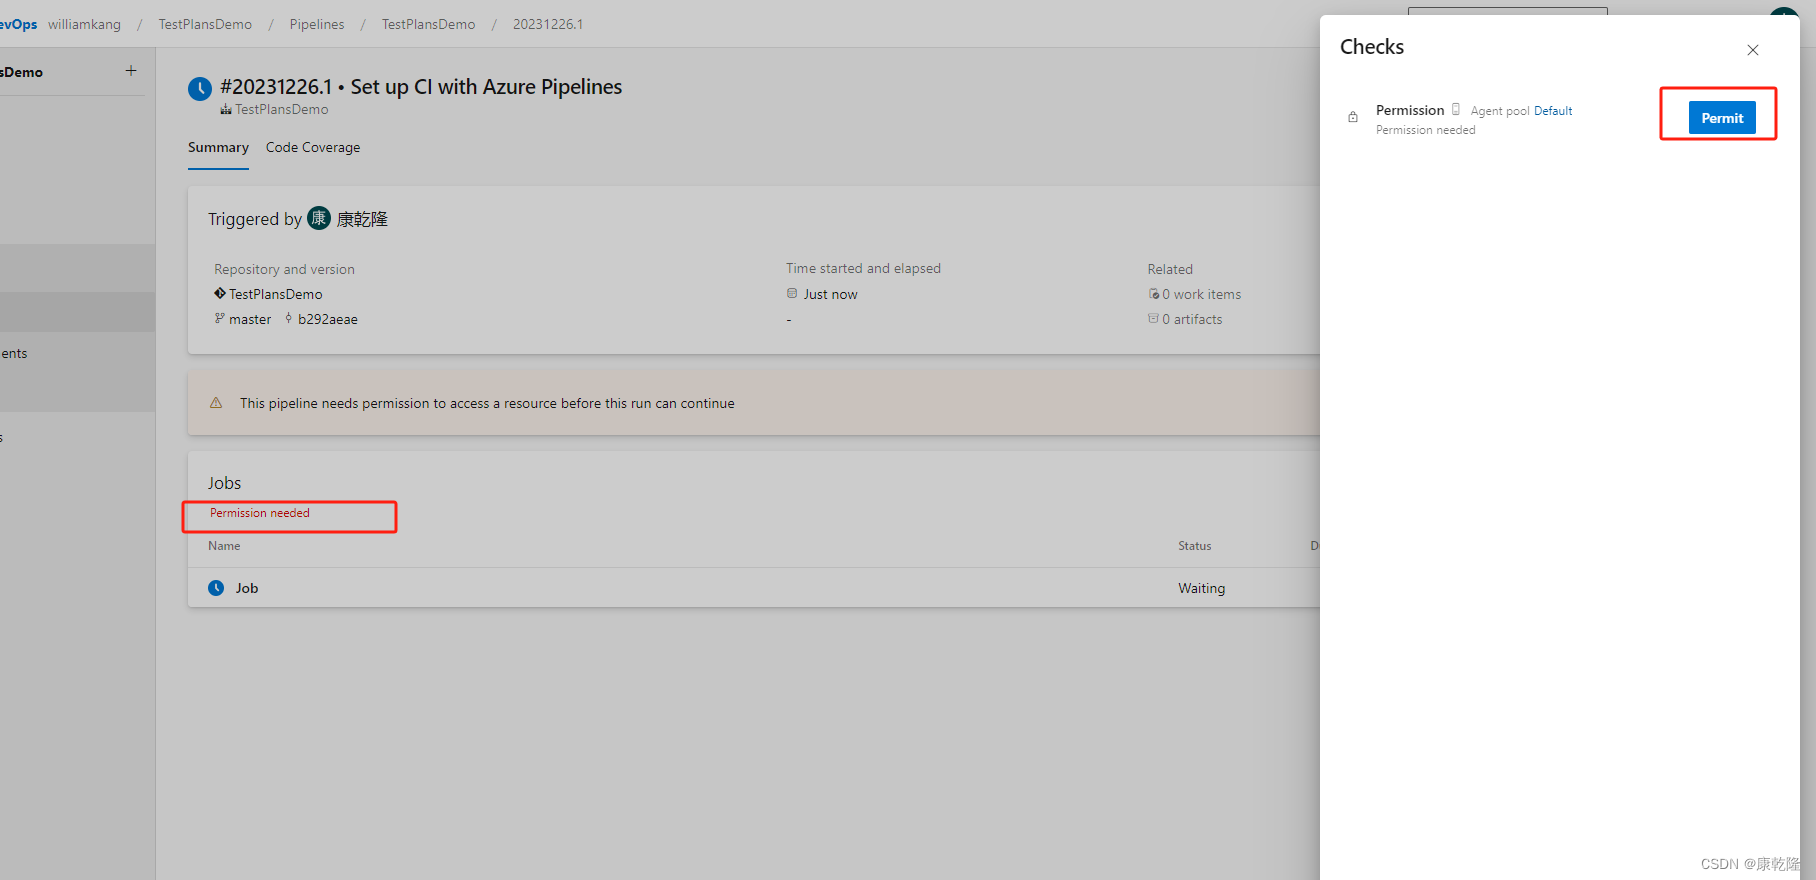
因为我使用了Windows代理,所以要对代理机器授权,选中Permission needed,点击Permit
配置Windows代理的步骤,有时间我会整理到另外一篇文章
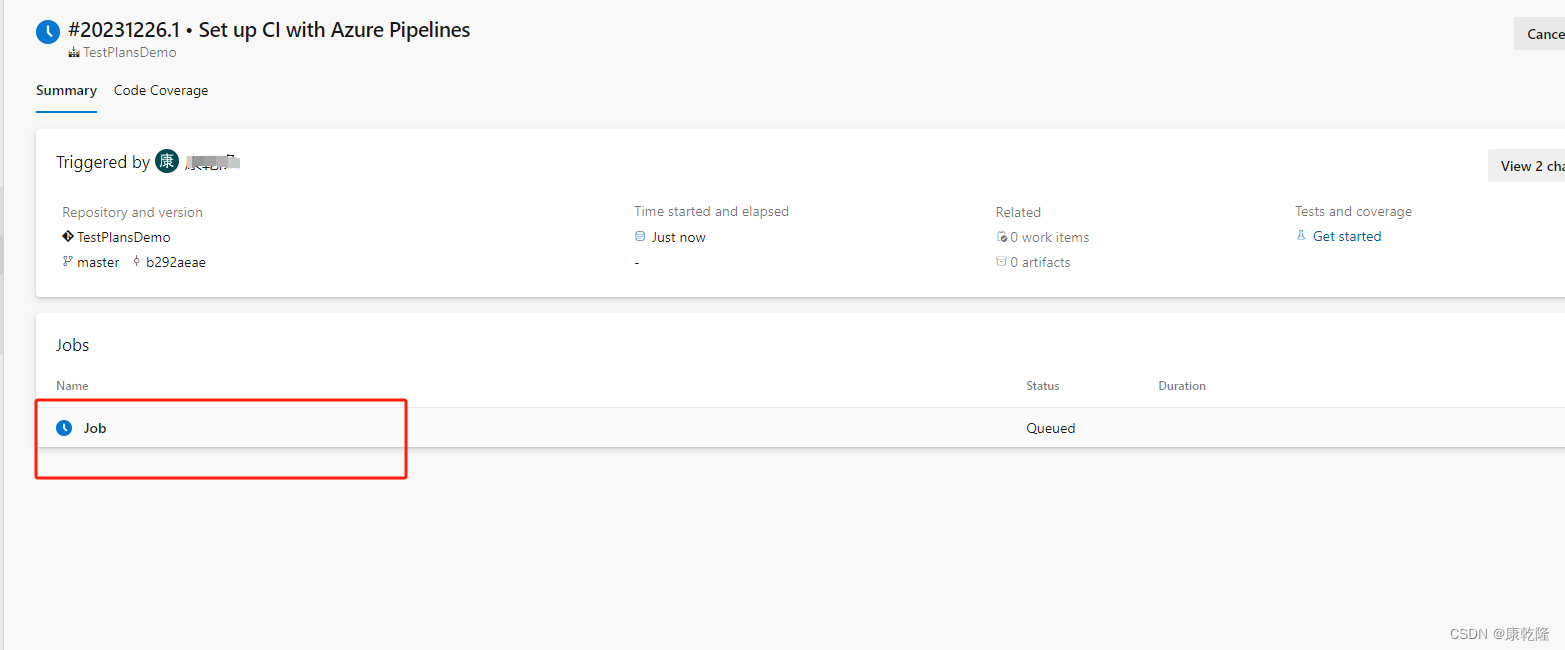
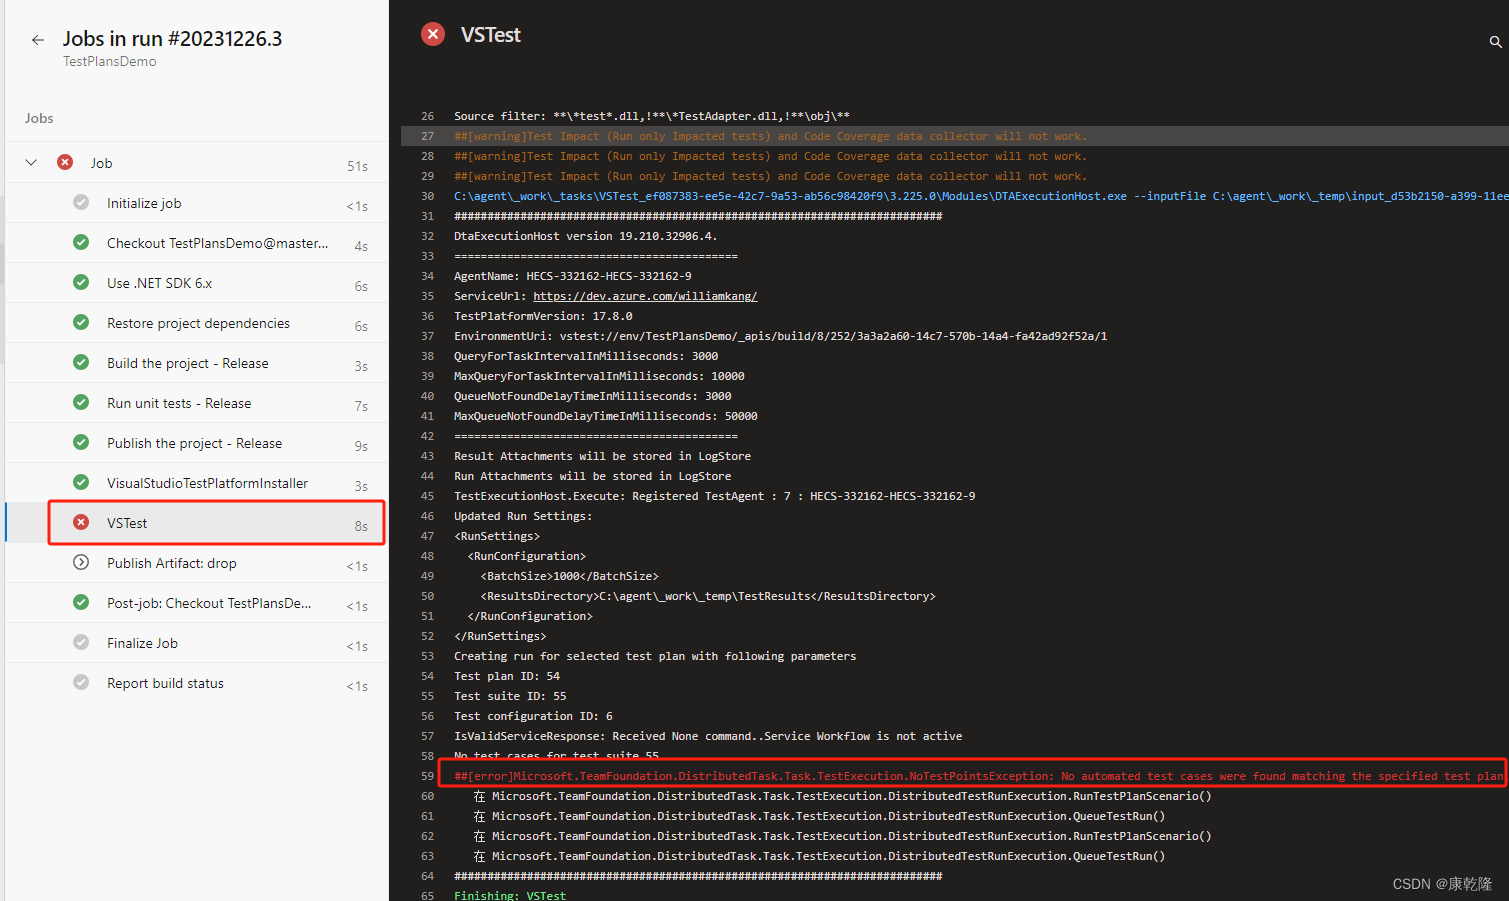
授权成功后,我们会看到Job正在运行,我们选中job看下执行详情
左侧是执行目录,右侧是执行的每条任务的详情
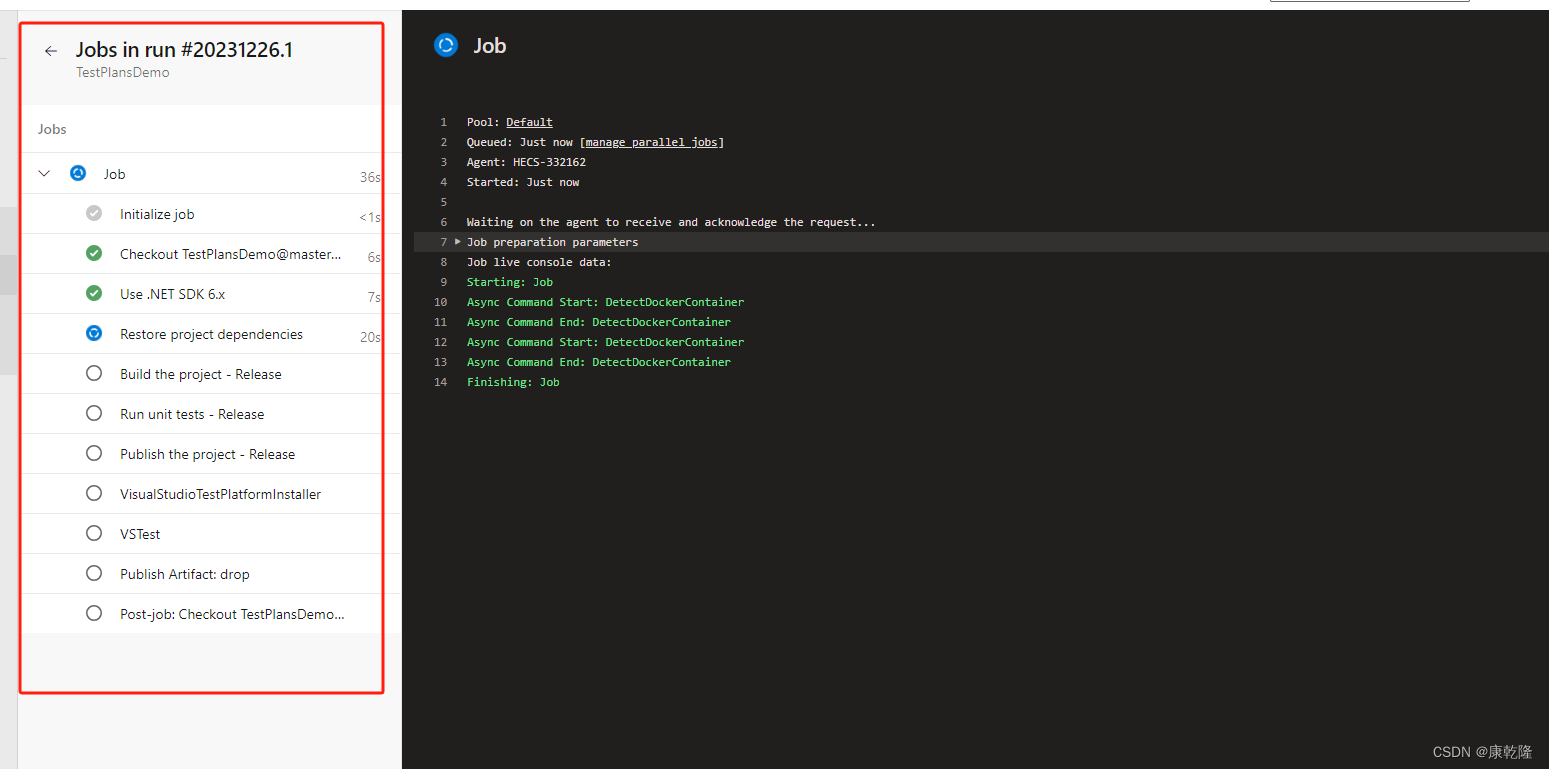
这个时候我们发现,VSTest报错了,错误信息是 找不到测试任务
##[error]Microsoft.TeamFoundation.DistributedTask.Task.TestExecution.NoTestPointsException: No automated test cases were found matching the specified test plan, test suites, test configuration. Ensure that right values were specified and try again.
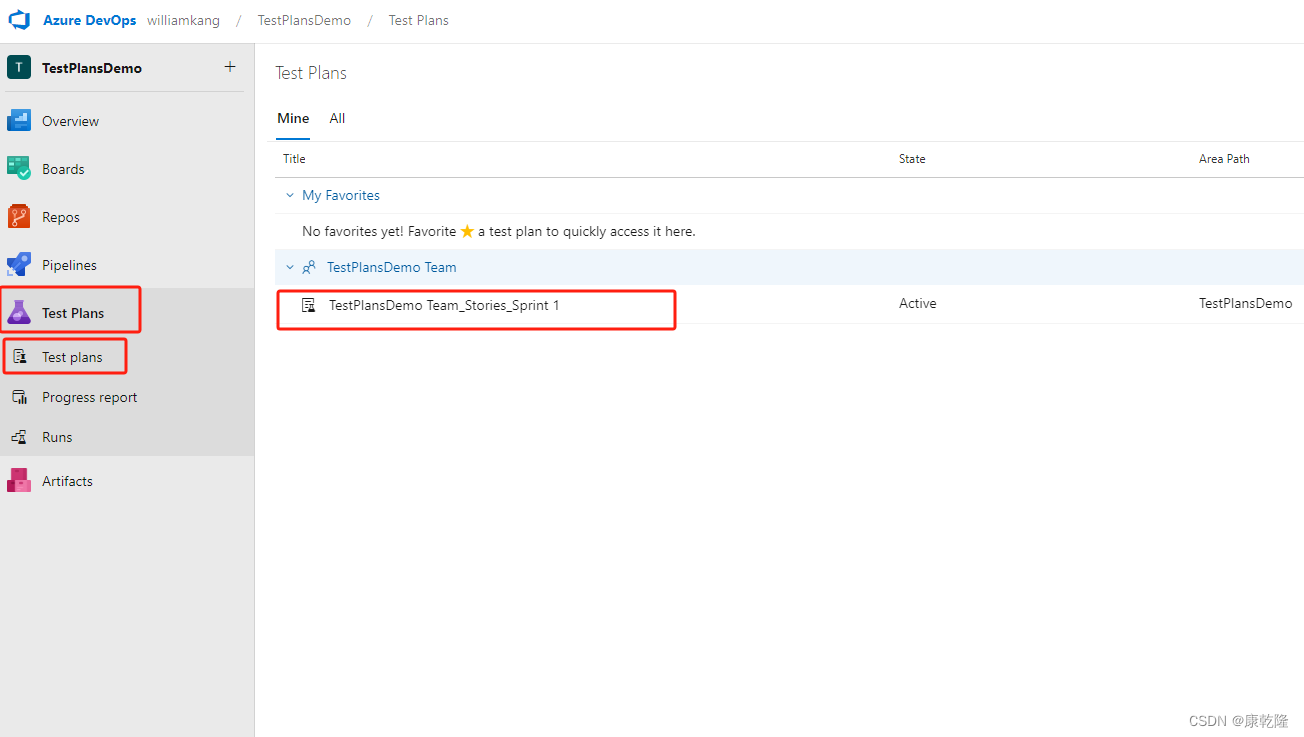
这个时候我们打开Test Plans,会看到一个Sprint1
双击进入编辑页面,我们会看到在Boards中建的测试任务,记住开发任务后面的ID
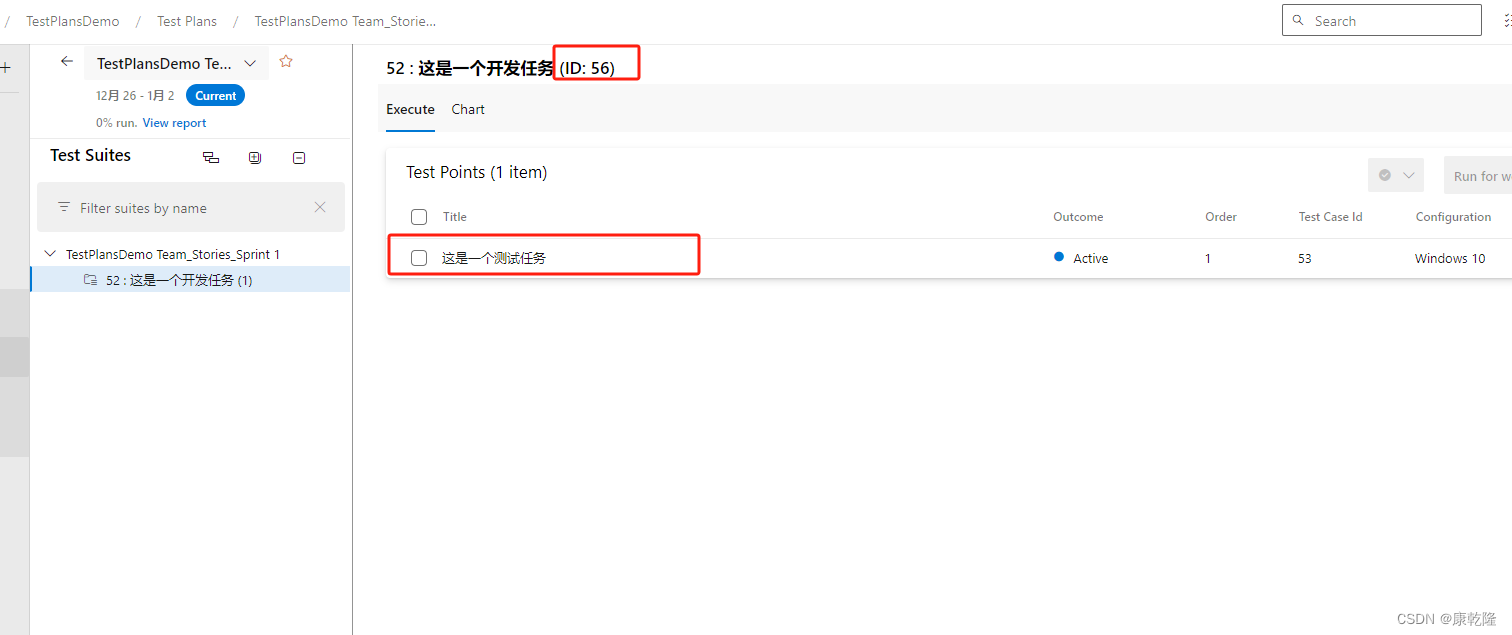
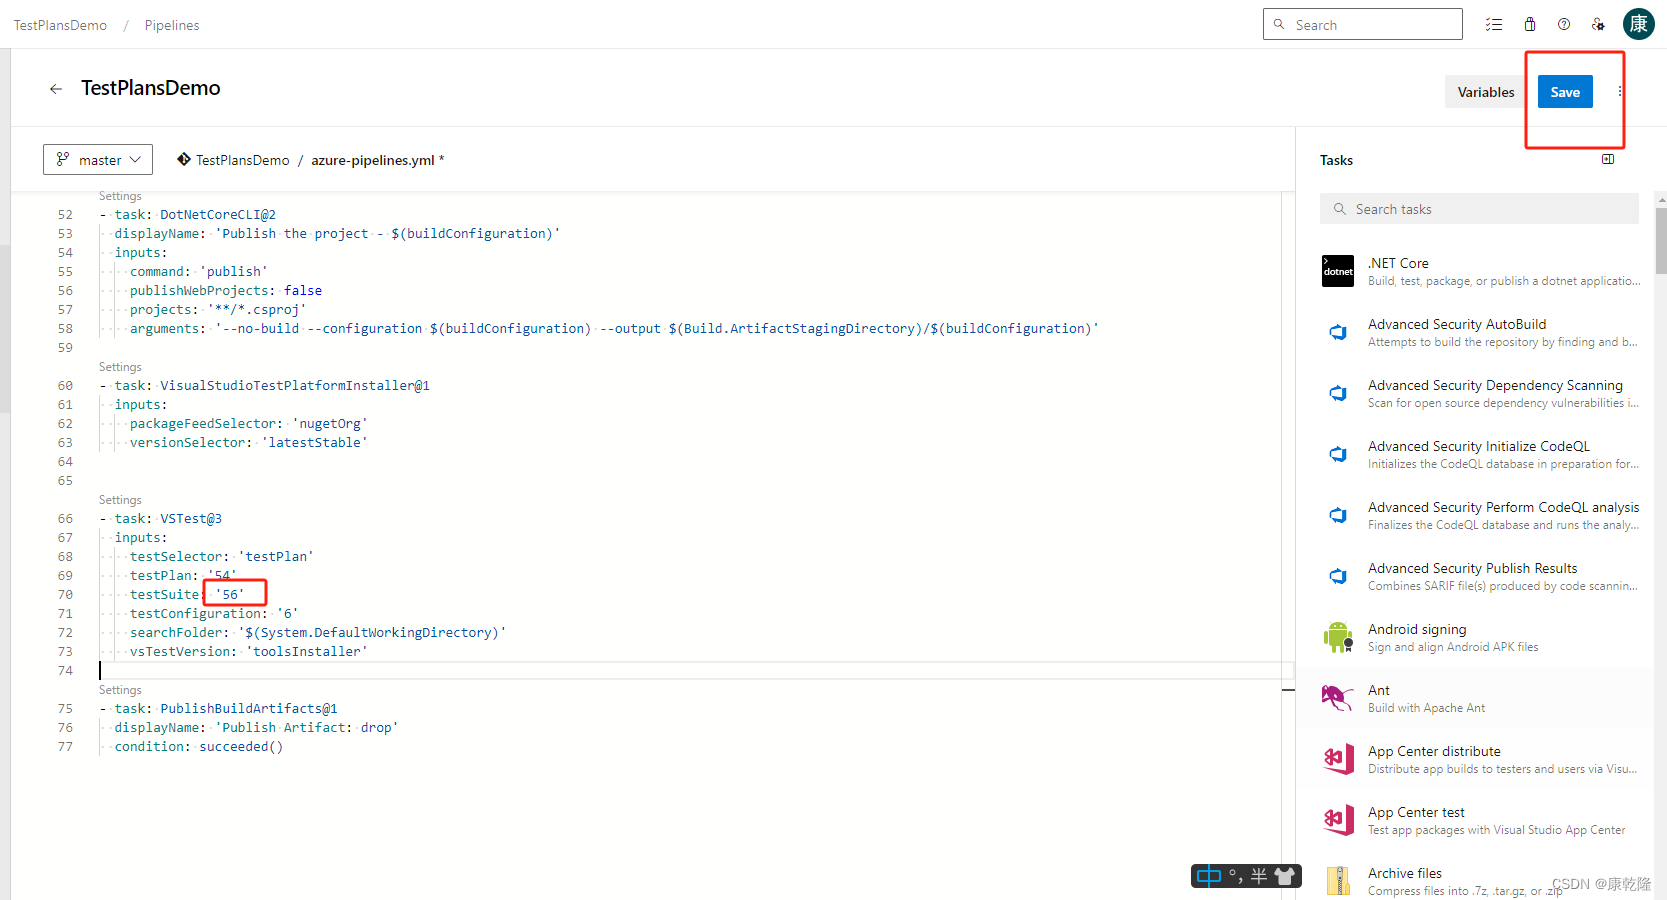
把这个数字填写到Azure Pipelines的YAML中,测试我们看到下拉框中是没有二级菜单中的56ID的开发任务的,只有父级,但是父级又不包含子集的Execute,这里我们手动改VSTest@3的配置,将inputs>testSuite 手动改成刚才的ID 56
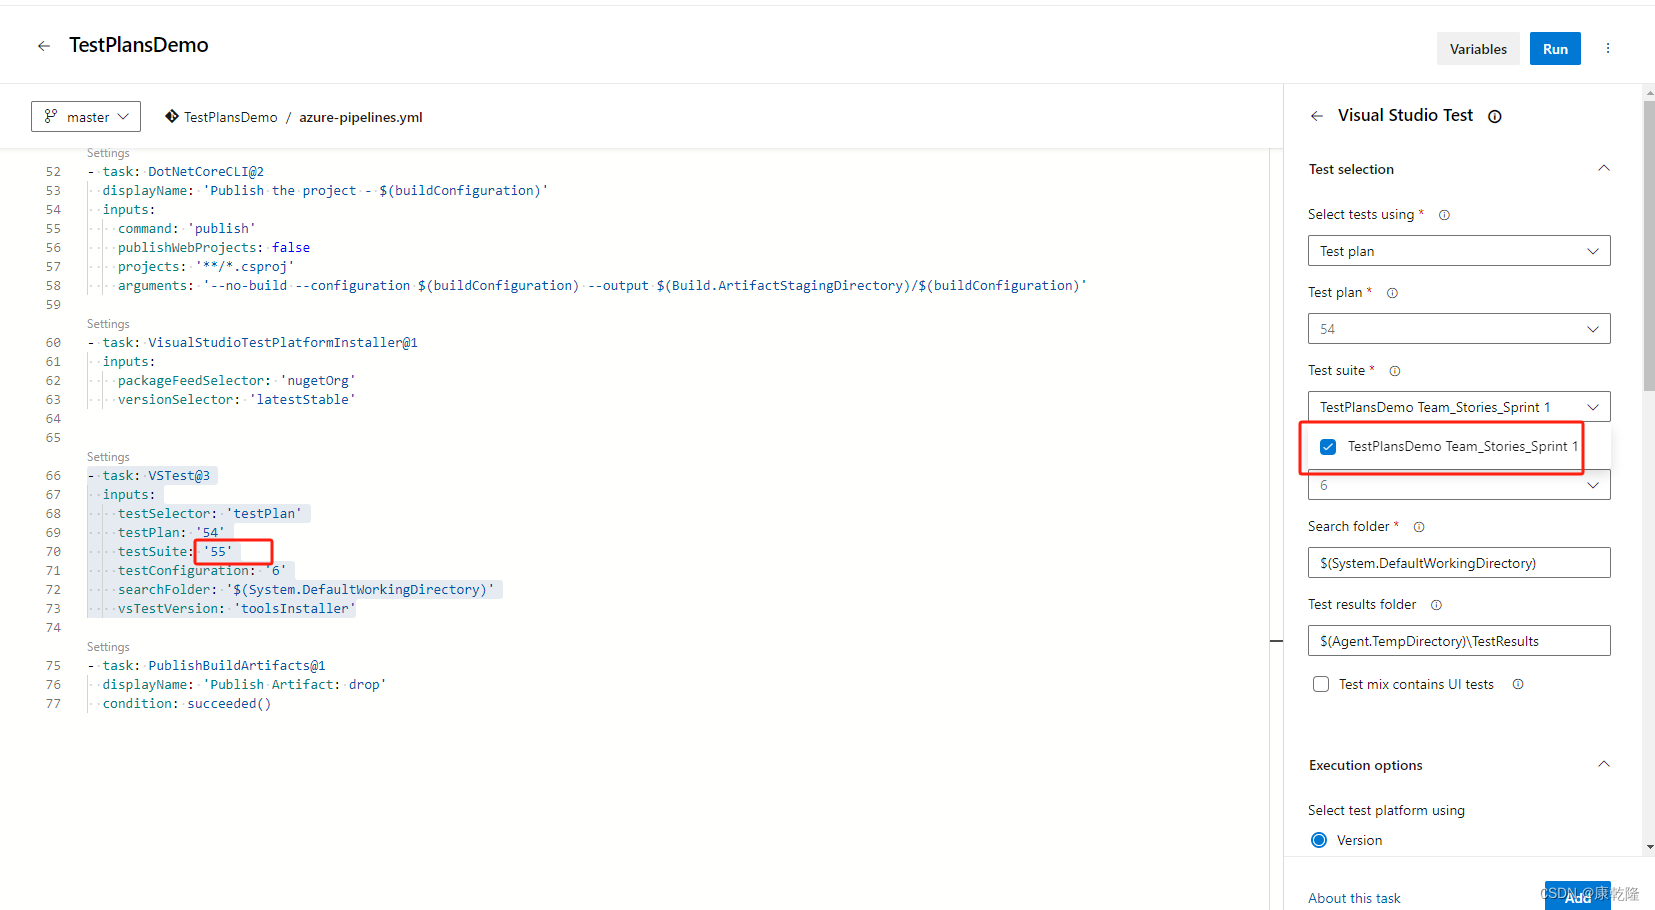
点击保存,然后运行
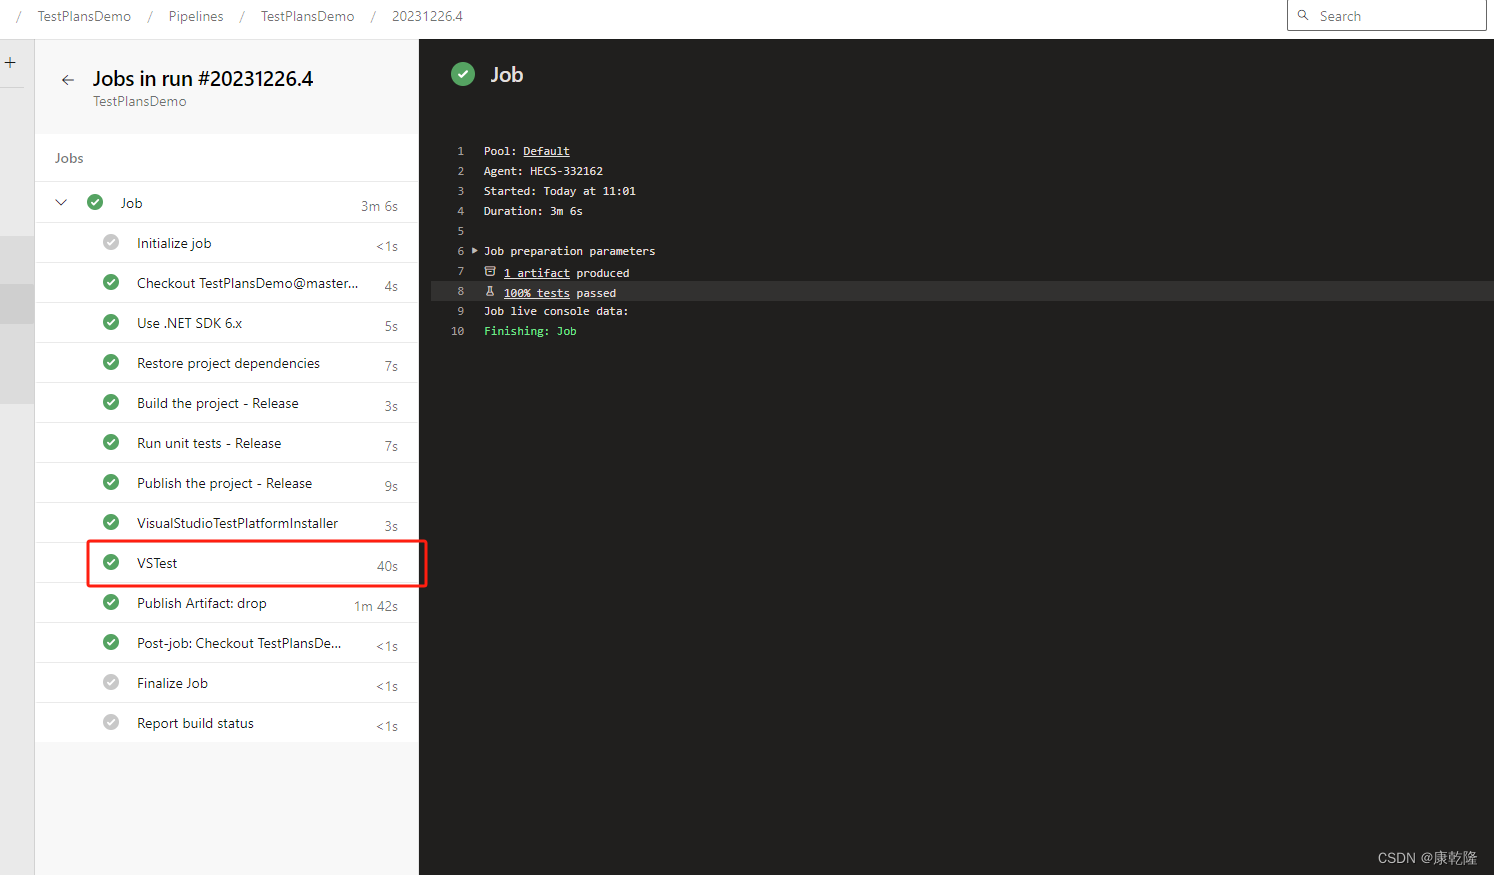
这个时候我们看大到,管道里的测试执行过了
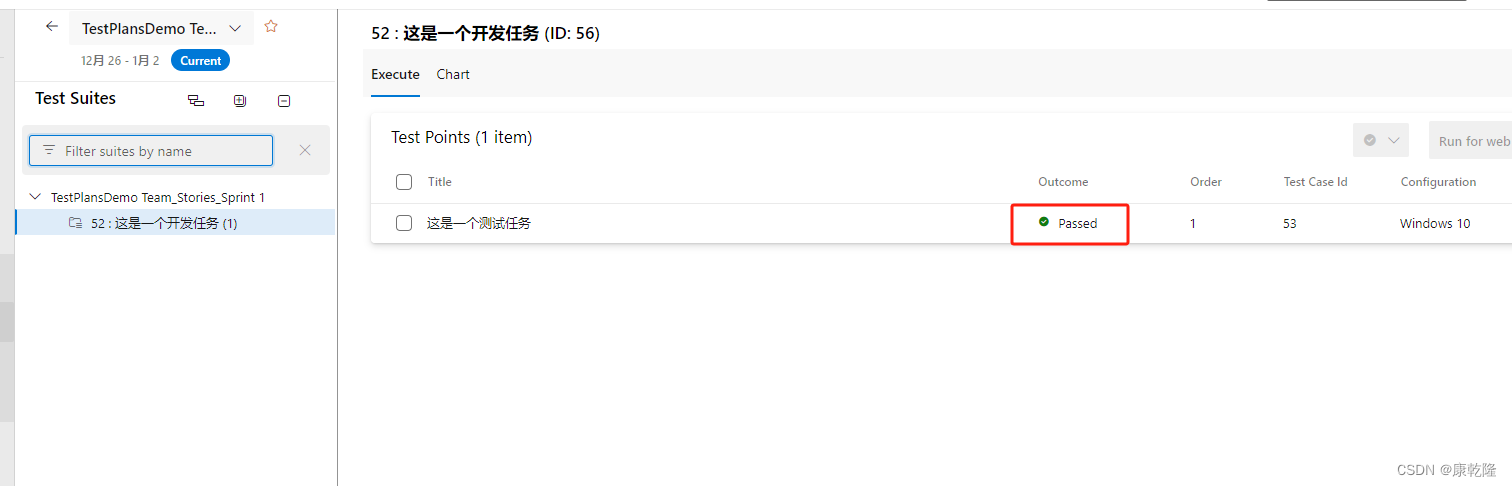
我们回到Test Plans中看,返现测试任务的状态变成了【Passed】

北京人形旗下天工造物具身智能开源社区,聚焦具身天工与慧思开物两大平台
更多推荐
 8
8 0
0- 0


 已为社区贡献1条内容

所有评论(0)