nginx负载均衡多个tomcat实例
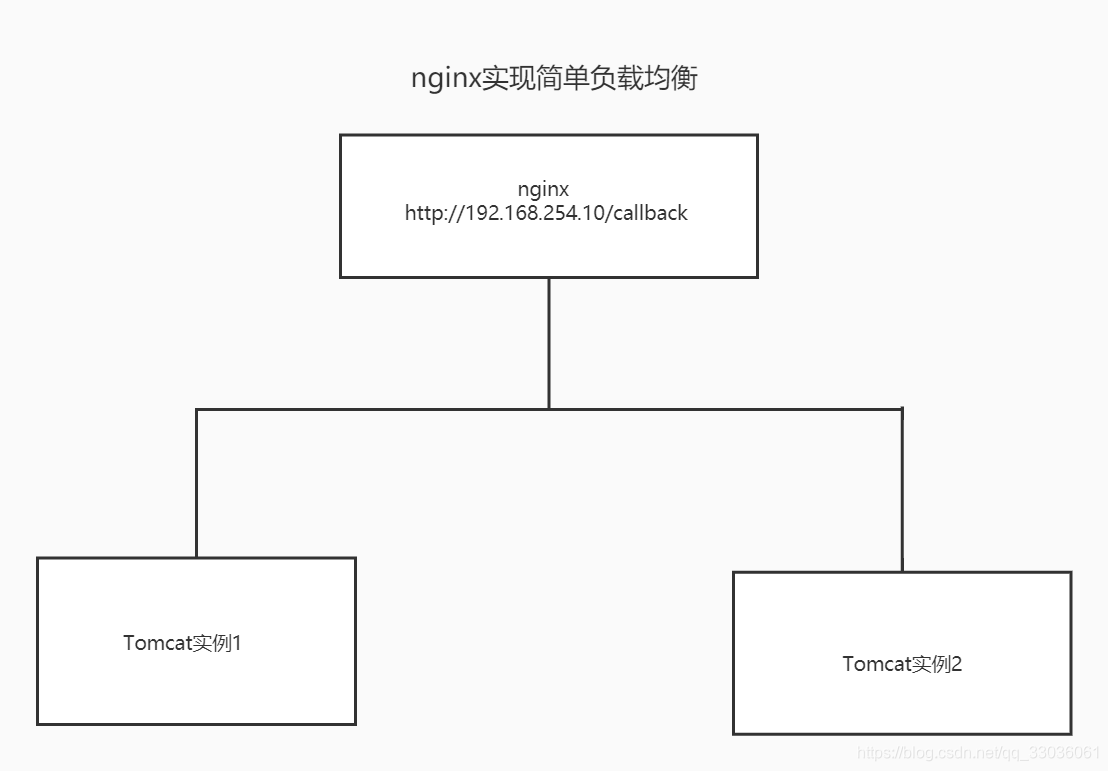
一、架构图
二、启动本地项目
idea 2018暂时不能使用springboot的形式启动多个tomcat实例,就只好用命令实现多个应用实例的启动,首先切换至target目录使用默认端口9000启动:
java -jar springboot-redis-cache-breakdown-0.0.1-SNAPSHOT.jar
再启动一个实例:
java -jar springboot-redis-cache-breakdown-0.0.1-SNAPSHOT.jar --server.port=9001
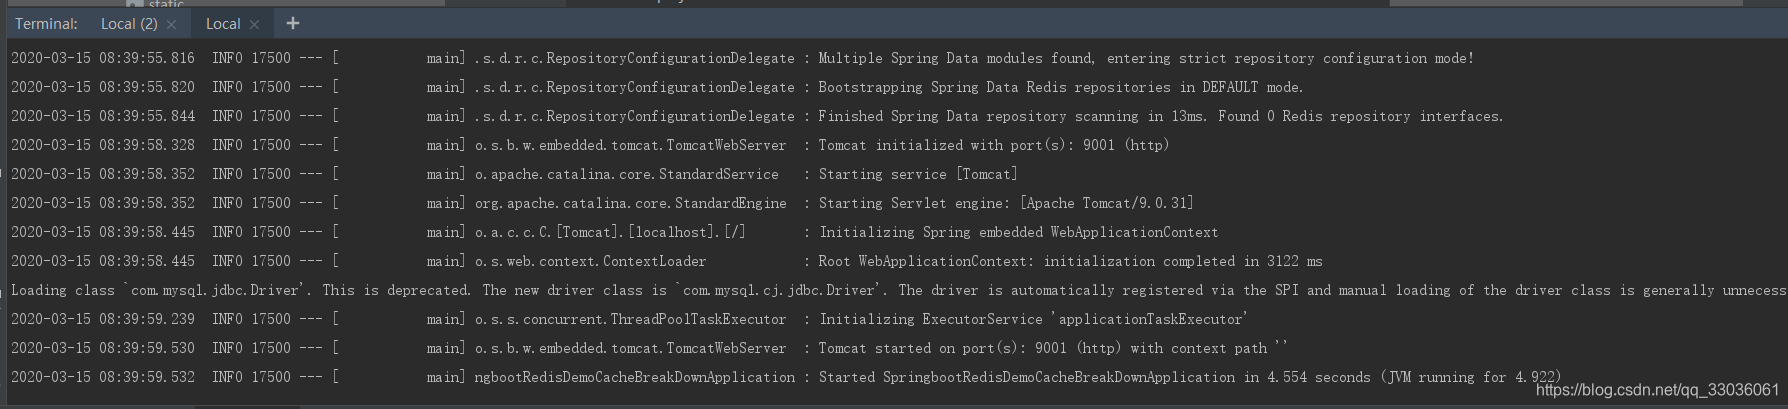
2个实例启动完毕,如下:
三、修改nginx配置
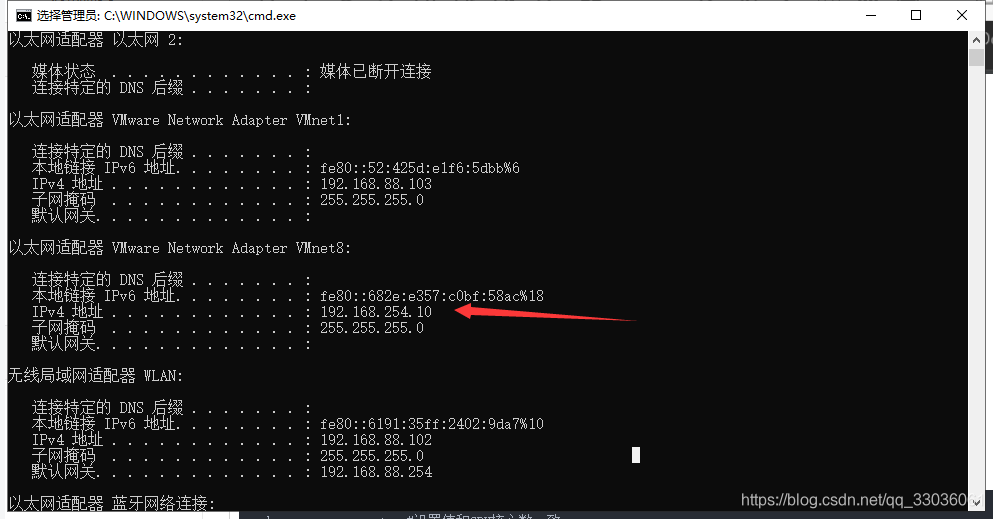
注: 最好使用v8的ip,因为在之前我配的v8ip是固定的,ip为手动配置的,不变。添加的配置如下:
添加2台代理的tomcat服务器:
upstream callback{
server 192.168.254.10:9000;
server 192.168.254.10:9001;
}
location / {
proxy_pass http://callback;
}
注: location里的proxy_pass 地址如果不含有 / ,那么在访问的时候,location后的匹配符省略。
如果proxy_pass的地址后面包含 /,那么在访问的时候,需要在转发到主机后,添加location 后面的匹配符。
user www www;
worker_processes auto; #设置值和CPU核心数一致
error_log /usr/local/webserver/nginx/logs/nginx_error.log crit; #日志位置和日志级别
pid /usr/local/webserver/nginx/nginx.pid;
#Specifies the value for maximum file descriptors that can be opened by this process.
worker_rlimit_nofile 65535;
events
{
  use epoll;
  worker_connections 65535;
}
http
{
  include mime.types;
  default_type application/octet-stream;
  log_format main  '$remote_addr - $remote_user [$time_local] "$request" '
               '$status $body_bytes_sent "$http_referer" '
               '"$http_user_agent" $http_x_forwarded_for';

#charset gb2312;

  server_names_hash_bucket_size 128;
  client_header_buffer_size 32k;
  large_client_header_buffers 4 32k;
  client_max_body_size 8m;

  sendfile on;
  tcp_nopush on;
  keepalive_timeout 60;
  tcp_nodelay on;
  fastcgi_connect_timeout 300;
  fastcgi_send_timeout 300;
  fastcgi_read_timeout 300;
  fastcgi_buffer_size 64k;
  fastcgi_buffers 4 64k;
  fastcgi_busy_buffers_size 128k;
  fastcgi_temp_file_write_size 128k;
  gzip on;
  gzip_min_length 1k;
  gzip_buffers 4 16k;
  gzip_http_version 1.0;
  gzip_comp_level 2;
  gzip_types text/plain application/x-javascript text/css application/xml;
  gzip_vary on;

  #limit_zone crawler $binary_remote_addr 10m;

  upstream callback{
      server 192.168.254.10:9000;
      server 192.168.254.10:9001;
  }


 #下面是server虚拟主机的配置
 server
  {
    listen 80;#监听端口
    server_name bingbing.com;#域名
    index index.html index.htm index.php;
    root /usr/local/webserver/nginx/html;#站点目录

    location / {
     proxy_pass http://callback;
   }

      location ~ .*\.(php|php5)?$
    {
      #fastcgi_pass unix:/tmp/php-cgi.sock;
      fastcgi_pass 127.0.0.1:9000;
      fastcgi_index index.php;
      include fastcgi.conf;
    }


    location ~ .*\.(gif|jpg|jpeg|png|bmp|swf|ico)$
    {
      expires 30d;
  # access_log off;
    }
    location ~ .*\.(js|css)?$
    {
      expires 15d;
   # access_log off;
    }
    access_log off;
  }

}
java代码为:
package com.hand.redis.web;


import org.springframework.beans.factory.annotation.Value;
import org.springframework.web.bind.annotation.GetMapping;
import org.springframework.web.bind.annotation.RequestMapping;
import org.springframework.web.bind.annotation.RestController;

@RestController
@RequestMapping("/callback")
public class RedisStockController {


    @Value("${server.port}")
    private  String port;

    /**
     * 测试nginx是否可以代理
     * @return
     */

    @GetMapping
    public String testNginx(){
        return "欢迎你,nginx!";
    }


    @GetMapping("/test01")
    public String LoadBalance(){
        return "欢迎你,nginx!实例为:"+port;
    }

}
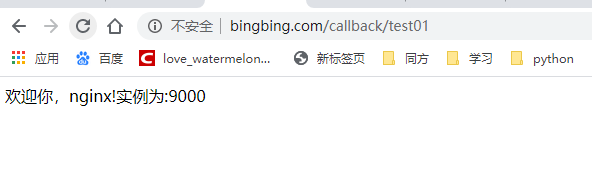
访问如下地址,可以发现在不同的tomcat实例之间切换:
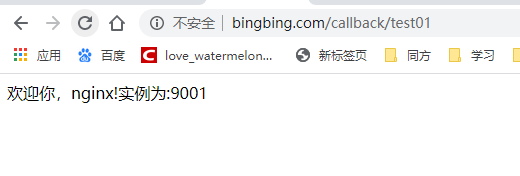
总结: 能够访问nginx的前提是先要与windowsping通,安装好nginx后能够进入到nginx首页,最好使用手动配置的v8的ip进行访问,使用WLAN的ip可能会变,负载均衡将无法进行。
使用nginx代理请求: https://blog.csdn.net/qq_33036061/article/details/104864609
使用nat模式连通windows并能够连上外网: https://blog.csdn.net/qq_33036061/article/details/104741517

北京人形旗下天工造物具身智能开源社区,聚焦具身天工与慧思开物两大平台
更多推荐
 0
0 0
0- 0


 已为社区贡献4条内容

所有评论(0)