windows控制Android手机的几种方法
1、ADB
1)、安装ADB
ADB Windows 版本:https://dl.google.com/android/repository/platform-tools-latest-windows.zip
解压并添加目录至环境变量,cmd验证版本号:
C:\Users\52884>adb version
Android Debug Bridge version 1.0.41
Version 36.0.1-13811061
Installed as D:\DevelopmentTool\platform-tools\adb.exe
Running on Windows 10.0.26100
adb start-server启动服务,adb kill-server关闭服务,adb devices 查看连接
2)、打开手机USB调试模式
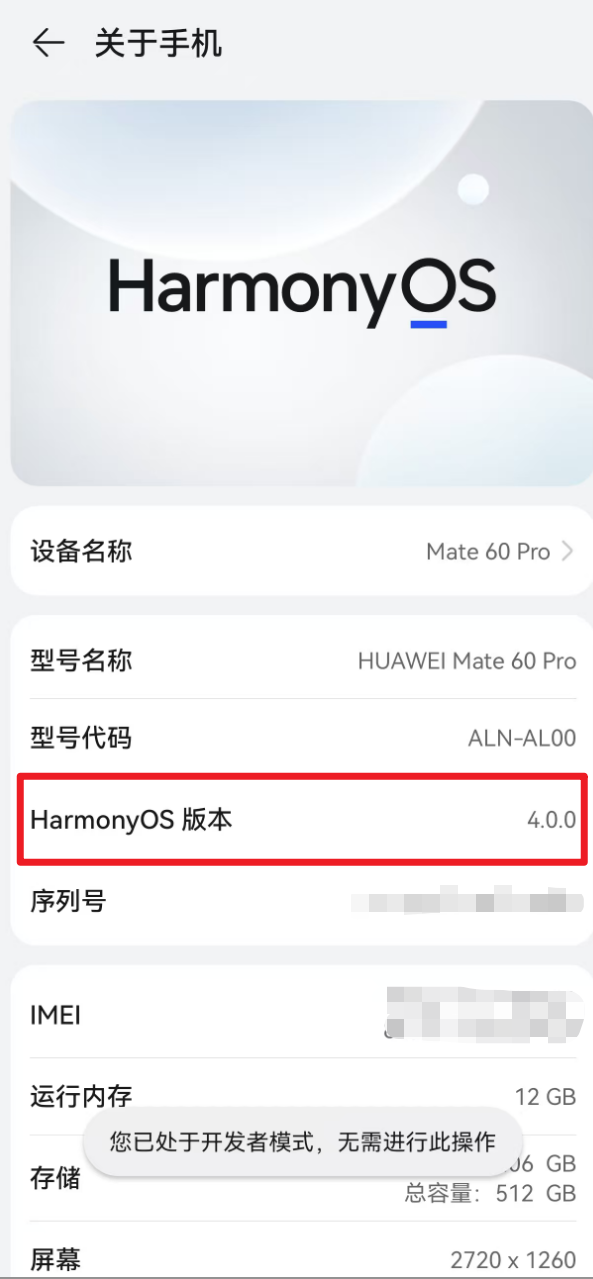
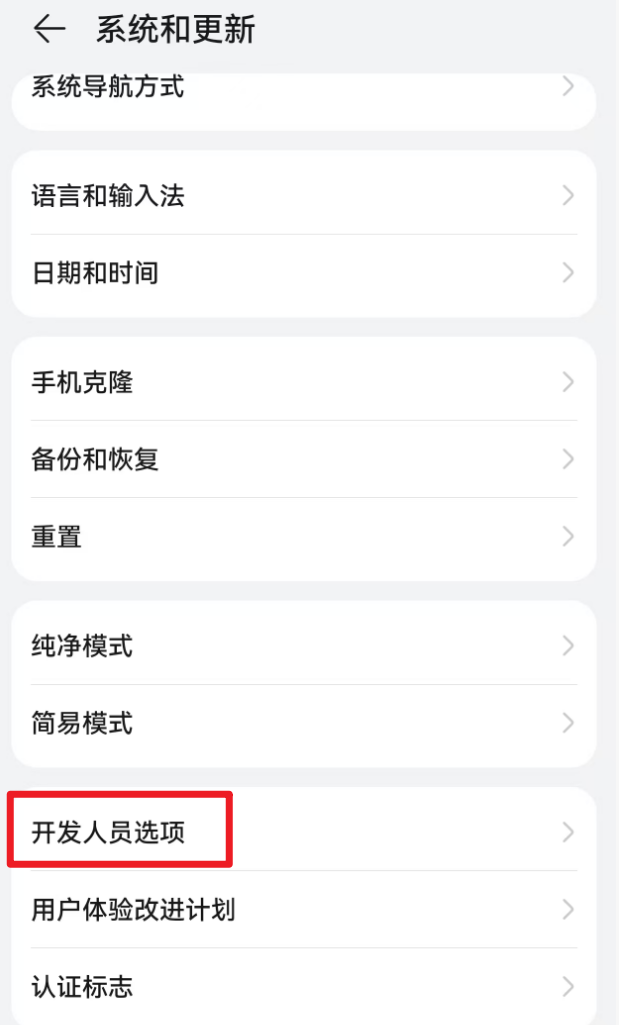
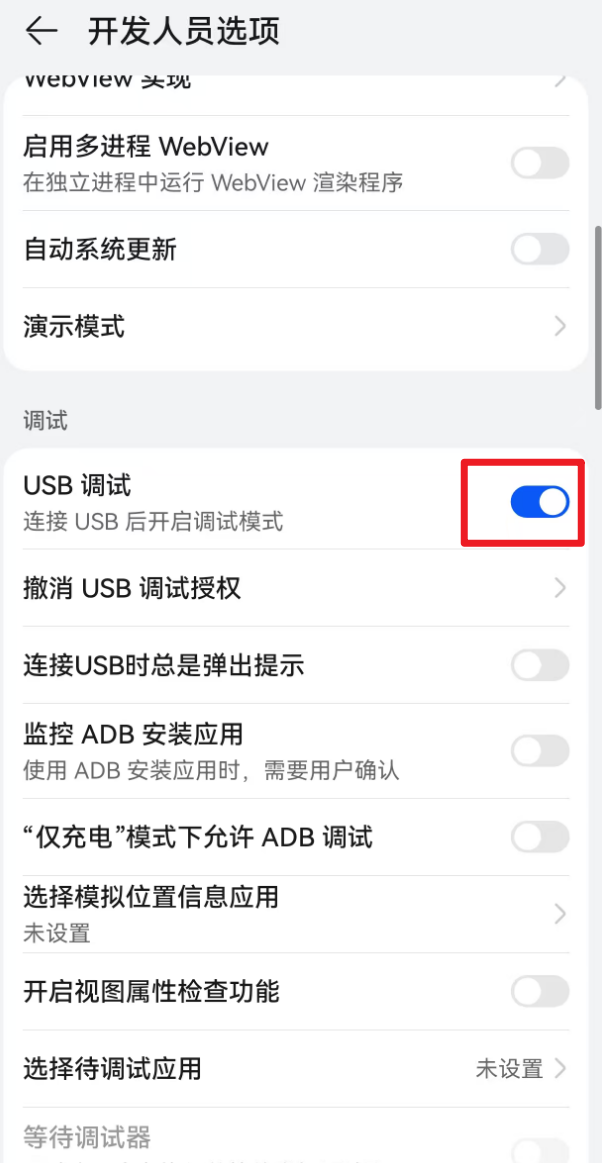
以huawei mate60 pro为例:设置-关于手机-连续点击版本号 开启开发者模式,再到 设置-系统和更新-开发人员选项-USB调试 打开
3)、查看连接情况
打开cmd命令行,输入adb devices查看连接情况,device表示连接成功(如果只有“List of devices attached”,说明并没有找到设备;或者“offline”,表示找到设备,但未连接成功或无响应)
C:\Users\52884>adb devices
List of devices attached
FMR0224130017980        device
4)、命令
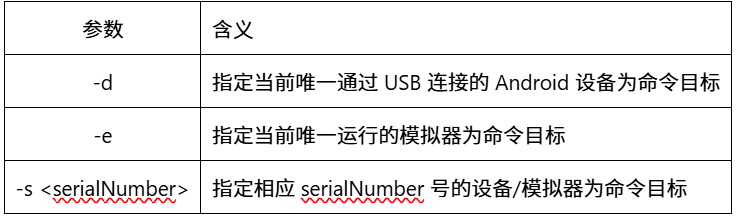
adb 命令的基本语法:adb [-d|-e|-s <serialNumber>] <command>
如果只有一个设备/模拟器连接时,可以省略掉 [-d|-e|-s <serialNumber>] 这一部分,直接使用 adb <command>
如果有多个设备/模拟器连接,则需要为命令指定目标设备。
开启手机相机:
adb shell am start -a android.media.action.STILL_IMAGE_CAMERA拍照:
adb shell input keyevent 27变焦(放大):
adb shell input keyevent KEYCODE_ZOOM_IN变焦(缩小):
adb shell input keyevent KEYCODE_ZOOM_OUT把手机照片传到电脑指定位置:
adb -s 【deviceId】 pull /sdcard/temp.png C:\\AMD\\a.png截图保存到电脑:
adb exec-out screencap -p > C:\Users\52884\Desktop\screenshot.png屏幕录像,Ctrl+c停止录制:
adb shell screenrecord > C:\Users\52884\Desktop\HoleRecognition\test.mp4
--size #视频大小
--bit-rate #比特率
--time-limit #持续时间
--verbose #命令行显示log信息
注:模拟器和安卓4.4以下版本不支持录屏
python测试代码:
import tkinter as tk
import subprocess
import time

def adb_command(command):
    """执行 ADB 命令"""
    result = subprocess.run(command, shell=True, stdout=subprocess.PIPE, stderr=subprocess.PIPE)
    return result.stdout.decode().strip(), result.stderr.decode().strip()

def adb_command2(command):
    """执行 ADB 命令的辅助函数"""
    try:
        # 使用 Popen 启动命令
        process = subprocess.Popen(command, shell=True, stdout=subprocess.PIPE, stderr=subprocess.PIPE)
        return process
    except Exception as e:
        print(f"执行命令出错: {e}")
        return None

def zoom_in():
    """放大(变焦)"""
    """执行两个滑动命令"""
    adb_command("adb shell input keyevent KEYCODE_ZOOM_IN")
    time.sleep(0.1)  # 每次放大后稍微延迟

def zoom_out():
    """缩小(变焦)"""
    print("缩小中...")
    # 模拟从屏幕顶部向下滑动
    adb_command("adb shell input swipe 500 500 500 1000 100")  # 从 (500, 500) 到 (500, 1000) 滑动
    time.sleep(0.1)  # 每次缩小后稍微延迟

def take_picture():
    """拍照"""
    print("拍照中...")
    adb_command("adb shell input keyevent KEYCODE_CAMERA")
    time.sleep(1)  # 等待一秒以确保拍照完成

def on_take_picture():
    """拍照按钮点击事件"""
    take_picture()

# 创建主窗口
root = tk.Tk()
root.title("相机控制")

# 创建放大和缩小按钮
zoom_in_button = tk.Button(root, text="放大", command=zoom_in)
zoom_in_button.pack(pady=10)

zoom_out_button = tk.Button(root, text="缩小", command=zoom_out)
zoom_out_button.pack(pady=10)

# 创建拍照按钮
take_picture_button = tk.Button(root, text="拍照", command=on_take_picture)
take_picture_button.pack(pady=20)

# 启动相机应用
adb_command("adb shell am start -a android.media.action.STILL_IMAGE_CAMERA")
time.sleep(2)  # 等待相机应用启动

# 启动主循环
root.mainloop()
2、scrcpy控制
下载scrcpy:https://github.com/Genymobile/scrcpy
配置scrcpy路径到环境变量
USB连接手机,命令行查看
C:\Users\52884>adb devices
List of devices attached
FMR0224130017980        device
执行scrcpy(--show-touches显示手机触摸位置):
C:\Users\52884>scrcpy --show-touches
scrcpy 3.3.1 <https://github.com/Genymobile/scrcpy>
INFO: ADB device found:
INFO:     -->   (usb)  FMR0224130017980                device  ALN_AL00
D:\download\chrome\scrcpy-win64-v3.3.1\scrcpy-server: 1 file pushed, 0 skipped. 126.9 MB/s (90788 bytes in 0.001s)
[server] INFO: Device: [HUAWEI] HUAWEI ALN-AL00 (Android 12)
INFO: Renderer: direct3d
INFO: Texture: 1264x2720
成功显示
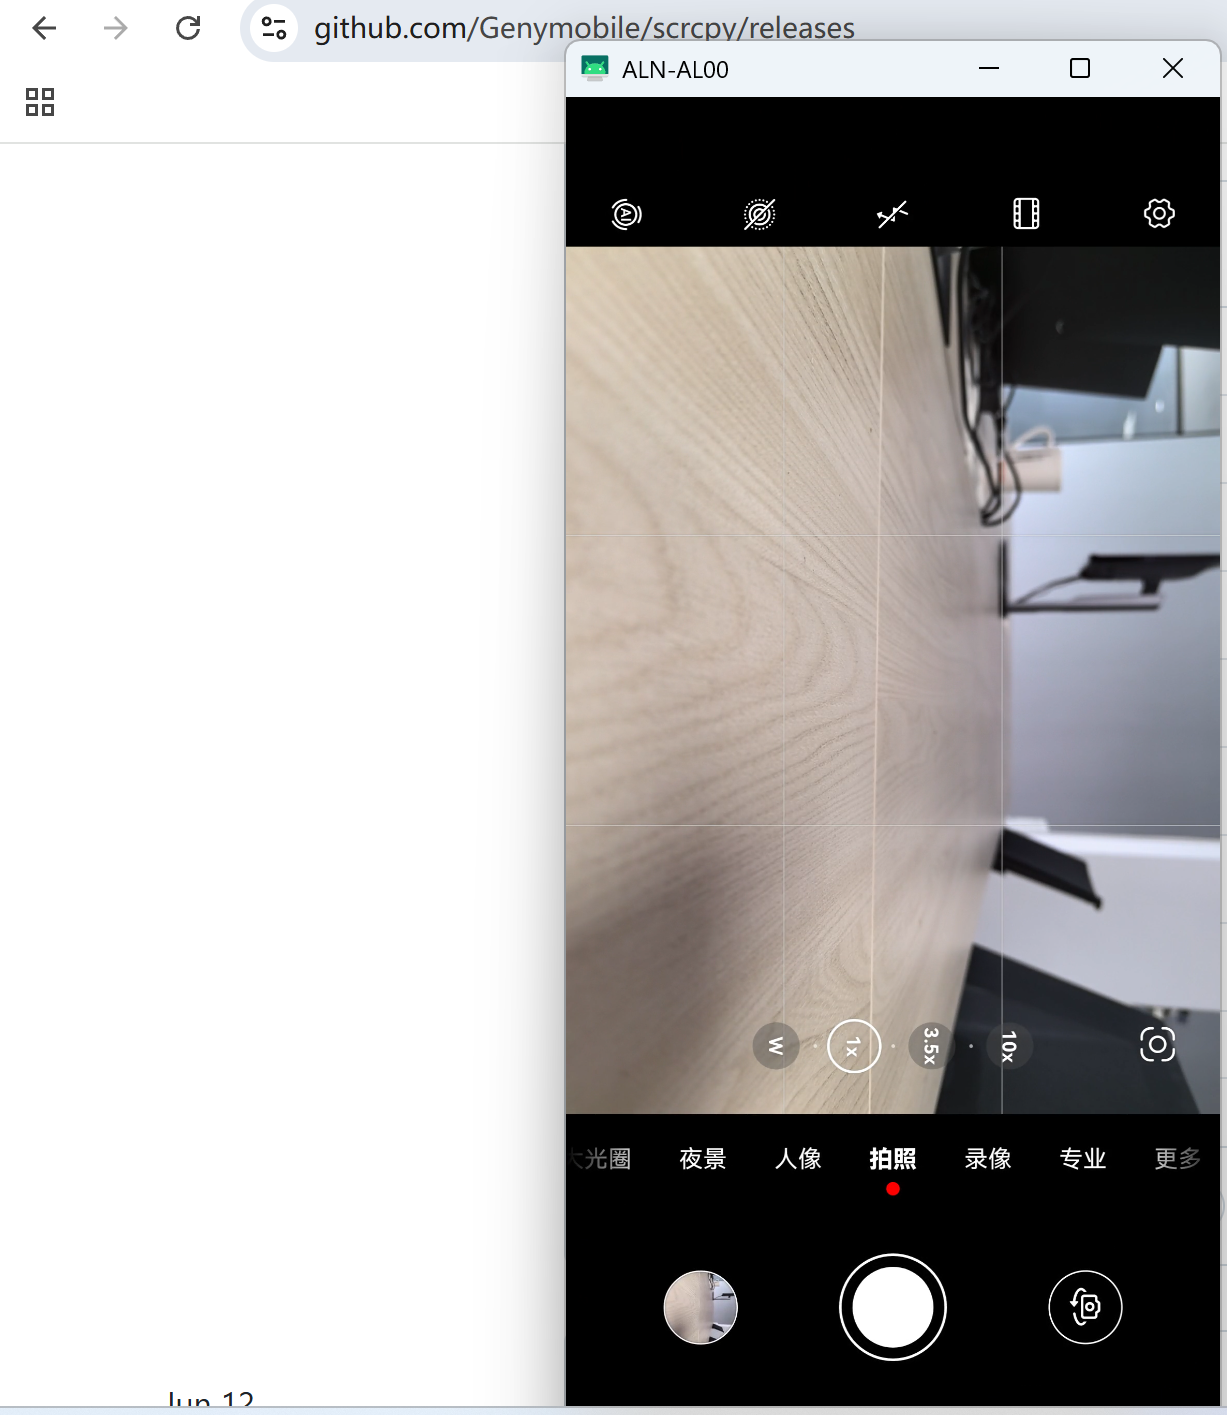
3、图形化界面escrcpy
图形化界面:https://github.com/viarotel-org/escrcpy (教程https://escrcpy.viarotel.eu.org/zhHans/guide/started)
或 https://github.com/barry-ran/QtScrcpy
1)、有线连接

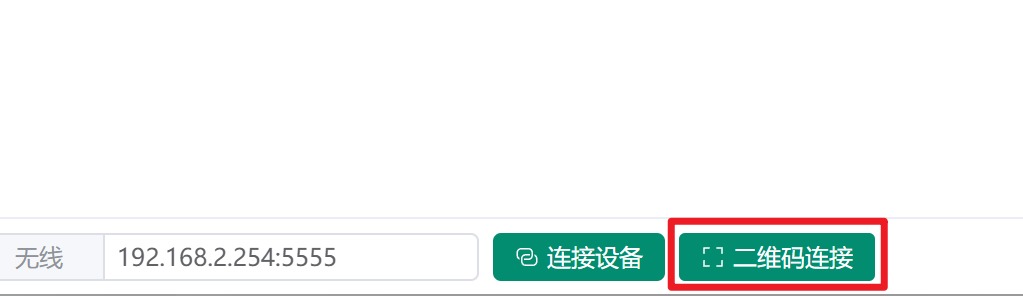
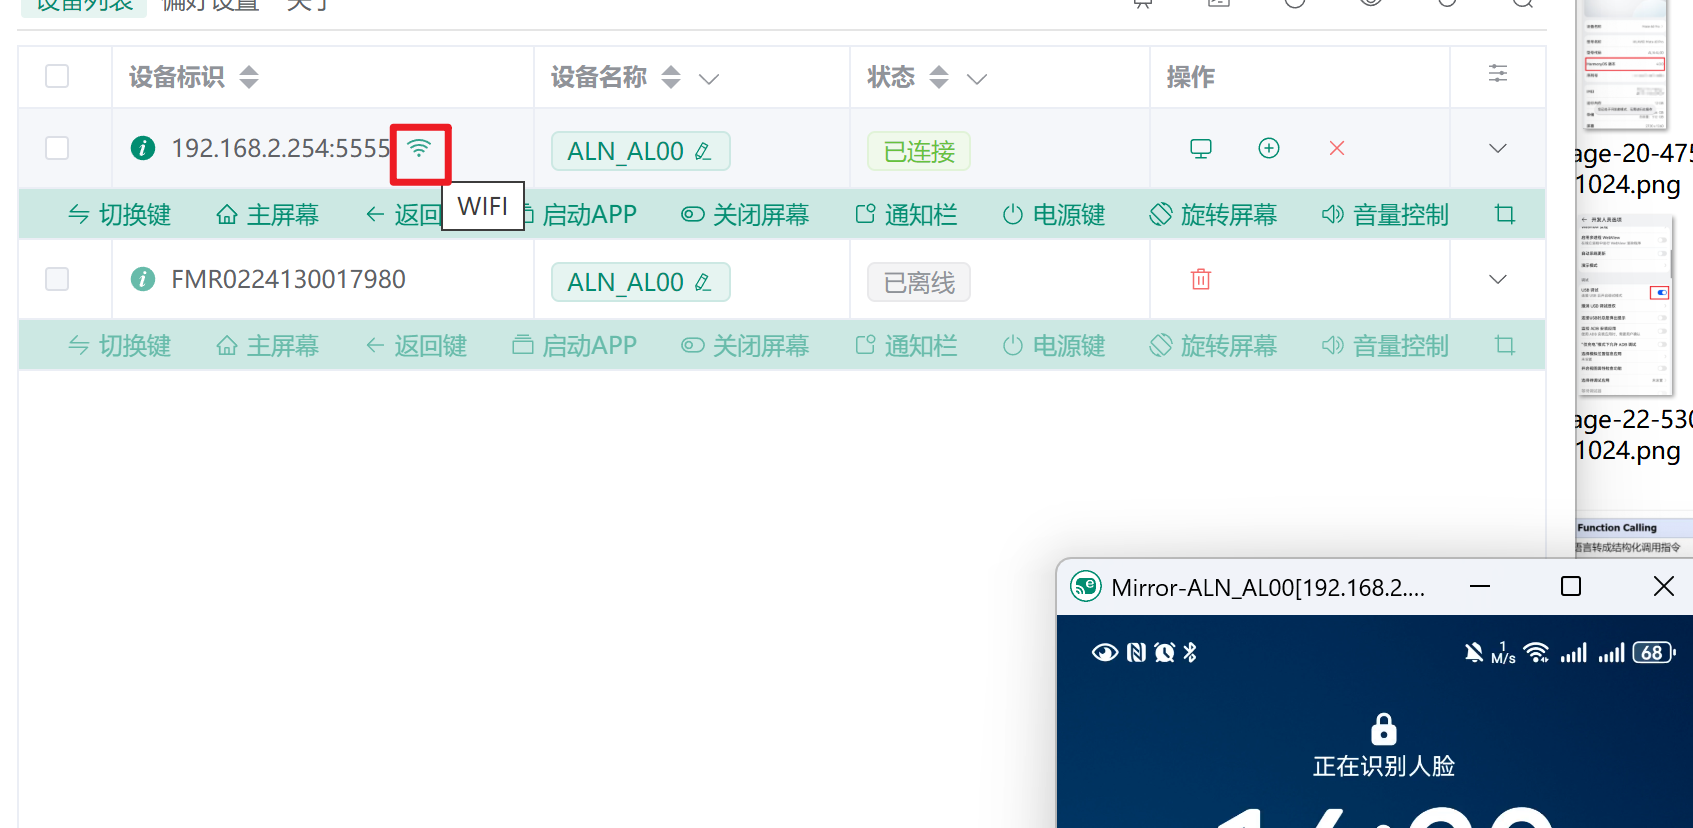
2)、wifi无线连接
第一次连接需要按照有线连接的1、2步骤,且两个设备连在同一个wifi,然后选择二维码扫码连接,连接成功后拔掉数据线,关闭后下一次会自动连接

北京人形旗下天工造物具身智能开源社区,聚焦具身天工与慧思开物两大平台
更多推荐
 24
24 0
0- 0


 已为社区贡献2条内容

所有评论(0)