windows中squid安装&使用
·
windows代理squid使用
目的
在 windows10 下安装 squid 作 http 代理,不设置用户/密码。
下载 squid.msi
# 下载Windows版本
https://squid.diladele.com/
安装
下载后,直接点击安装,一直下一步安装完即可。安装好后在任务栏下可以看到图标
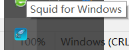
右键,即可看到 squid 配置。安装好就是启动的了
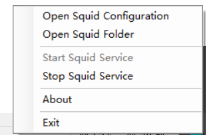
配置 ssh 端口代理
默认允许端口配置
acl SSL_ports port 443
acl Safe_ports port 80		# http
acl Safe_ports port 21		# ftp
acl Safe_ports port 443		# https
acl Safe_ports port 70		# gopher
acl Safe_ports port 210		# wais
acl Safe_ports port 1025-65535	# unregistered ports
acl Safe_ports port 280		# http-mgmt
acl Safe_ports port 488		# gss-http
acl Safe_ports port 591		# filemaker
acl Safe_ports port 777		# multiling http
...
http_access deny !Safe_ports
修改为,添加一行 acl Safe_ports port 22 # ssh
acl SSL_ports port 443
acl Safe_ports port 80		# http
acl Safe_ports port 21		# ftp
acl Safe_ports port 22		# ssh
acl Safe_ports port 443		# https
acl Safe_ports port 70		# gopher
acl Safe_ports port 210		# wais
acl Safe_ports port 1025-65535	# unregistered ports
acl Safe_ports port 280		# http-mgmt
acl Safe_ports port 488		# gss-http
acl Safe_ports port 591		# filemaker
acl Safe_ports port 777		# multiling http
...
# 必须添加,否则 22 端口不能代理,Safe_ports和!Safe_ports 使用其中一个即可
http_access allow Safe_ports
# http_access deny !Safe_ports

北京人形旗下天工造物具身智能开源社区,聚焦具身天工与慧思开物两大平台
更多推荐
 3
3 0
0- 0


 已为社区贡献2条内容

所有评论(0)