vscode调试c++程序
·
目录
ch10.cpp: (放在一个文件夹里,我的是ch10文件夹)
#include <iostream>
#include <string>
#include <vector>
#include <algorithm>

// from ex 10.9
void elimdups(std::vector<std::string> &vs)
{
    std::sort(vs.begin(), vs.end());
    auto new_end = std::unique(vs.begin(), vs.end());
    vs.erase(new_end, vs.end());
}

void biggies(std::vector<std::string> &vs, std::size_t sz)
{
    using std::string;

    elimdups(vs);

    // sort by size, but maintain alphabetical order for same size.
    std::stable_sort(vs.begin(), vs.end(), [](string const& lhs, string const& rhs){
        return lhs.size() < rhs.size();
    });

    // get an iterator to the first one whose size() is >= sz
    auto wc = std::find_if(vs.begin(), vs.end(), [sz](string const& s){
            return s.size() >= sz;
    });

    // print the biggies
    std::for_each(wc, vs.end(), [](const string &s){
        std::cout << s << " ";
    });
}

int main()
{
    // ex10.16
    std::vector<std::string> v
    {
        "1234","1234","1234","hi~", "alan", "alan", "cp"
    };
    std::cout << "ex10.16: ";
    biggies(v, 3);
    std::cout << std::endl;

    return 0;
}
一、安装必要的插件
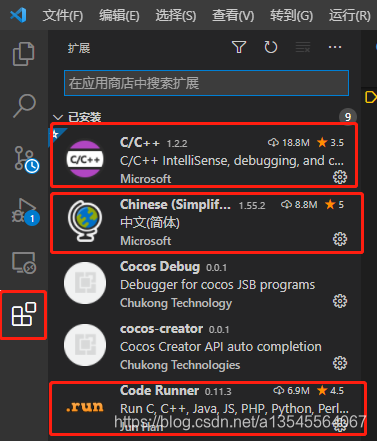
重启生效
二、安装c++编译器
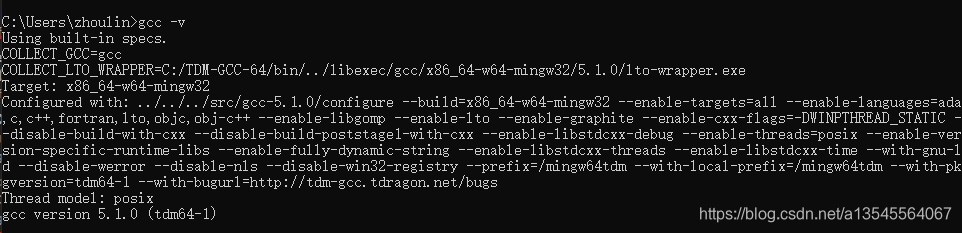
我使用的是TDM-GCC-64编译器,下载地址:https://jmeubank.github.io/tdm-gcc/
将安装路径加入环境变量path中,我的是直接放在c盘:

打开cmd输入gcc -v,出现版本信息表明安装成功:
三、编辑配置文件
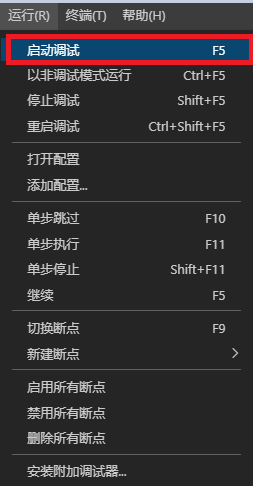
点击运行->启动调试->选择c++(GDB/LLDB)->选择g++.exe


会弹出launch.json文件
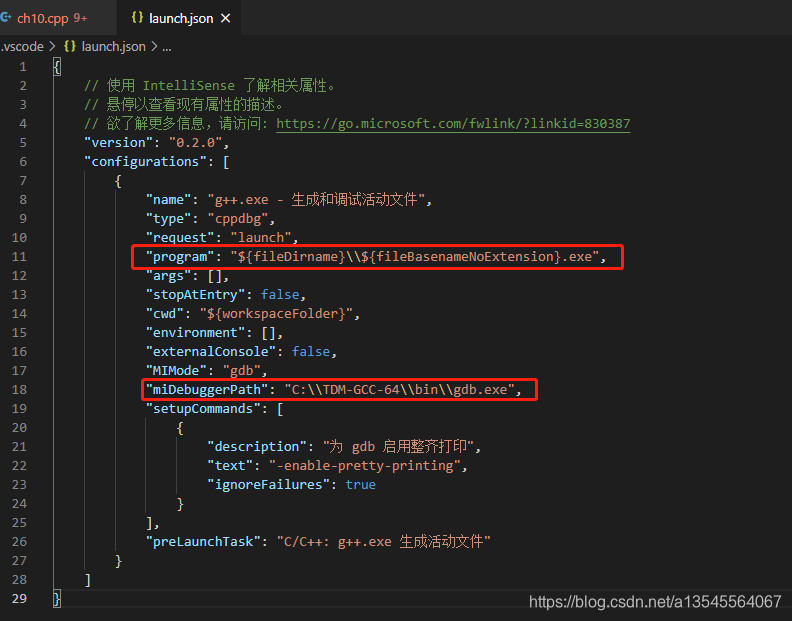
修改文件
program填要生成的exe文件名
miDebuggerPath填编译器的安装位置
例如我的:
{
    // 使用 IntelliSense 了解相关属性。
    // 悬停以查看现有属性的描述。
    // 欲了解更多信息,请访问: https://go.microsoft.com/fwlink/?linkid=830387
    "version": "0.2.0",
    "configurations": [
        {
            "name": "(gdb) 启动",
            "type": "cppdbg",
            "request": "launch",
            "program": "${workspaceFolder}\\ch10.exe",
            "args": [],
            "stopAtEntry": false,
            "cwd": "${workspaceFolder}",
            "environment": [],
            "externalConsole": false,
            "MIMode": "gdb",
            "miDebuggerPath": "C:\\TDM-GCC-64\\bin\\gdb.exe",
            "setupCommands": [
                {
                    "description": "为 gdb 启用整齐打印",
                    "text": "-enable-pretty-printing",
                    "ignoreFailures": true
                }
            ]
        }
    ]
}
修改完毕后文件夹里多了.vscode文件夹

四、生成可执行exe文件
打开powershell,输入g++ ch10.cpp --std=c++11 -o ch10.exe -g
g++后接cpp文件, --std=c++11支持c++11新特性(文件里有auto 自动数据类型),-o后接要生成的exe文件名,-g调试需要

执行完毕文件夹ch10里会有ch10.exe文件
五、调试
打断点,F5进入调试模式,右方操作调试过程
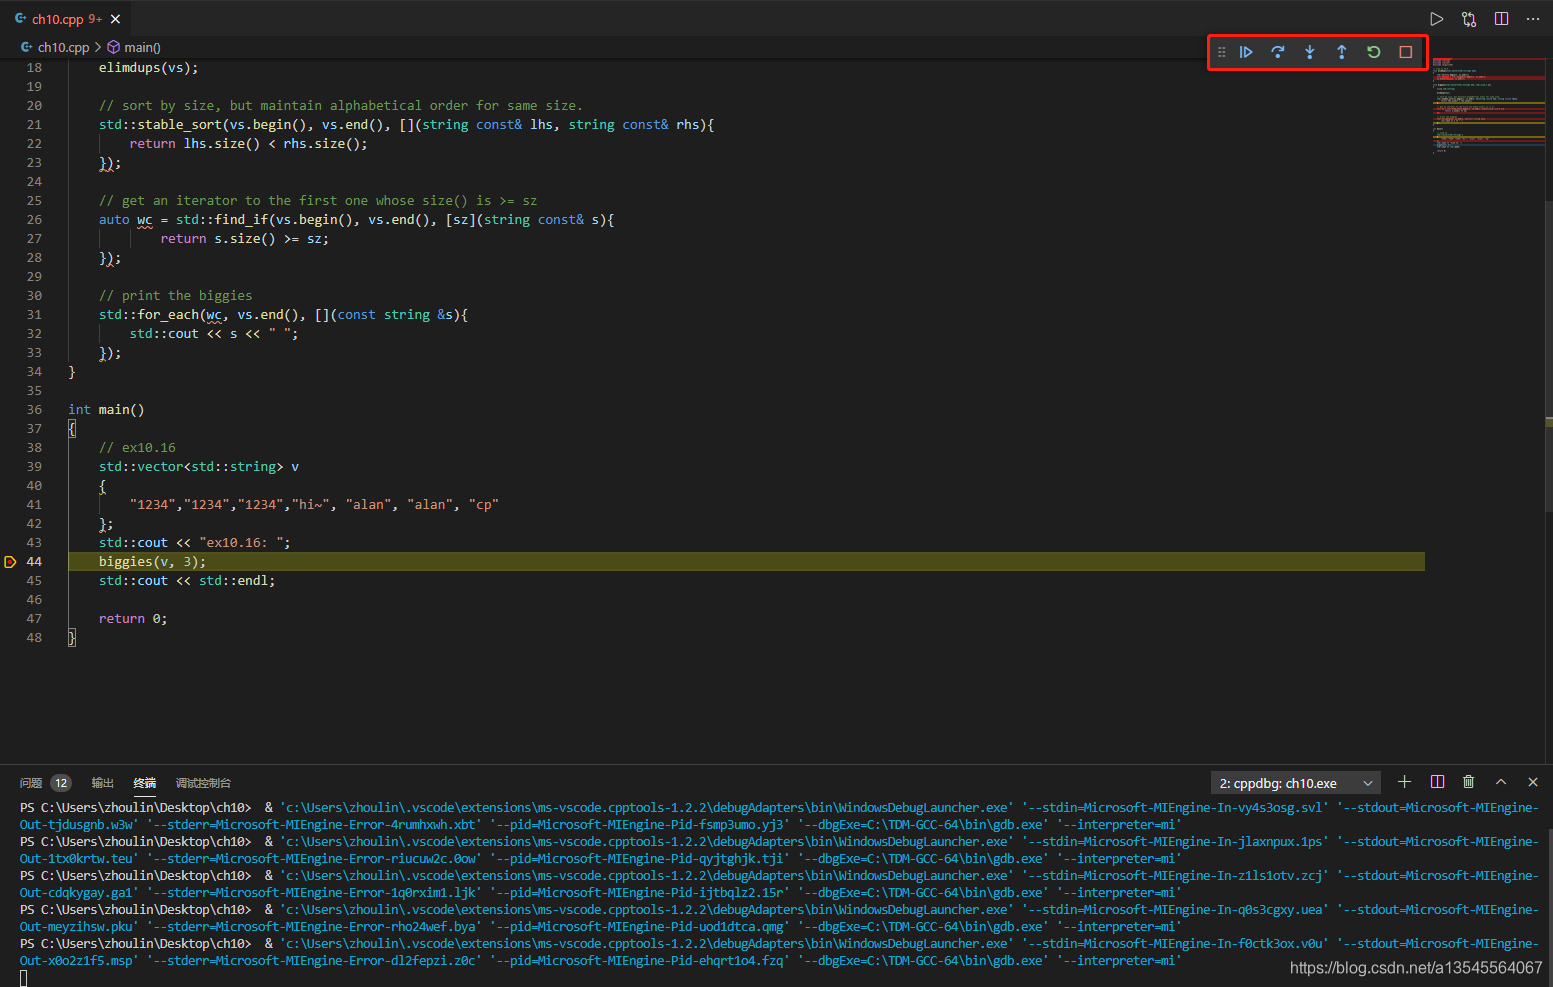
参考:https://www.runoob.com/note/28179
https://blog.csdn.net/weixin_44081296/article/details/108420616

北京人形旗下天工造物具身智能开源社区,聚焦具身天工与慧思开物两大平台
更多推荐
 1
1 0
0- 0


 已为社区贡献12条内容

所有评论(0)