1.下载驱动

pylon 5 for Linux ARM hardfloat

2.解压

解压后放在 /Desktop/pylon-5.0.5.9000-armhf

[plain]  view plain  copy
  在CODE上查看代码片 派生到我的代码片
  1. cd /Desktop/pylon-5.0.5.9000-armhf  
将其中的压缩文件解压至opt
[plain]  view plain  copy
  在CODE上查看代码片 派生到我的代码片
  1. sudo tar -C /opt -xzf pylonSDK-5.0.5.9000-armhf.tar.gz  

3.修改环境变量

[plain]  view plain  copy
  在CODE上查看代码片 派生到我的代码片
  1. cd /opt  
  2. source ./pylon5/bin/pylon-setup-env.sh pylon5  

4.配置IP

使用Win7环境下的pylon IP Configurator,设置相机的IP为:

IP: 192.168.4.5
Subnet Mask: 255.255.255.0
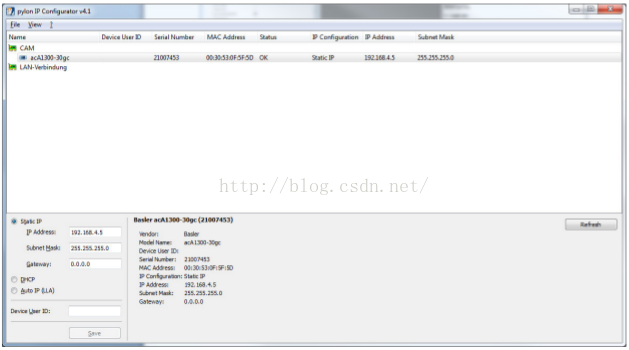
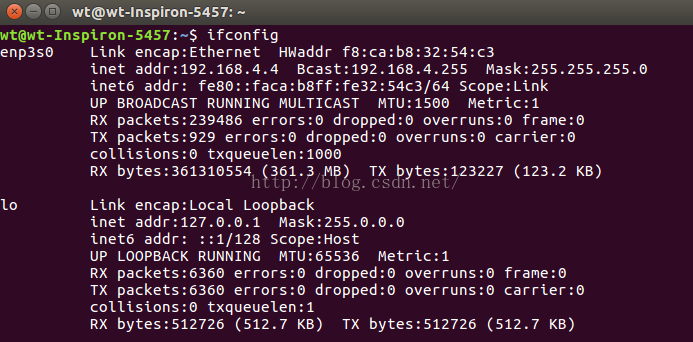
打开终端,
[plain]  view plain  copy
  在CODE上查看代码片 派生到我的代码片
  1. ifconfig  

此处的enp3s0也可能是eth0。

若找不到ipv4的地址,可通过设置-System Settings-Network-Wired进行设置。

[plain]  view plain  copy
  在CODE上查看代码片 派生到我的代码片
  1. sudo ifconfig enp3s0 192.168.4.4 netmask 255.255.255.0  
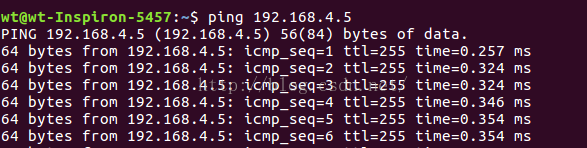
  2. ping 192.168.4.5  
看看是否可ping通


5.运行demo

[plain]  view plain  copy
  在CODE上查看代码片 派生到我的代码片
  1. cd  
  2. cd Desktop/pylon-5.0.5.9000-armhf  
  3. cd Samples/C++/Grab  
  4. sudo make  
  5. ./Grab  
  6. 转载来自:http://blog.csdn.net/wt881010/article/details/53350340?locationNum=3&fps=1
Logo

北京人形旗下天工造物具身智能开源社区,聚焦具身天工与慧思开物两大平台

更多推荐