065、STM32项目分享:智能安防系统
·
目录
一、项目成品图片
二、项目功能简介
1.主要器件组成
2.功能详解介绍
三、项目原理图设计
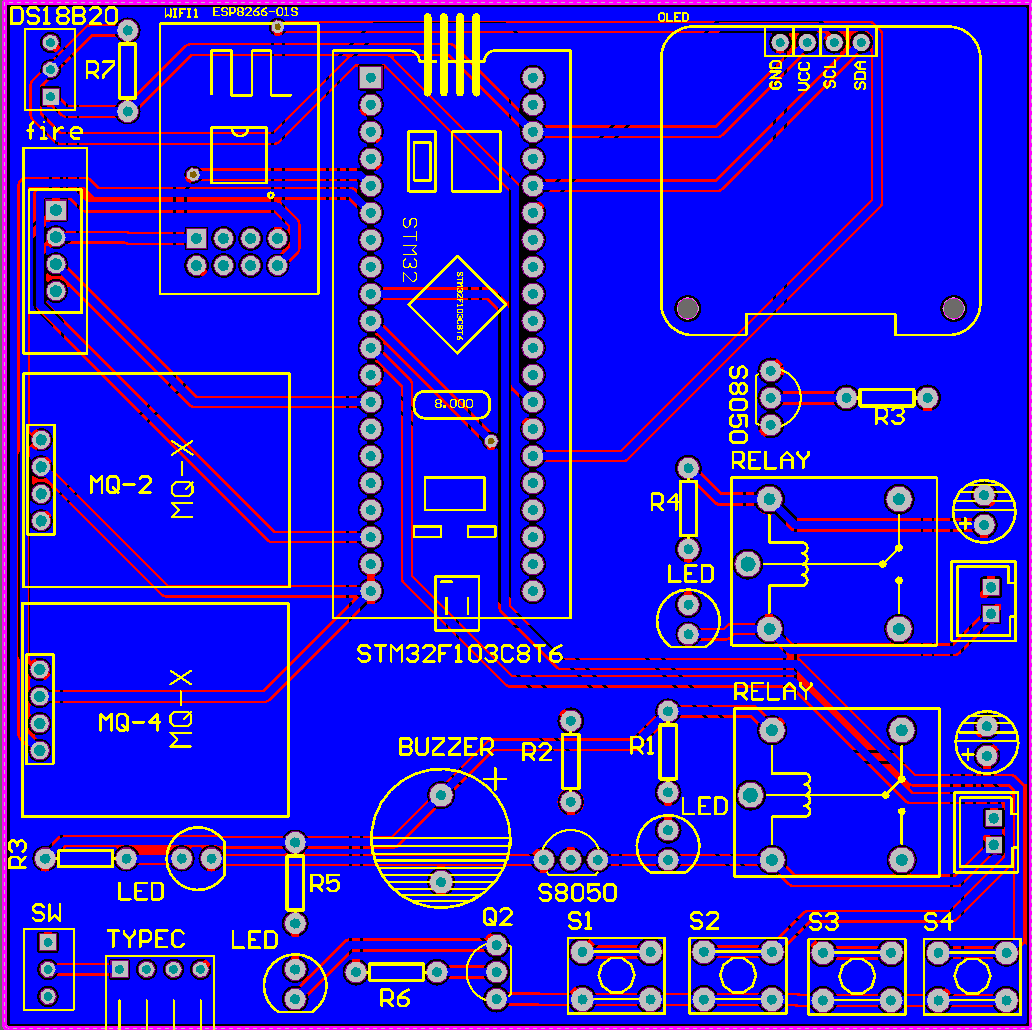
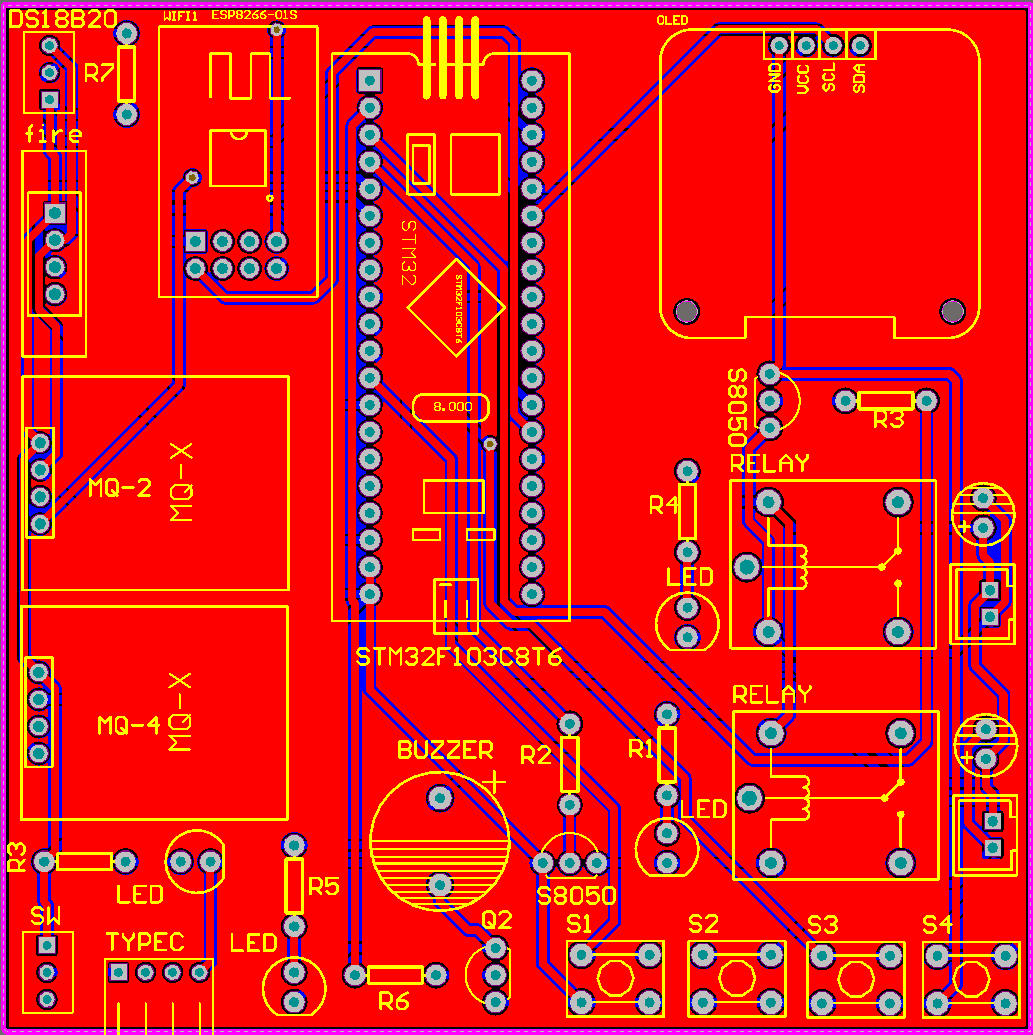
四、项目PCB硬件设计
项目PCB图
五、项目程序设计
六、项目实验效果 编辑
七、项目包含内容
一、项目成品图片
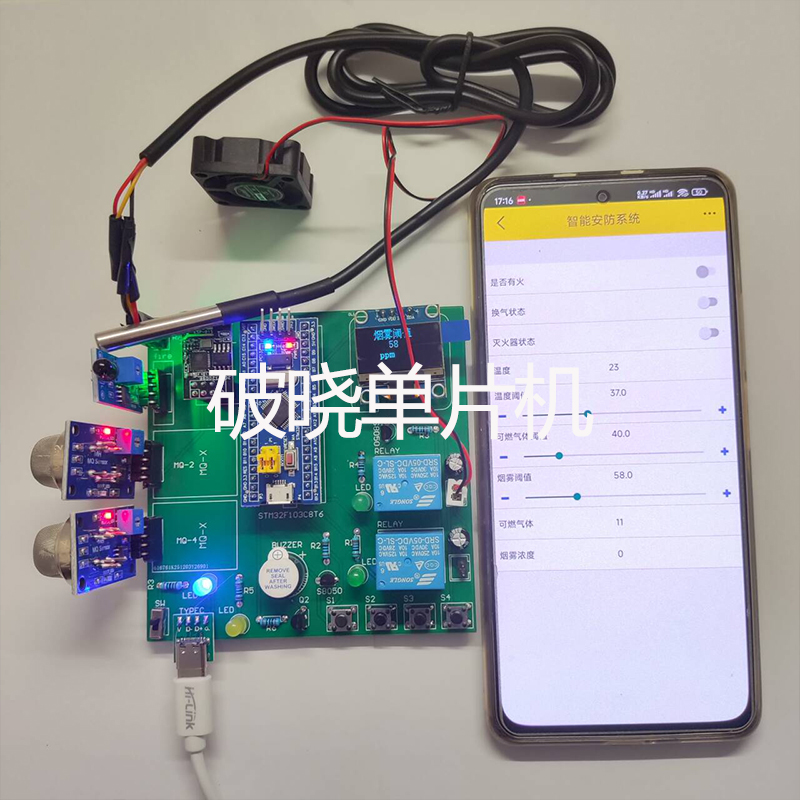
哔哩哔哩视频链接:
资料分享看文章末尾
二、项目功能简介
1.主要器件组成
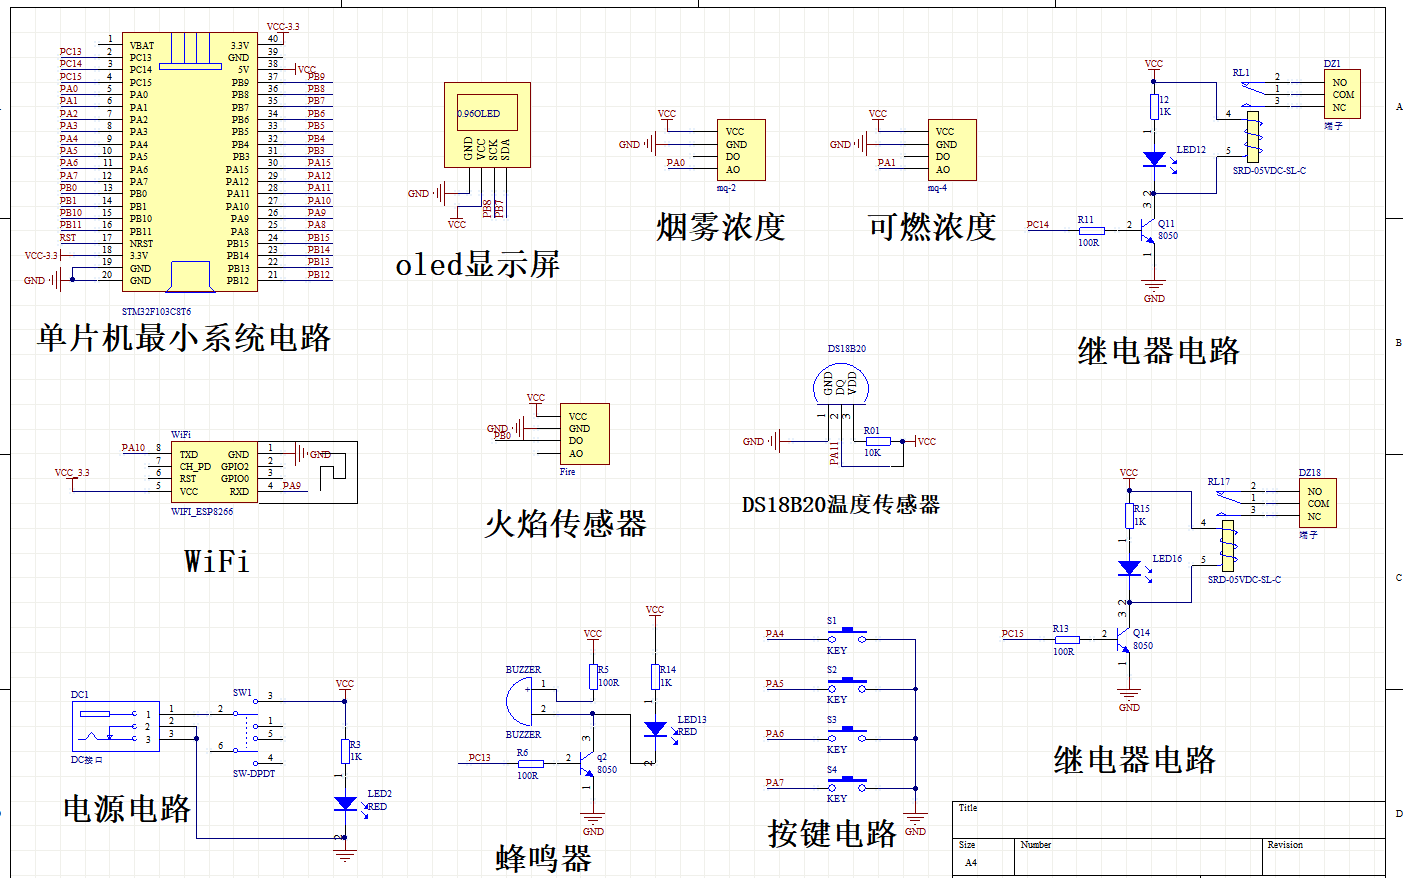
本设计由STM32F103C8T6单片机+WIFI模块ESP8266-01S电路+OLED屏幕电路+DS18B20温度传感器电路+MQ-2烟雾传感器电路+MQ-4可燃气体传感器电路+火焰传感器+继电器模块电路+蜂鸣器电路+按键电路+电源电路组成。
2.功能详解
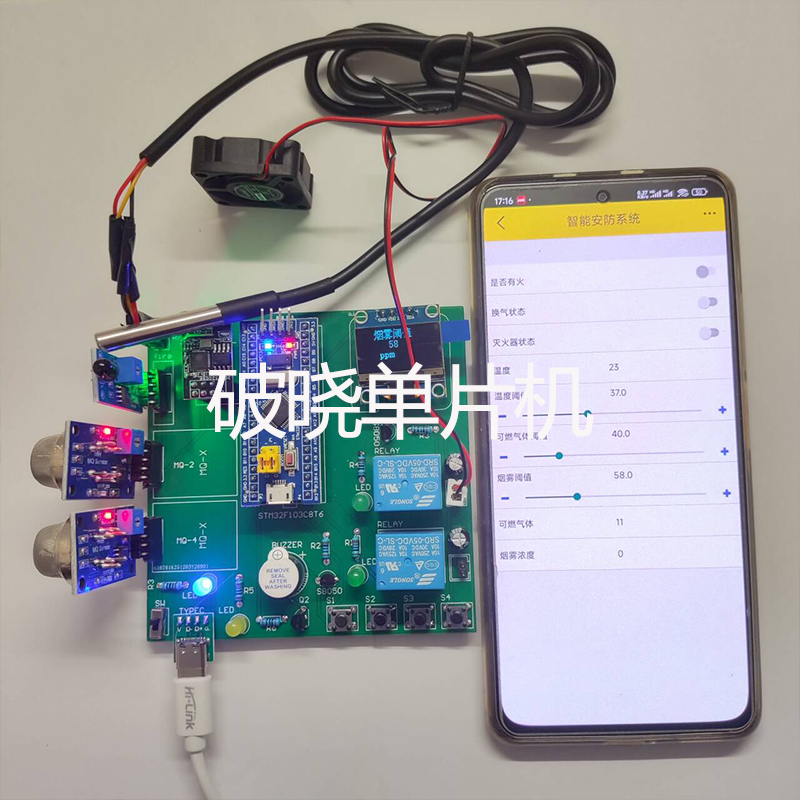
1、环境采集:DS18B20温度传感器采集温度和湿度、MQ-2烟雾传感器检测烟雾浓度是否正常、MQ-4可燃气体传感器检测可燃气体浓度是否正常情况、火焰传感器检测是否发生火灾。
2、屏幕显示:OLED屏幕显示当前温度、可燃气体、烟雾、换气状态、灭火状态、是否发生火灾状态信息
3、自动换气:MQ-2烟雾传感器检测烟雾浓度是否异常,当烟雾大于设置的阈值时,自动开启换气。,MQ-4可燃气体传感器检测可燃气体浓度是否异常,当可燃气体大于设置的阈值时,自动开启换气。
4、智能灭火:火焰传感器检测到发生火灾时,灭火器开启灭火。
5、阈值设置:可通过按键和app设置温度、可燃气体、烟雾阈值
6、温度提醒:温度大于设置的阈值时声光报警
7、烟雾提醒:烟雾大于设置的阈值时声光报警
8、可燃提醒:可燃气体大于设置的阈值时声光报警
9、远程控制:通过WIFI连接手机APP,APP可以查看当前环境信息数据,可调节阈值范围
三、项目原理图设计
四、项目PCB硬件设计
五、项目程序设计
#include "stm32f10x.h"
#include "delay.h"
#include "usart.h"
#include "USART2/usart2.h"
#include "usart3.h"
#include "oled.h"
#include "timer.h"
#include "adc.h"
#include "menu.h"
#include "key.h"
#include "modules.h"
#include "led.h"
#include "uln2003.h"
#include "beep.h"
#include "mq2.h"
#include "relay.h"
#include "voice.h"
#include "cry.h"
#include "DS18B20/ds18b20.h"
#include "yudi.h"
/****************破晓电子工作室*******************
*** 破晓单片机
*** 项目:STM32智能安防系统
*** BILIBILI:破晓单片机
*** 小红书:破晓单片机
*** 授权IP:破晓单片机
*** 淘宝:破晓单片机
*** 淘宝:破晓电子
*** 版本:V01.01
*** MCU:STM32F103C8T6
******************破晓单片机***********************/
//显示界面
CaiDanJieGouTi KeyTab[SIZE_CAIDAN]=
{
{0 ,0 ,0 ,0 ,0 ,Main_Menu0},
{1 ,1 ,1 ,1 ,1 ,Main_Menu1},
{2 ,2 ,2 ,2 ,2 ,Main_Menu2},
{3 ,3 ,3 ,3 ,3 ,Main_Menu3},
{4 ,4 ,4 ,4 ,4 ,Main_Menu4},
{5 ,5 ,5 ,5 ,5 ,Main_Menu5},
{6 ,6 ,6 ,6 ,6 ,Main_Menu6},
{7 ,7 ,7 ,7 ,7 ,Main_Menu7},
{8 ,8 ,8 ,8 ,8 ,Main_Menu8},
} ;
//传感器变量声明
typedef struct
{
uint16_t tempds;//ds18b20
u8 fire;//
uint16_t combustible;//
uint16_t smoke;//
}SensorModulesValue;
typedef struct
{
uint8_t tempdsTV;//阈值
uint8_t smokeTV;//阈值
uint8_t combustibleTV;//
}SensorThresholdValue;
typedef struct
{
uint8_t BEEPFlag;
uint8_t RELAYFlag;
uint8_t RELAY1Flag;
}DriveFlag;
int main(void)
{
delay_init();
TIM3_Int_Init(9,7199);//定时器初始化
OLEDGUI_Config(); //OLED
OLEDGUI_DispString(30,16,"Init...",16,1);
key_Init();//按键初始化
Adc_Init();//Adc初始化
beep_Init();//beep初始化
DS18B20_Init();//DS18B20初始化
MQ2_Init();//MQ2初始化
led_Init();//led初始化
MQ4_Init();//MQ4初始化
relay_Init();//relay初始化
FIRE_Init();//FIRE初始化
SensorThresholdSet();//阈值初始化
uart1_init(9600);
delay_ms(100);
uart2_init(9600);
delay_ms(100);
memset((uint8_t *)¤tDataPoint, 0, sizeof(dataPoint_t));
gizwitsInit();
OLEDGUI_Clear(); //OLED清屏
while(1)
{
//获取按键值
key_scan();
//进入菜单界面显示处理数据
GetKeylnput(&Keystatus);
//获取传感器数据
SensorDataGet();
//数据上传
currentDataPoint.valueTemp=SensorData.tempds/10;
currentDataPoint.valuecombustible=SensorData.combustible;
currentDataPoint.valueSmoke=SensorData.smoke;
currentDataPoint.valuefire=SensorData.fire;
currentDataPoint.valueRELAY=DriveFlagData.RELAYFlag;
currentDataPoint.valueRELAY1=DriveFlagData.RELAY1Flag;
gizwitsHandle((dataPoint_t *)¤tDataPoint);
//数据下发
Sensorthreshold.tempTV=currentDataPoint.valueTempyz;
Sensorthreshold.smokeTV=currentDataPoint.valueSmokeyz;
Sensorthreshold.combustibleTV=currentDataPoint.valuecombustibleyz;
delay_ms(100);
}
}
六、项目实验效果
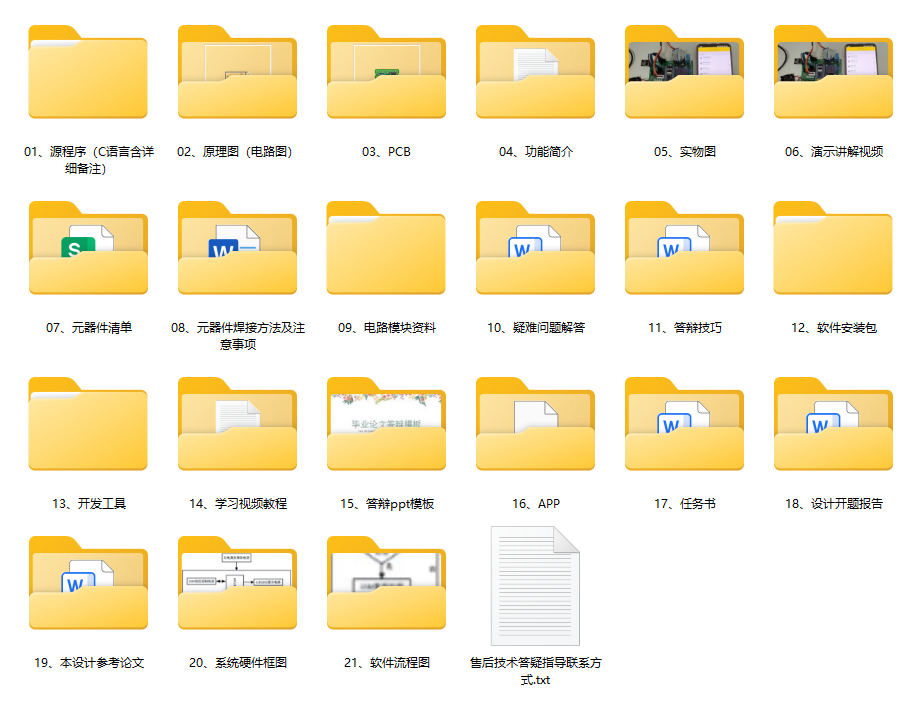
七、项目包含内容

北京人形旗下天工造物具身智能开源社区,聚焦具身天工与慧思开物两大平台
更多推荐
 2
2 0
0- 0


 已为社区贡献1条内容

所有评论(0)