Aruco物体定位(追踪)在UE4中的实现
目录
一、环境配置
环境配置参考博客:UE4.26+VS2019+OpenCV4.5.1_still_eat_a_lot的博客-CSDN博客(感谢)
版本:UE4.25(4.26)+ VS2019 + OpenCV4.5.1(亲测成功)
具体步骤:
1、下载所需版本opencv(以4.5.1为例)
链接:https://pan.baidu.com/s/1u-nRKgPUdre9JsIVd_v5qg
提取码:ahf7
下载后解压
2、在UE4中新建一个空的c++项目

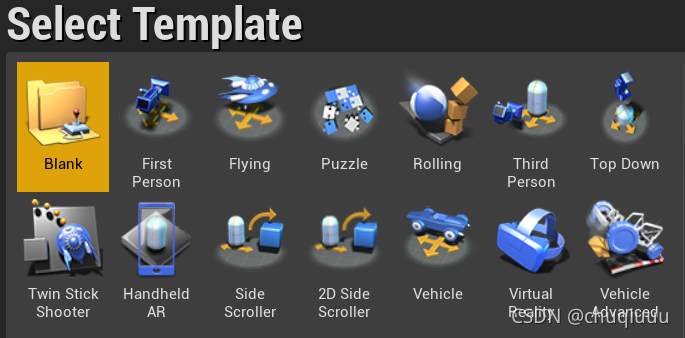
3、打开新建项目的项目文件夹,在根目录下新建以下文件夹:
“ThirdParty/OpenCV/Includes”
“ThirdParty/OpenCV/Libraries”
“ThirdParty/OpenCV/Libraries/Win64/”
4、移动文件
· 将下载文件夹中“OpenCV/build/include/”中的所有文件复制到项目文件夹“ThirdParty/OpenCV/Includes/”中
· 将下载的文件夹中“/build/x64/vc15/bin/”中的所有文件复制到项目文件夹“ThirdParty/OpenCV/Libraries/Win64/”和“Binaries/Win64”中
· 将下载的文件夹中“/build/x64/vc15/lib/”中的所有文件复制到项目文件夹“ThirdParty/OpenCV/Libraries/Win64/”
5、修改代码
· 修改文件1:ThirdParty/OpenCV/Includes/opencv2/core/utility.hpp文件
(1)注释以下三行代码

(2)将所有的check()改成cv_check()【1处】
· 修改文件2:ThirdParty/OpenCV/Includes/opencv2/core/cvstd_wrapper.hpp文件
(1)所有的check()改成cv_check()【2处】
(2)将所有的check改成cv_check【1处】

· 修改文件3:Source/YOURPROJECT/YOURPROJECT.Build.cs(【YOURPROJECT】是创建项目时取得项目名)
.Build.cs整体代码如下:
using System.IO;
using UnrealBuildTool;

public class test1820 : ModuleRules{
	string OPENCV_VERSION = "451";

    private string ThirdPartyPath
    {
		get{
			return Path.GetFullPath(Path.Combine(ModuleDirectory, "../../ThirdParty/"));
		}
	}

    public bool LoadOpenCV(ReadOnlyTargetRules Target)
    {
		bool isLibrarySupported = false;// Create OpenCV Path
		string OpenCVPath = Path.Combine(ThirdPartyPath, "OpenCV");
		string LibPath = "";
		bool isdebug = Target.Configuration == UnrealTargetConfiguration.Debug;
		if (Target.Platform == UnrealTargetPlatform.Win64)
		{
			LibPath = Path.Combine(OpenCVPath, "Libraries", "Win64");
			isLibrarySupported = true;
		}
		else
		{
            string Err = string.Format("{0} dedicated server is made to depend on             {1}. We want to avoid this, please correct module dependencies.", Target.Platform.ToString(), this.ToString());
			System.Console.WriteLine(Err);
		}
		if (isLibrarySupported)
		{
			PublicIncludePaths.AddRange(new string[] { Path.Combine(OpenCVPath, "Includes") });
			PublicAdditionalLibraries.Add(Path.Combine(LibPath, "opencv_world" + OPENCV_VERSION + ".lib"));
			PublicDelayLoadDLLs.Add("opencv_world" + OPENCV_VERSION + ".dll");
			PublicDelayLoadDLLs.Add("opencv_videoio_ffmpeg" + OPENCV_VERSION + "_64.dll");
		}
		PublicDefinitions.Add(string.Format("WITH_OPENCV_BINDING={0}", isLibrarySupported ? 1 : 0));
		return isLibrarySupported;
	}

    public test1820(ReadOnlyTargetRules Target) : base(Target)
    {
		PCHUsage = PCHUsageMode.UseExplicitOrSharedPCHs;
		PublicDependencyModuleNames.AddRange(new string[] { "Core", "CoreUObject", "Engine", "InputCore" });
		PrivateDependencyModuleNames.AddRange(new string[] { });
		LoadOpenCV(Target);
	}
}
复制后的注意点:
(1)string OPENCV_VERSION = "451"改成使用的OpenCV的版本号
(2)public test1820(ReadOnlyTargetRules Target) : base(Target)中test1820换成自己的项目名称
6、配置VS
· 打开项目的vs工程文件(.sln)
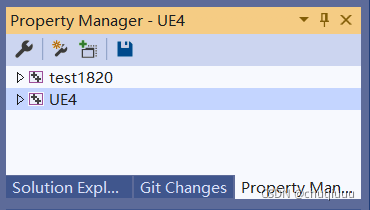
· Solution Explorer窗口下方选择Property Manege子窗口,双击UE打开属性管理器窗口
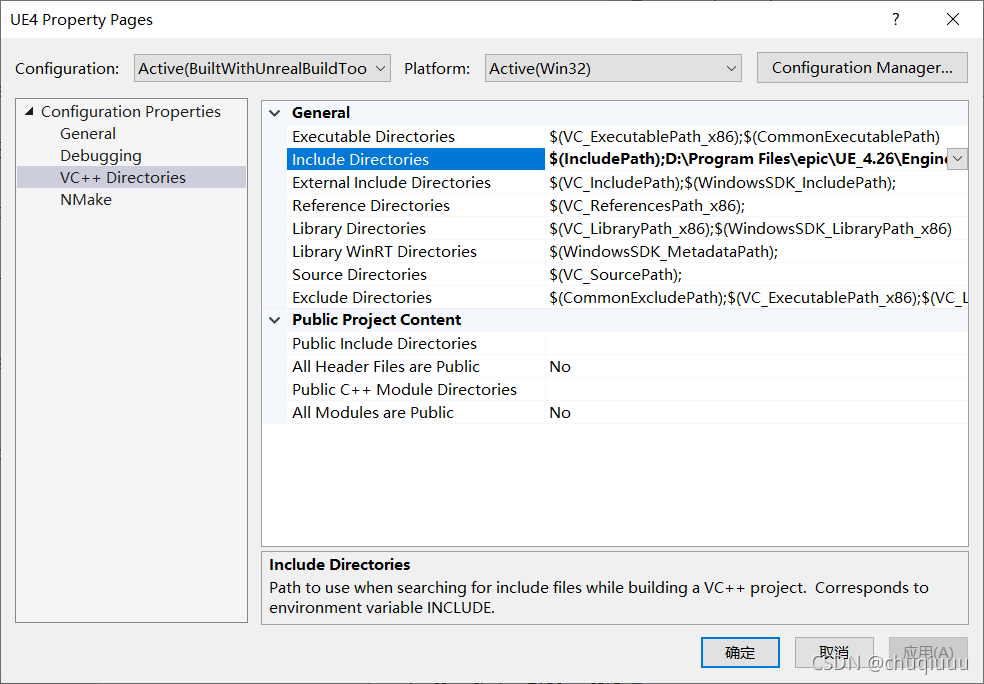
· 将项目中opencv的Includes文件夹(之前自己建的那个)的路径添加到VC++++的include dictionary中
二、配置Leapmotion插件(选看)
1、添加插件的相关文件
· 下载Leapmotion的插件文件
链接:https://pan.baidu.com/s/1uXfn5YK3aJgvK8wk56HVSw
提取码:xtxb
· 在项目文件夹根目录下新建Plugins文件夹
· 将下载的文件解压后放入Plugins文件夹中
2、在UE4中添加插件
· 在资源窗口View Options里勾选show plugin content的选项(一般默认是勾选了的)
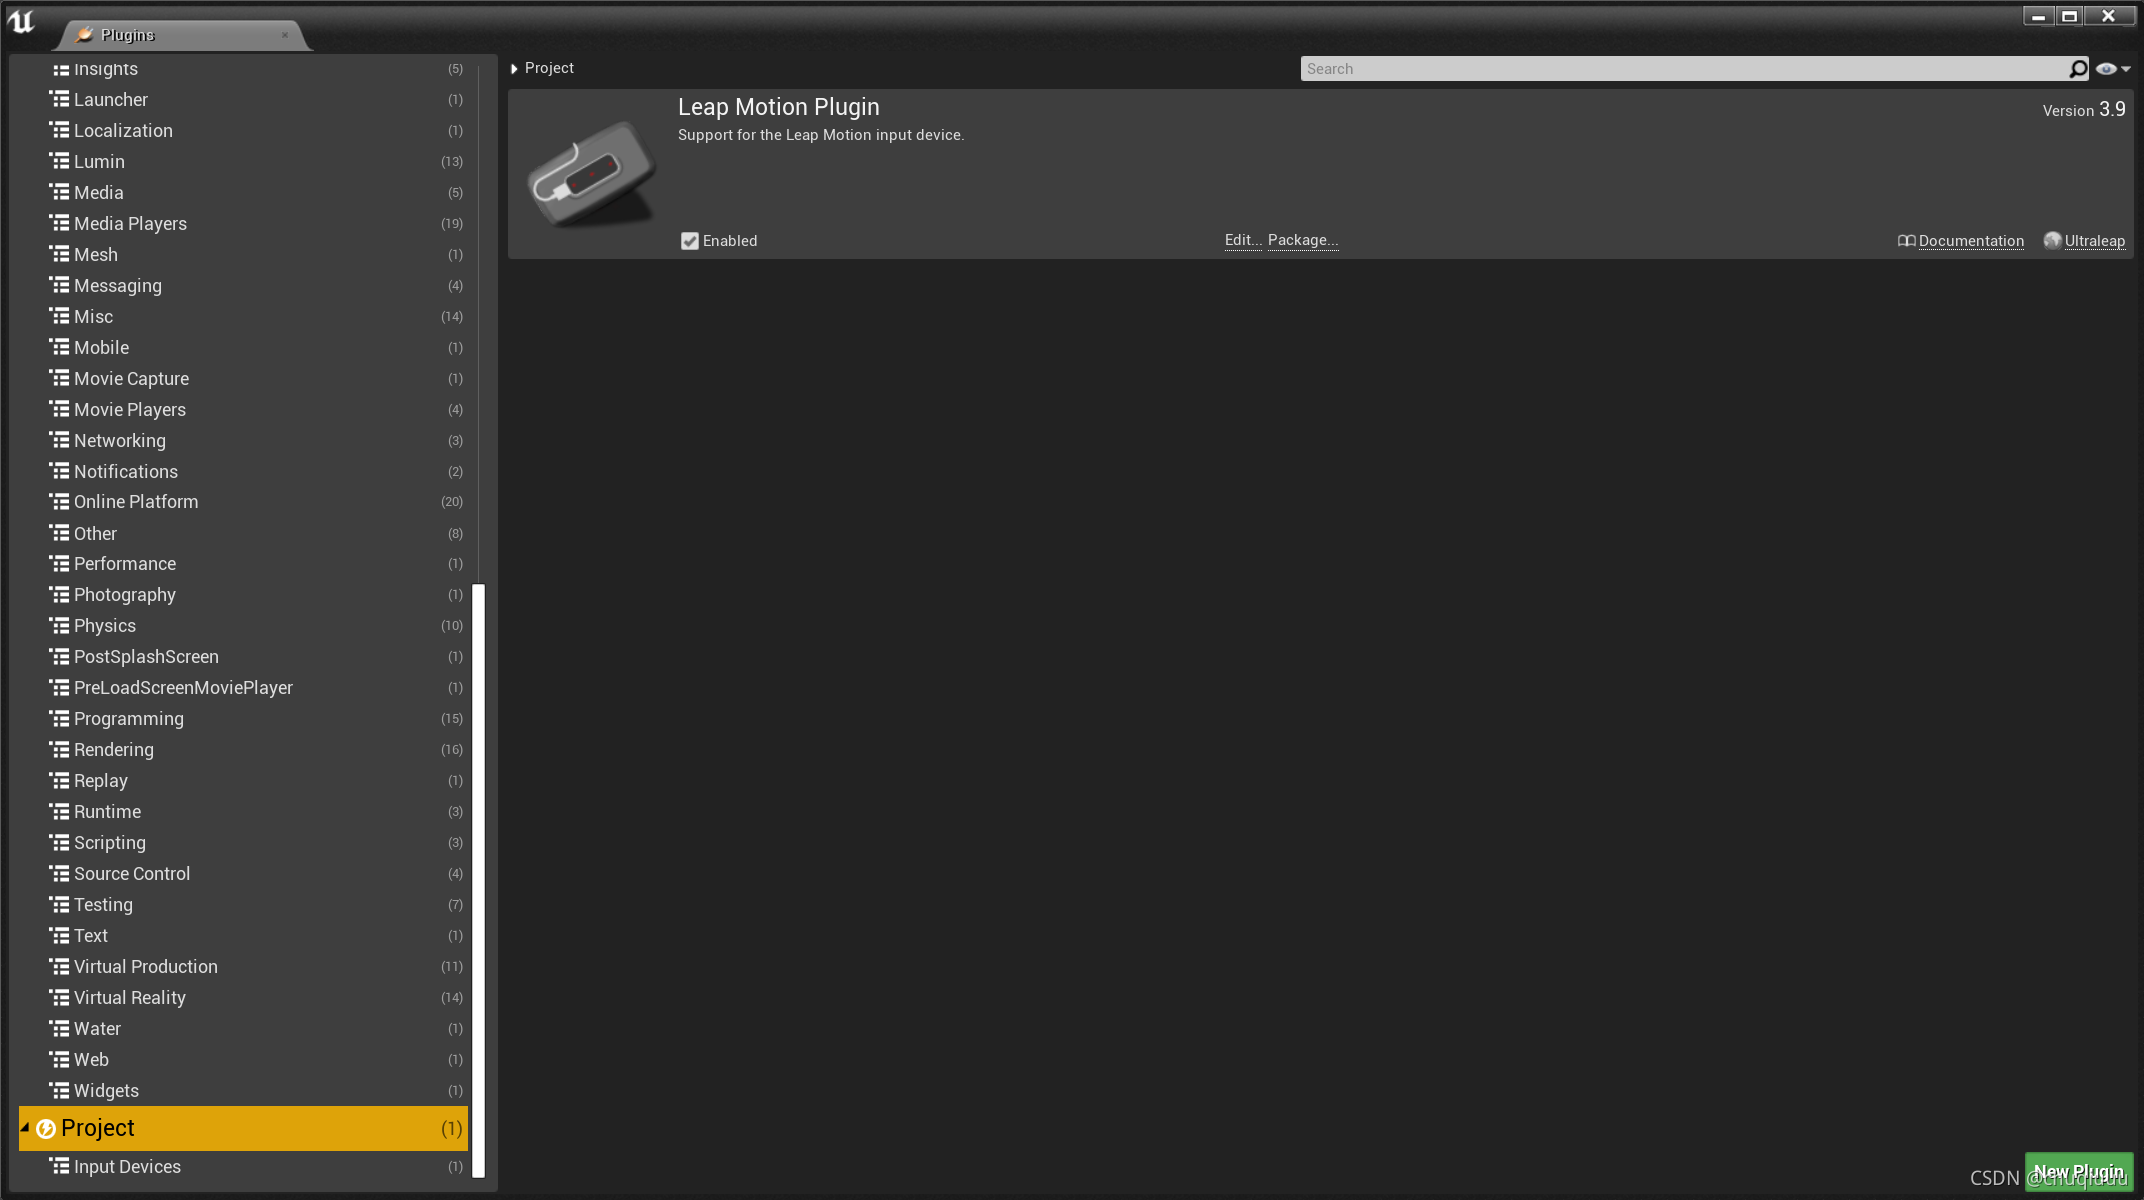
· 重新打开UE4工程(一定要添加了文件之后打开,不然那可能会没有插件),打开插件管理窗口(在edit栏里面),勾选上Leapmotion插件(默认会自动勾选)
3、Leapmotion的使用(测试)
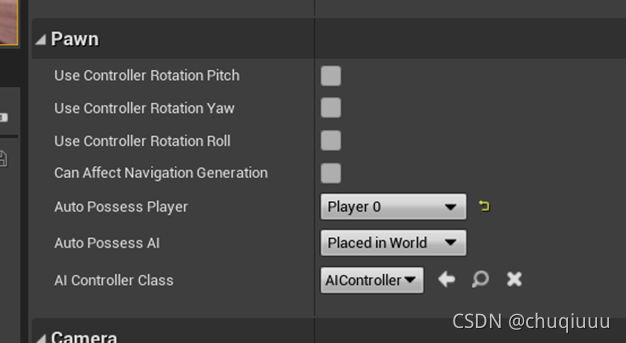
· 将资源文件夹中LeapMotion Content/Examples/LeapHandsPawn拖入环境中,将右侧detail栏Auto Posses Player改为player0
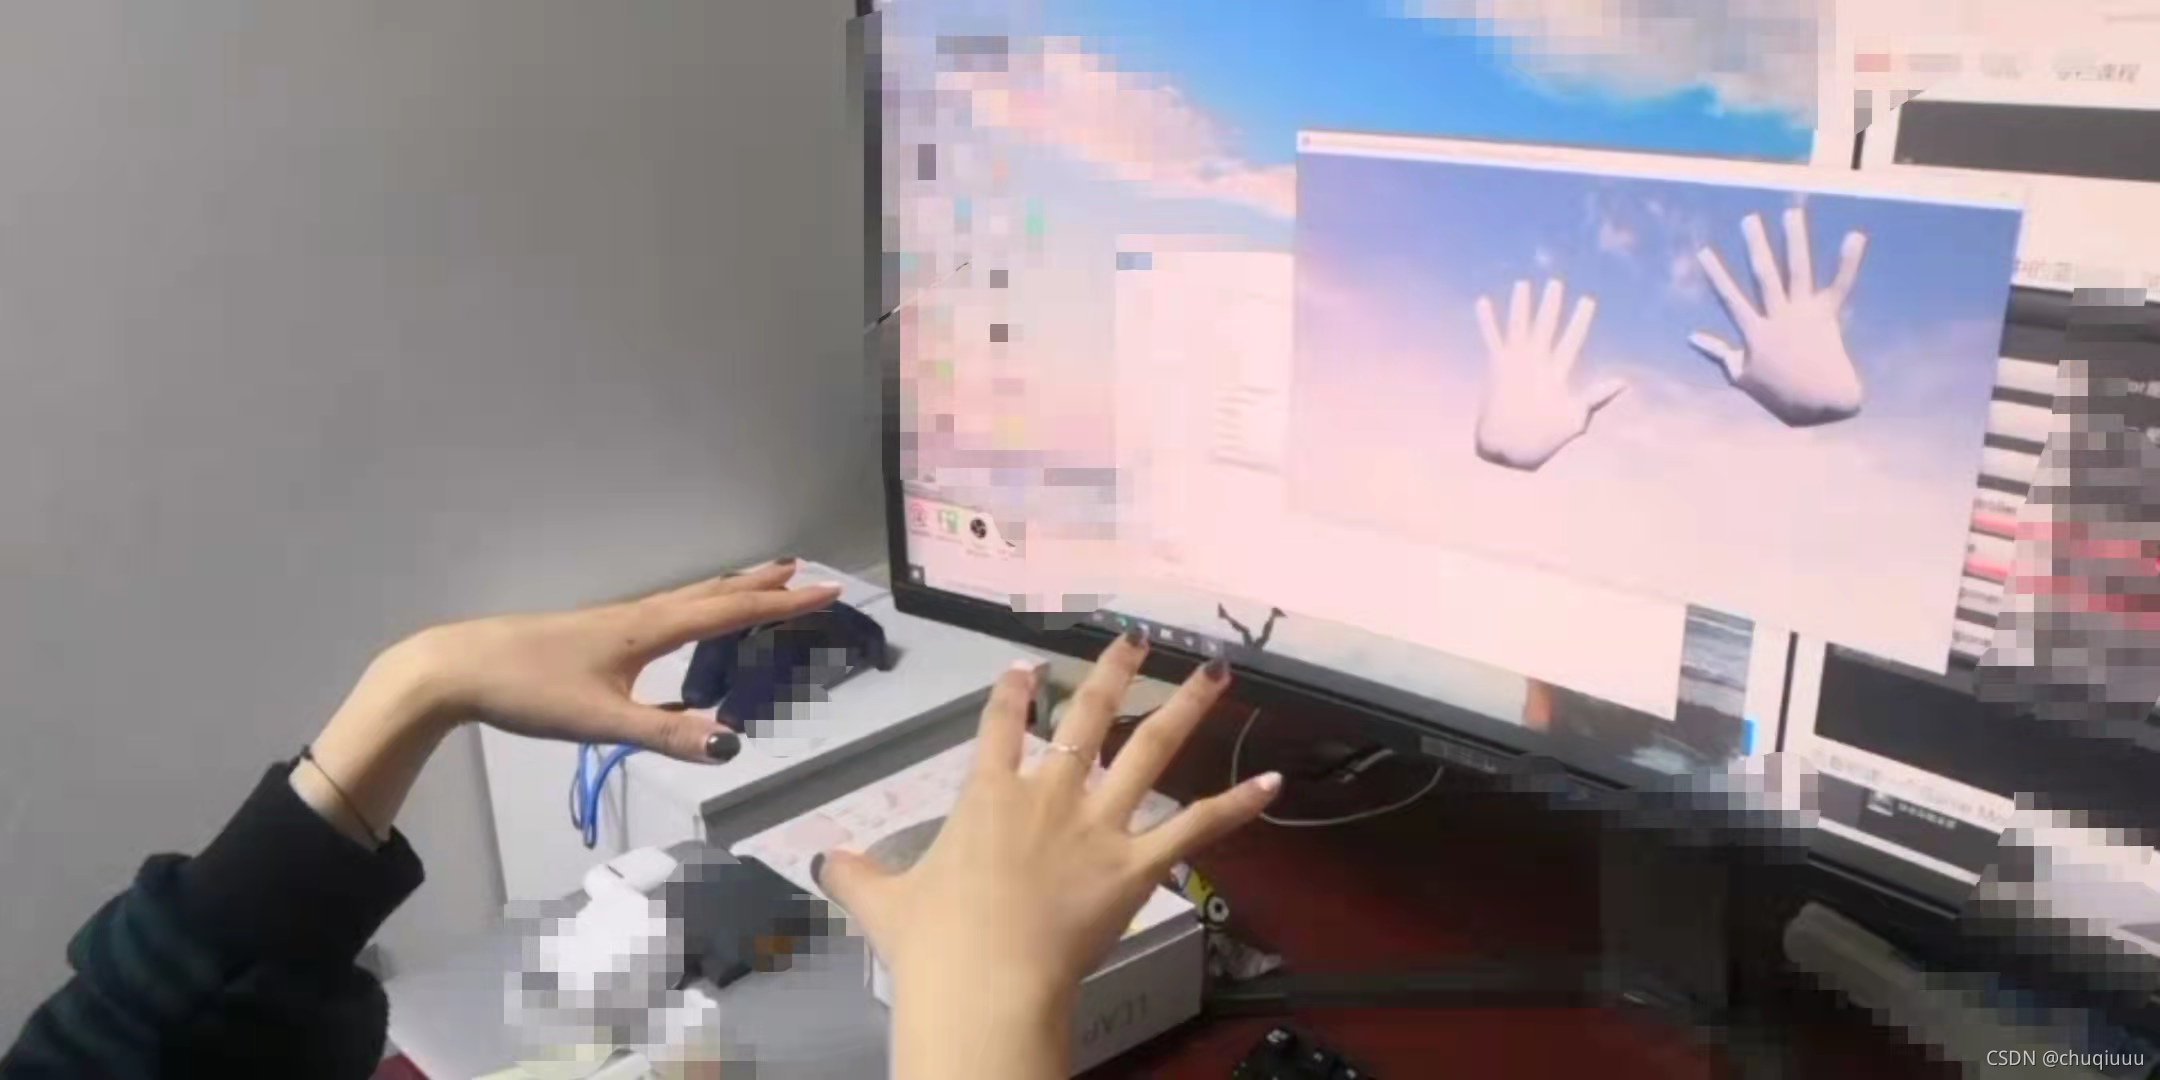
· 采用VR模式运行程序之后,即可在虚拟场景里看见自己的手的模型了!
三、Aruco物体定位(追踪)的实现
1、新建C++类
· UE2015之前的版本可以在add里面直接添加C++类
· UE2015之后的版本需要在资源窗口View Options里勾选show c++ classes的选项,之后在资源文件夹里即可看见一个C++ Classes的文件夹,右键文件夹新建C++类
· 新建的C++类选择Actor类,类名自取(嫌修改代码麻烦的话可以和我取一样的名字Move1),勾选Public
2、编写代码
· 头文件
#pragma once

#include "CoreMinimal.h"
#include "GameFramework/Actor.h"
#include "Move1.generated.h"

namespace {
    const char* about = "Pose estimation of ArUco marker images";
    const char* keys =
        "{d        |16    | dictionary: DICT_4X4_50=0, DICT_4X4_100=1, "
        "DICT_4X4_250=2, DICT_4X4_1000=3, DICT_5X5_50=4, DICT_5X5_100=5, "
        "DICT_5X5_250=6, DICT_5X5_1000=7, DICT_6X6_50=8, DICT_6X6_100=9, "
        "DICT_6X6_250=10, DICT_6X6_1000=11, DICT_7X7_50=12, DICT_7X7_100=13, "
        "DICT_7X7_250=14, DICT_7X7_1000=15, DICT_ARUCO_ORIGINAL = 16}"
        "{h        |false | Print help }"
        "{l        |0.06   | Actual marker length in meter }"
        "{v        |<none>| Custom video source, otherwise '0' }"
        "{h        |false | Print help }"
        "{l        |0.06  | Actual marker length in meter }"
        "{v        |<none>| Custom video source, otherwise '0' }"
        ;
}

UCLASS()
class TEST1820_API AMove1 : public AActor
{
	GENERATED_BODY()

public:
	// Sets default values for this actor's properties
	AMove1();
    ~AMove1();
    float x_wall, y_wall, z_wall;
    float compute[3];
    int dictionaryId = 16;
    float marker_length_m = 0.06;
    int wait_time = 40;

    UFUNCTION()
        int GetXYZ();

protected:
	// Called when the game starts or when spawned
	virtual void BeginPlay() override;

public:
	// Called every frame
	virtual void Tick(float DeltaTime) override;

};
· cpp文件
#include "Move1.h"    //修改为自己的类名
#include <opencv2/opencv.hpp>
#include <opencv2/aruco.hpp>
#include <iostream>
#include <cstdlib>

//全局变量声明
cv::Mat camera_matrix, dist_coeffs; //相机参数(畸变)
cv::Mat image, image_copy;  //相机获取的每帧图片
//markers类型字典
cv::Ptr<cv::aruco::Dictionary>  dictionary =
cv::aruco::getPredefinedDictionary(cv::aruco::DICT_6X6_50);

cv::FileStorage fs("D:\\YYZ\\test.yaml", cv::FileStorage::READ);    //相机参数文件
std::vector<int> ids;   //markers的ID
std::vector<std::vector<cv::Point2f> > corners; //markers的四个角点的位置
std::vector<cv::Vec3d> rvecs, tvecs;    //旋转数组、坐标数组
std::ostringstream vector_to_marker;
FVector orig;
cv::String videoInput = "0";
cv::VideoCapture in_video;


// Sets default values
AMove1::AMove1()
{
 	// Set this actor to call Tick() every frame.  You can turn this off to improve performance if you don't need it.
	PrimaryActorTick.bCanEverTick = true;
}

AMove1::~AMove1()
{
    in_video.release();
}

UFUNCTION()
int AMove1::GetXYZ()
{
    camera_matrix.rows = 3;
    camera_matrix.cols = 3;
    fs["camera_matrix"] >> camera_matrix;
    fs["distortion_coefficients"] >> dist_coeffs;

    if (in_video.grab())
    {
        in_video.retrieve(image);
        image.copyTo(image_copy);
        //Marker点检测
        cv::aruco::detectMarkers(image, dictionary, corners, ids);

        // if at least one marker detected
        if (ids.size() > 0)
        {

            for (int i = 0; i < ids.size(); i++)
            {
                //在画面里框出Marker
                cv::aruco::drawDetectedMarkers(image_copy, corners, ids);

                //位姿估计
                cv::aruco::estimatePoseSingleMarkers(corners, marker_length_m,
                    camera_matrix, dist_coeffs, rvecs, tvecs);

                // 画出每一个Marker的坐标轴
                cv::aruco::drawAxis(image_copy, camera_matrix, dist_coeffs,
                    rvecs[i], tvecs[i], 0.1);

                //写出x、y、z坐标值
                vector_to_marker.str(std::string());
                vector_to_marker << std::setprecision(4)
                    << "x: " << std::setw(8) << tvecs[0](0);
                cv::putText(image_copy, vector_to_marker.str(),
                    cv::Point(10, 30), cv::FONT_HERSHEY_SIMPLEX, 0.6,
                    cv::Scalar(0, 252, 124), 1, CV_AVX);
                compute[0] = tvecs[0](0);   //赋值

                vector_to_marker.str(std::string());
                vector_to_marker << std::setprecision(4)
                    << "y: " << std::setw(8) << tvecs[0](1);
                cv::putText(image_copy, vector_to_marker.str(),
                    cv::Point(10, 50), cv::FONT_HERSHEY_SIMPLEX, 0.6,
                    cv::Scalar(0, 252, 124), 1, CV_AVX);
                compute[1] = tvecs[0](1);

                vector_to_marker.str(std::string());
                vector_to_marker << std::setprecision(4)
                    << "z: " << std::setw(8) << tvecs[0](2);
                cv::putText(image_copy, vector_to_marker.str(),
                    cv::Point(10, 70), cv::FONT_HERSHEY_SIMPLEX, 0.6,
                    cv::Scalar(0, 252, 124), 1, CV_AVX);
                compute[2] = tvecs[0](2);
            }
        }

        //物体位置
        float x, y, z;
        x = compute[0];
        y = compute[1];
        z = compute[2];

        orig.X = (x * 100)-15;
        orig.Y = -(z * 100);
        orig.Z = -(y * 100)+115;
        SetActorLocation(orig,true);

        //显示画面内容
        cv::imshow("pose estimation", image_copy);
        char key = (char)cv::waitKey(wait_time);
        /*if (key == 27)
            break;*/
    }
    return 0;
}

// Called when the game starts or when spawned
void AMove1::BeginPlay()
{
	Super::BeginPlay();
    orig.X = 10;
    orig.Y = 10;
    orig.Z = 100;
    SetActorLocation(orig,true);

    FVector now;
    now = GetActorLocation();
    UE_LOG(LogTemp, Log, TEXT("x is %f"), now.X);
    UE_LOG(LogTemp, Log, TEXT("y is %f"), now.Y);
    UE_LOG(LogTemp, Log, TEXT("z is %f"), now.Z);

    in_video.open(0);
    if (!in_video.isOpened()) {
        std::cerr << "failed to open video input: " << videoInput << std::endl;
    }
}

// Called every frame
void AMove1::Tick(float DeltaTime)
{
	Super::Tick(DeltaTime);
    int a = GetXYZ();
    FVector now;
    now = GetActorLocation();
    UE_LOG(LogTemp, Log, TEXT("x is %f"), now.X);
    UE_LOG(LogTemp, Log, TEXT("y is %f"), now.Y);
    UE_LOG(LogTemp, Log, TEXT("z is %f"), now.Z);
}
注:依旧记得将类名改成自己取的名字(AMove-->AYOURCLASSNAME)
3、添加物体
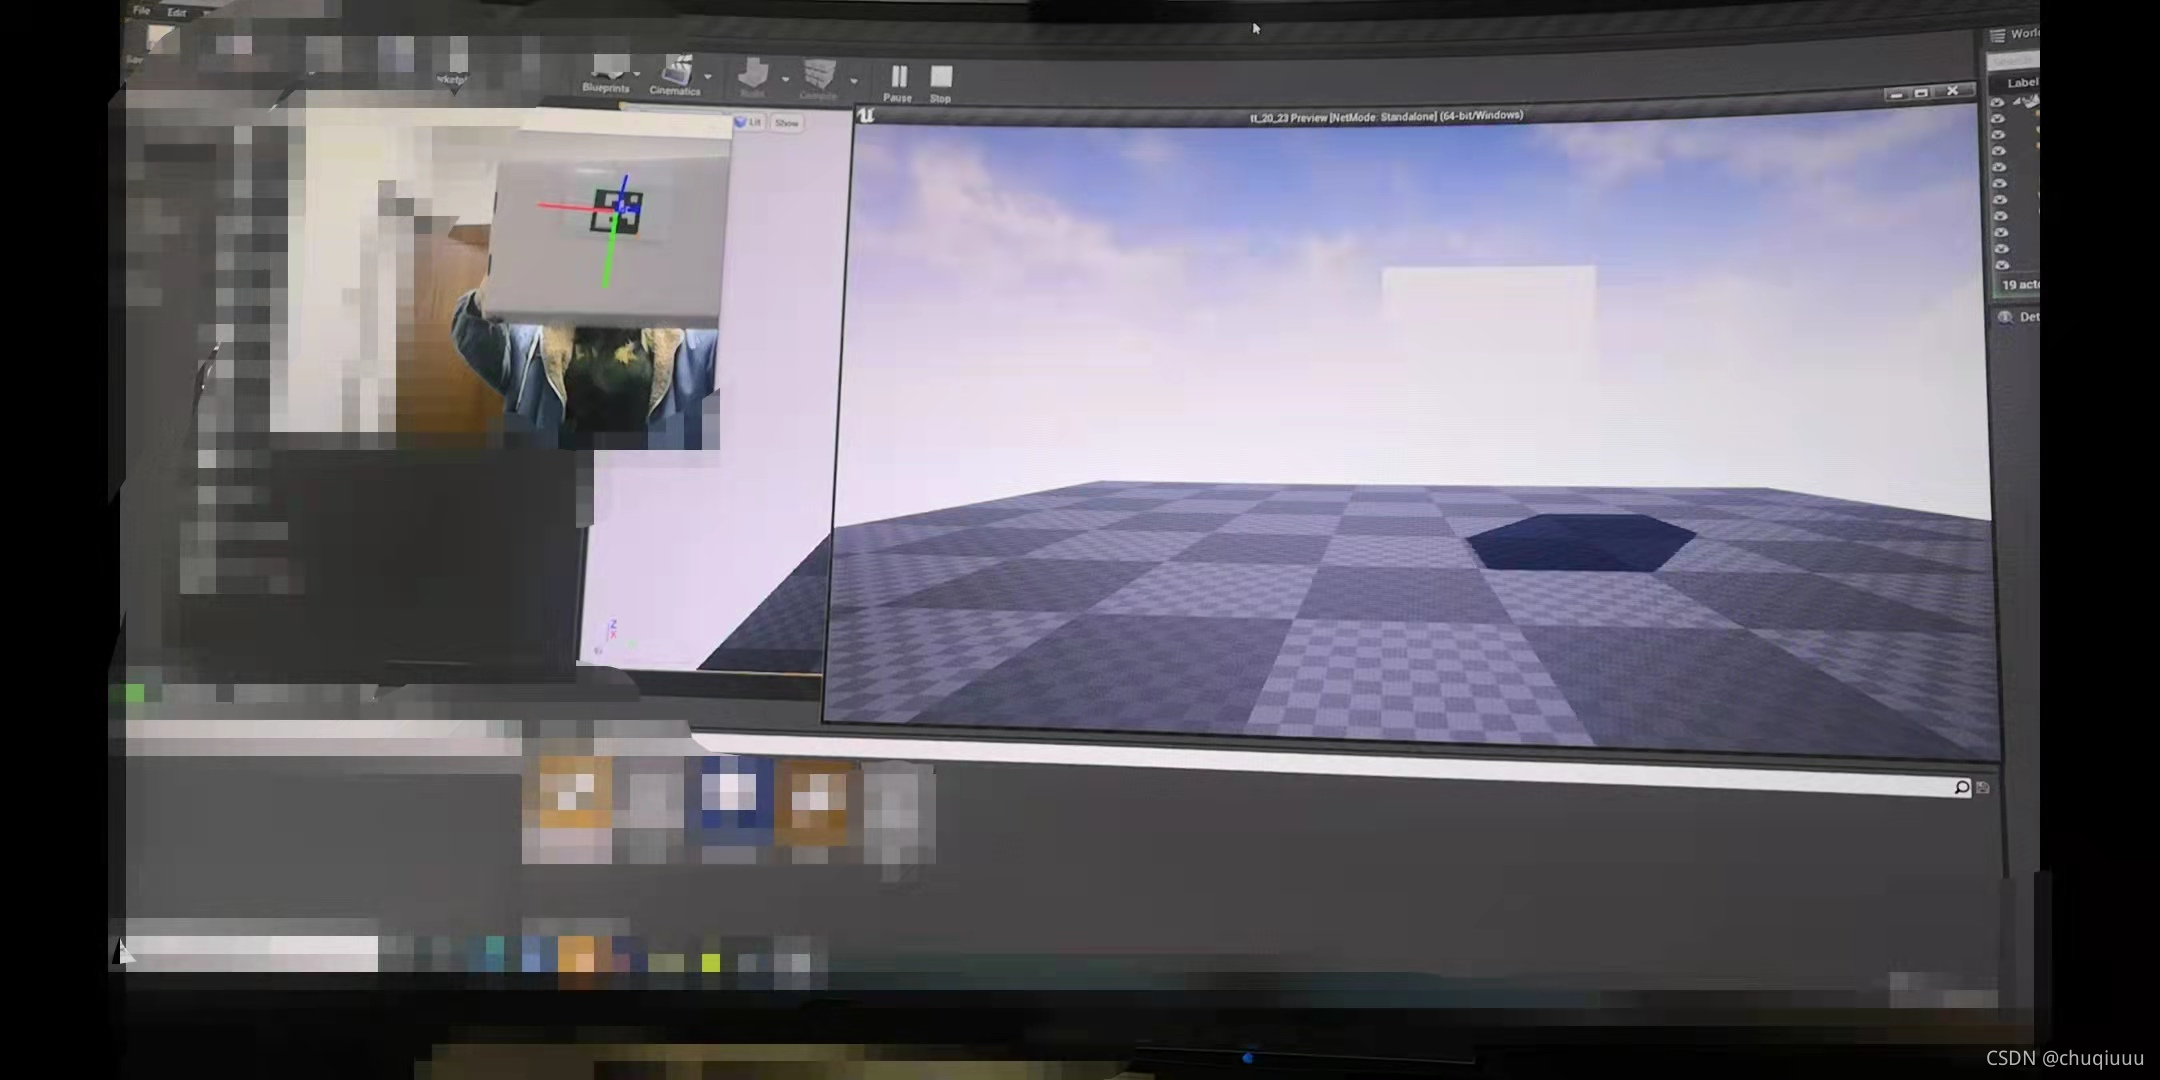
将写好的类拖入场景,通过Add Component为该类添加一个外观模型,运行之后通过Aruco中的mark标签即可使虚拟环境中的物体和现实标签同步移动。
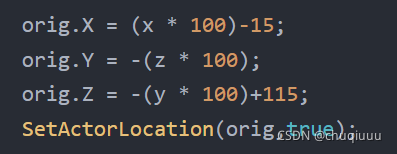
注:标签的三个轴的方向和环境中轴的方向不一定对应
· 方法1:可以手动调整代码中各轴的对应关系
· 方法2:转动标签的方向,使二者方向统一
最后运行即可,运行结果如下:
!!!致谢:感谢实验室一起努力的大家!!!

北京人形旗下天工造物具身智能开源社区,聚焦具身天工与慧思开物两大平台
更多推荐
 0
0 0
0- 0


 已为社区贡献1条内容

所有评论(0)