创建多个cuda版本,自由切换,不干扰源环境
主要是基于这篇文章:创建多个cuda版本,可以自由切换,不干扰源环境,且不用sudo指令,操作简单 - 知乎
太感谢了!终于成功了!
担心之后没了,记录一下,顺便补充一些细节。
1.初始环境建立
首先源base版本为11.6,目标在conda虚拟环境中下载一个11.3的cuda版本
可以使用以下指令查看(没有这些指令的,绕不开sudo)
nvcc -V创建环境,按照自己的改
conda create -n nerfies_shi python=3.8进入环境
conda activate nerfies_shi查看当前cuda为11.3
nvcc -V2.下载对应的cuda以及cuDNN
下载我们需要的cuda
上方为cuda下载链接
可以输入下列指令来查看当前ubuntu版本
gcc-v本次我选择的为下列的版本
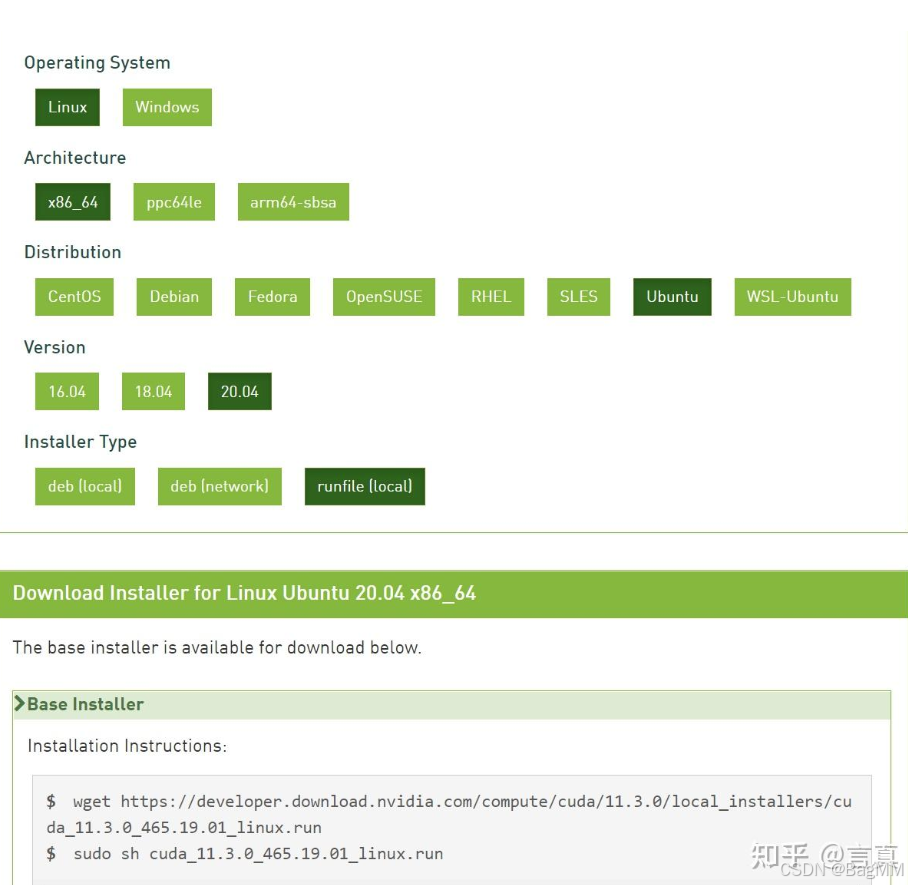
可以直接粘贴wget这行输入到命令行,来下载到我们所需要的位置,此时我下载到了一个小文件中,只需要在命令行,cd,进入此小文件夹,输入下方指令,
下载我们需要的cuDNN
下载地址cuDNN Archive需要简单注册一下
选择合适的CUDA版本,我这里选用的为8.2.1.32
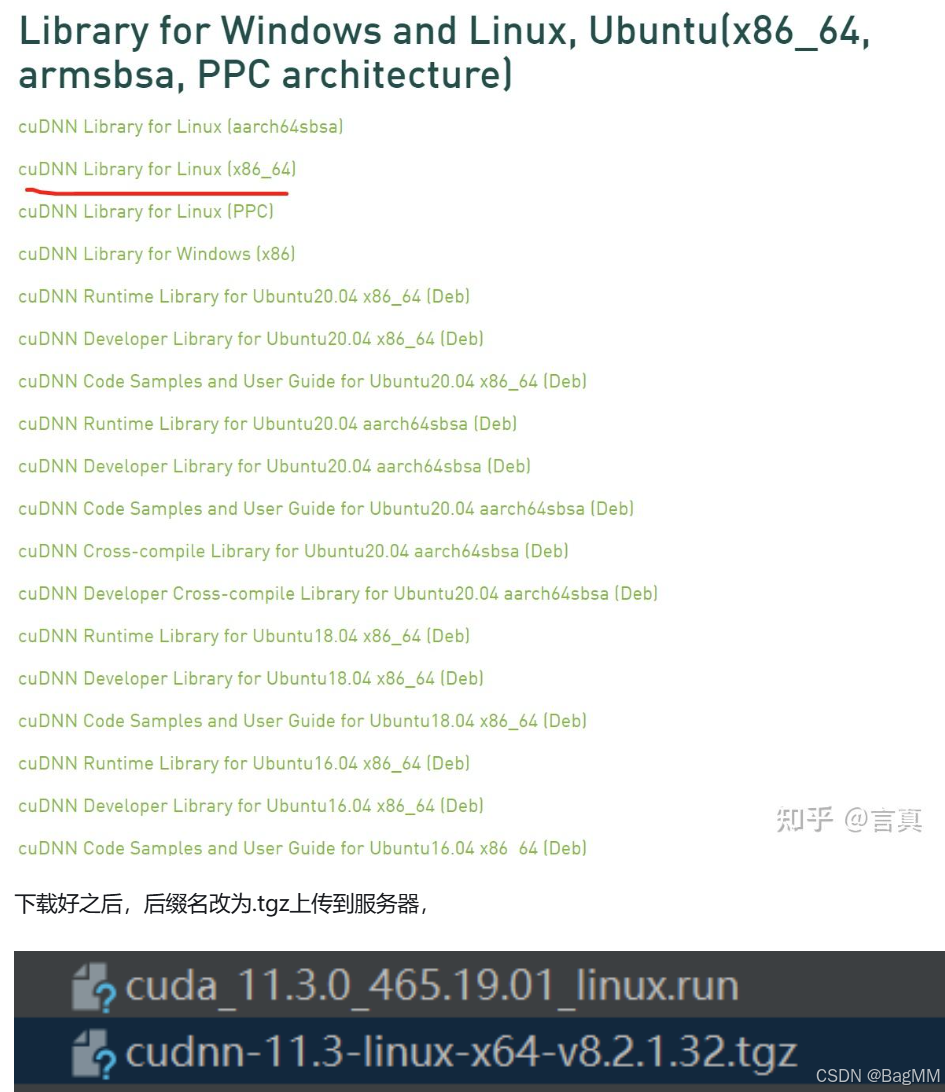
3.安装对应cuda以及cuDNN
安装cuda
//在pycharm的终端显示不全面,建议用putty;
给cuda权限
chmod +x cuda_11.3.0_465.19.01_linux.run运行run文件
sh cuda_11.3.0_465.19.01_linux.run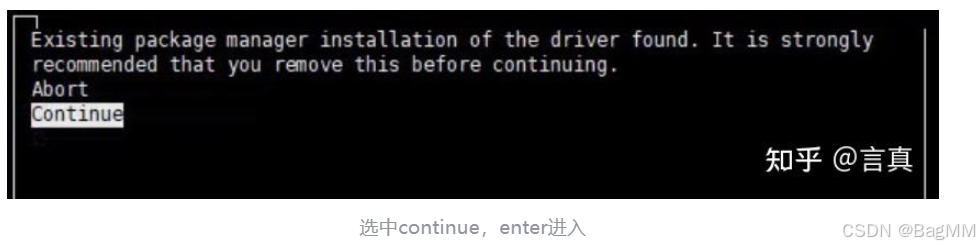
这里注意把命令行放大点,下面输入accept进入
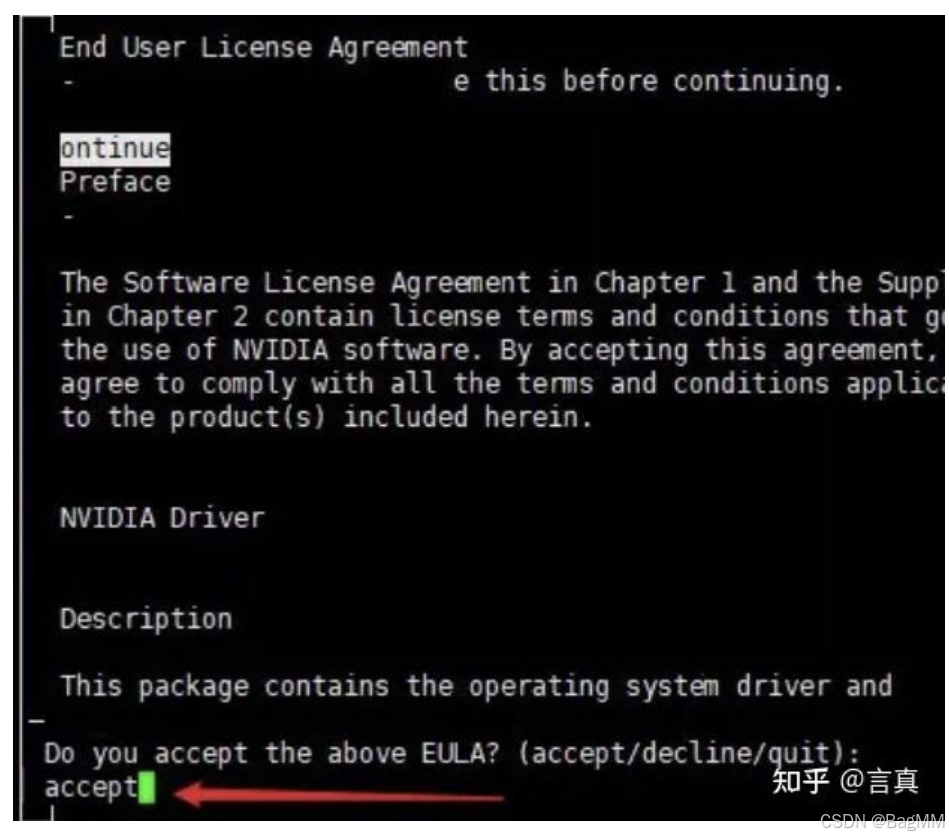
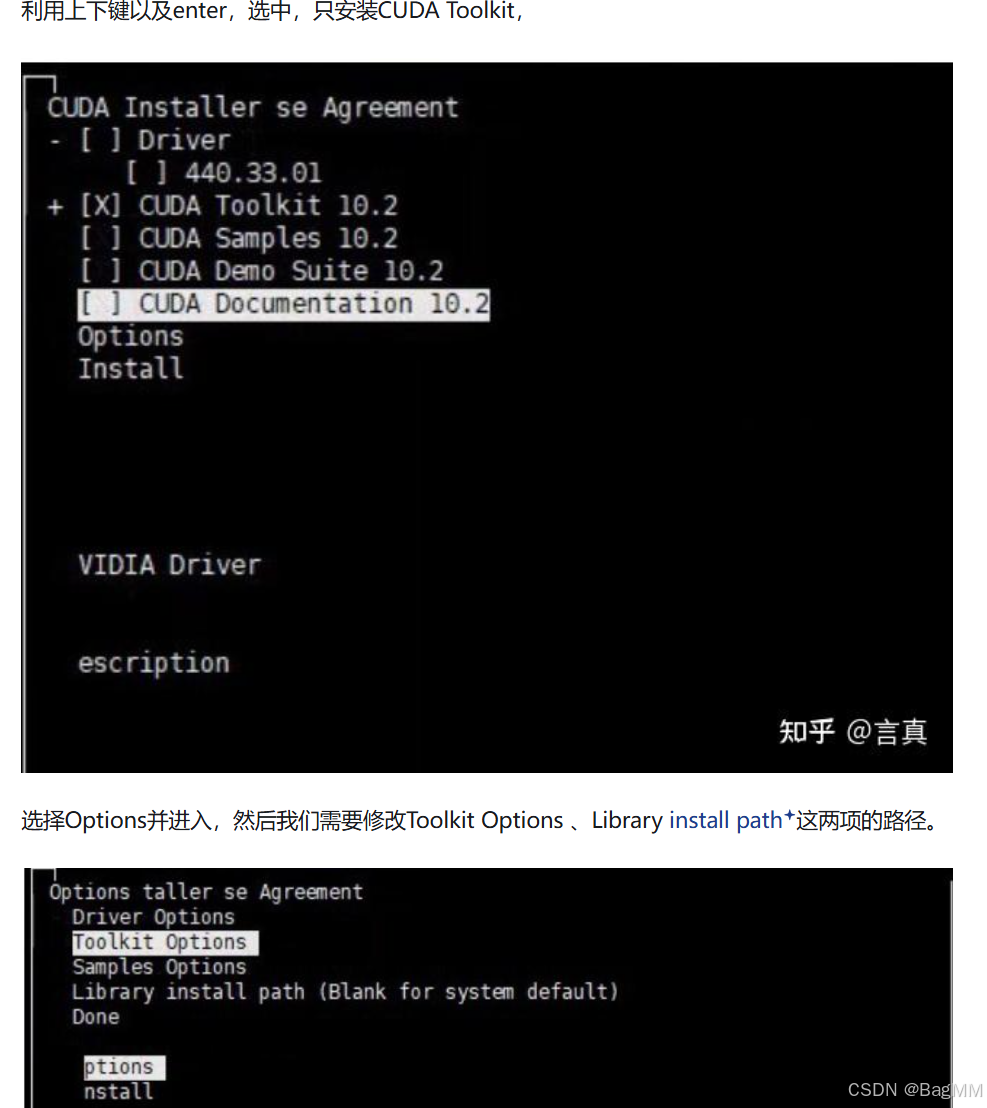
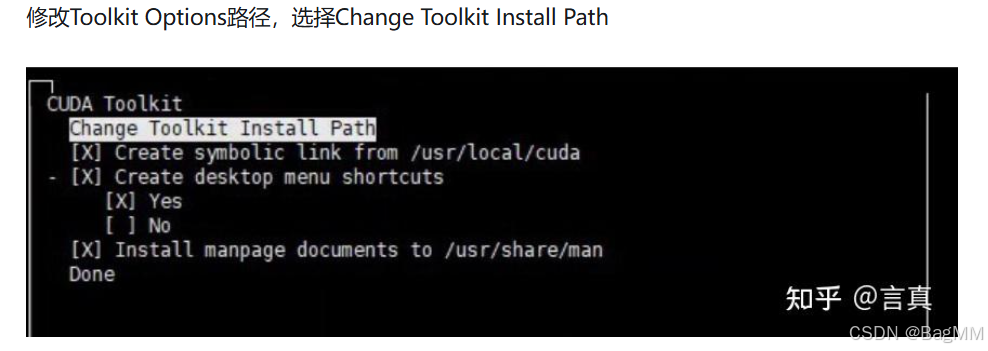
注意:这个名称不要自己随便取,不然后面找不到!!!就叫cuda-xx.x!
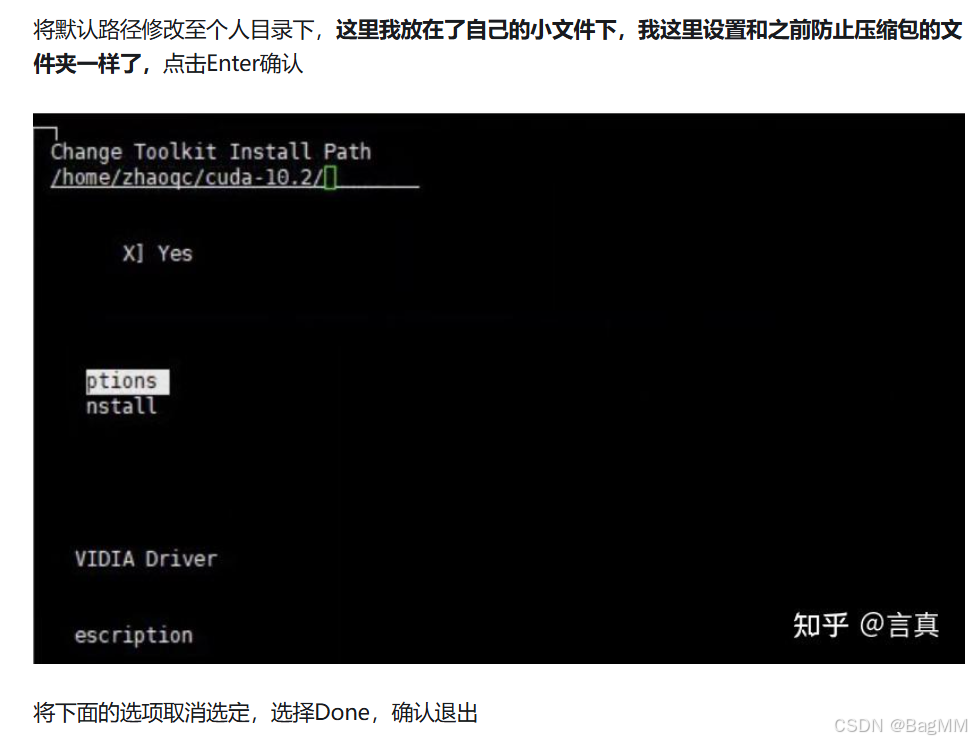
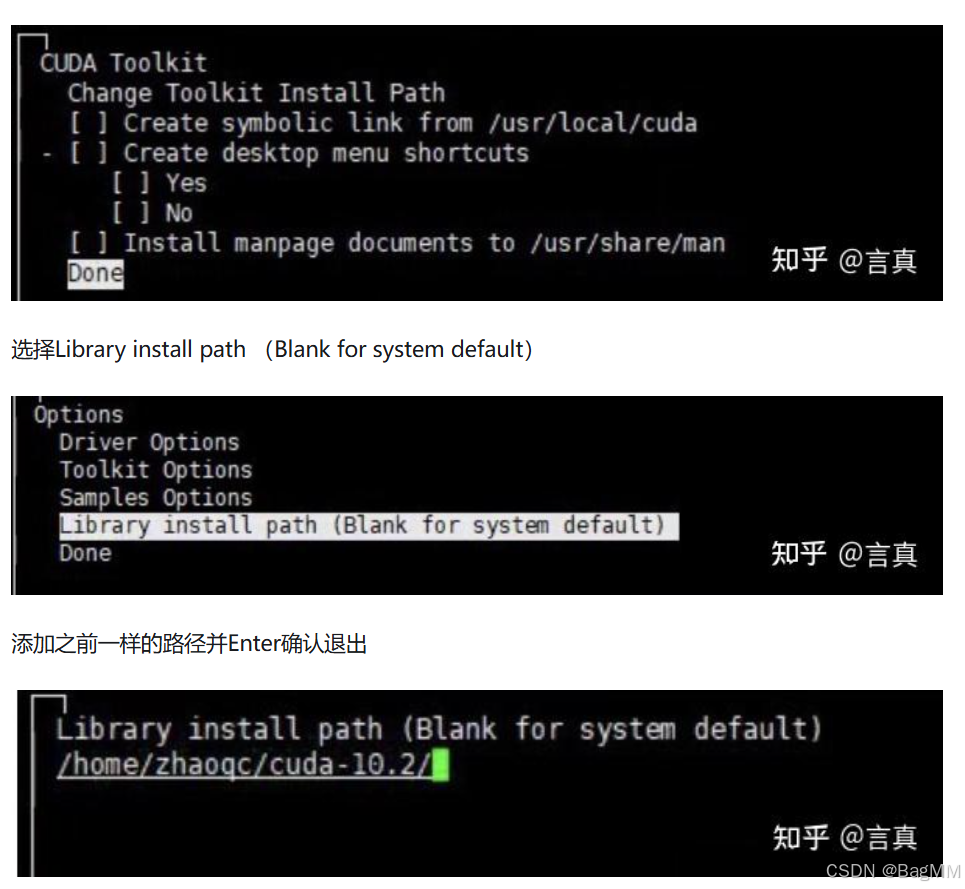
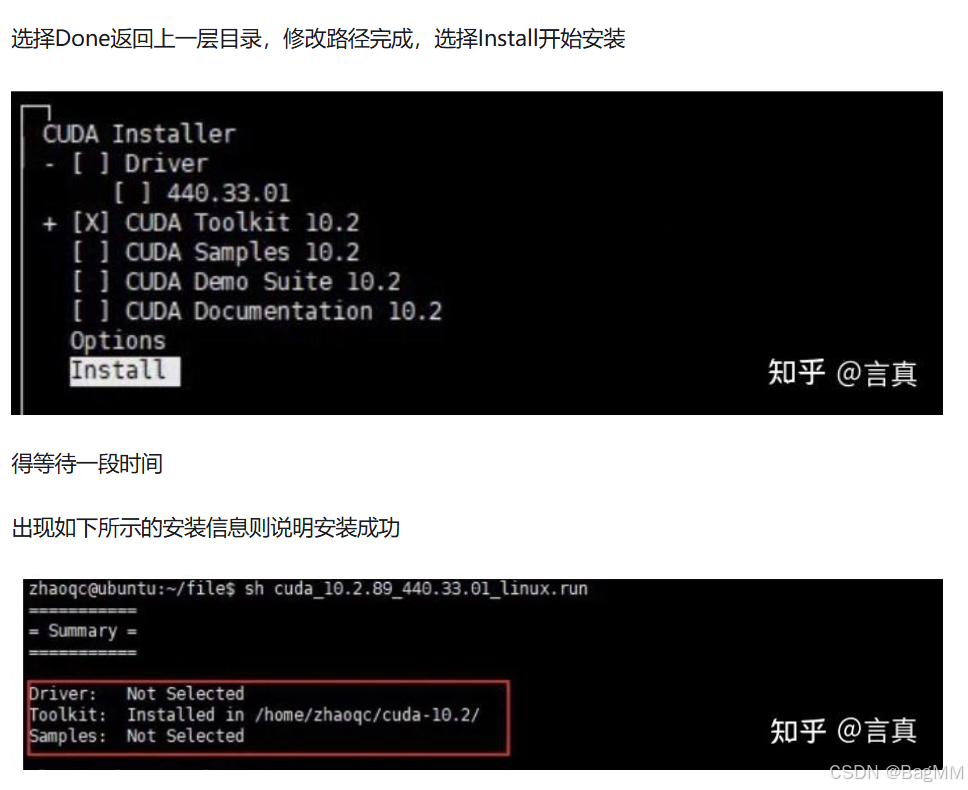
安装cuDNN直接解压即可,输入对应的名字
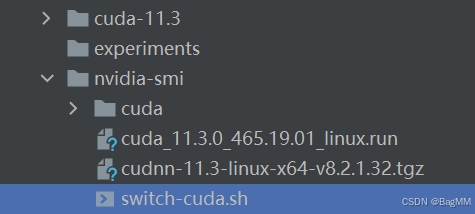
tar -zxvf cudnn-10.2-linux-x64-v8.0.0.39.tgz新建一个switch-cuda.sh文件
	#!/usr/bin/env bash

	# Copyright (c) 2018 Patrick Hohenecker
	#
	# Permission is hereby granted, free of charge, to any person obtaining a copy
	# of this software and associated documentation files (the "Software"), to deal
	# in the Software without restriction, including without limitation the rights
	# to use, copy, modify, merge, publish, distribute, sublicense, and/or sell
	# copies of the Software, and to permit persons to whom the Software is
	# furnished to do so, subject to the following conditions:
	#
	# The above copyright notice and this permission notice shall be included in all
	# copies or substantial portions of the Software.
	#
	# THE SOFTWARE IS PROVIDED "AS IS", WITHOUT WARRANTY OF ANY KIND, EXPRESS OR
	# IMPLIED, INCLUDING BUT NOT LIMITED TO THE WARRANTIES OF MERCHANTABILITY,
	# FITNESS FOR A PARTICULAR PURPOSE AND NONINFRINGEMENT. IN NO EVENT SHALL THE
	# AUTHORS OR COPYRIGHT HOLDERS BE LIABLE FOR ANY CLAIM, DAMAGES OR OTHER
	# LIABILITY, WHETHER IN AN ACTION OF CONTRACT, TORT OR OTHERWISE, ARISING FROM,
	# OUT OF OR IN CONNECTION WITH THE SOFTWARE OR THE USE OR OTHER DEALINGS IN THE
	# SOFTWARE.

	# author:   Patrick Hohenecker <mail@paho.at>
	# version:  2018.1
	# date:     May 15, 2018


	set -e


	# ensure that the script has been sourced rather than just executed
	if [[ "${BASH_SOURCE[0]}" = "${0}" ]]; then
	    echo "Please use 'source' to execute switch-cuda.sh!"
	    exit 1
	fi

	INSTALL_FOLDER="/usr/local"  # the location to look for CUDA installations at
	TARGET_VERSION=${1}          # the target CUDA version to switch to (if provided)

	# if no version to switch to has been provided, then just print all available CUDA installations
	if [[ -z ${TARGET_VERSION} ]]; then
	    echo "The following CUDA installations have been found (in '${INSTALL_FOLDER}'):"
	    ls -l "${INSTALL_FOLDER}" | egrep -o "cuda-[0-9]+\\.[0-9]+$" | while read -r line; do
	        echo "* ${line}"
	    done
	    set +e
	    return
	# otherwise, check whether there is an installation of the requested CUDA version
	elif [[ ! -d "${INSTALL_FOLDER}/cuda-${TARGET_VERSION}" ]]; then
	    echo "No installation of CUDA ${TARGET_VERSION} has been found!"
	    set +e
	    return
	fi

	# the path of the installation to use
	cuda_path="${INSTALL_FOLDER}/cuda-${TARGET_VERSION}"

	# filter out those CUDA entries from the PATH that are not needed anymore
	path_elements=(${PATH//:/ })
	new_path="${cuda_path}/bin"
	for p in "${path_elements[@]}"; do
	    if [[ ! ${p} =~ ^${INSTALL_FOLDER}/cuda ]]; then
	        new_path="${new_path}:${p}"
	    fi
	done

	# filter out those CUDA entries from the LD_LIBRARY_PATH that are not needed anymore
	ld_path_elements=(${LD_LIBRARY_PATH//:/ })
	new_ld_path="${cuda_path}/lib64:${cuda_path}/extras/CUPTI/lib64"
	for p in "${ld_path_elements[@]}"; do
	    if [[ ! ${p} =~ ^${INSTALL_FOLDER}/cuda ]]; then
	        new_ld_path="${new_ld_path}:${p}"
	    fi
	done

	# update environment variables
	export CUDA_HOME="${cuda_path}"
	export CUDA_ROOT="${cuda_path}"
	export LD_LIBRARY_PATH="${new_ld_path}"
	export PATH="${new_path}"

	echo "Switched to CUDA ${TARGET_VERSION}."

	set +e
	return
注意:INSTALL_FOLDER="/usr/local" # the location to look for CUDA installations at...
这个路径需要修改为之前自定义的路径,安装路径为 /home/yufei/cuda-11.8,那么这里我就要改为/home/yufei/。这也是为什么前面改路径的时候只能叫cuda-xx.x的原因!
上面这个脚本文件在3090的服务器上运行良好,但是在A800服务器上不可以,需要处理:
# 去除所有回车符
sed -i 's/\r$//' switch-cuda.sh
然后再使用后面的:
之后我们使用下方命令可以查看当前下的cuda版本
source switch-cuda.sh使用下方指令去切换到对应的版本
source switch-cuda.sh 11.3之后我们可以使用下方命令去查看
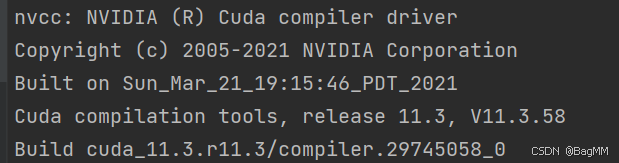
nvcc -V最后,
激活使用的环境 ,conda activate xxx
找到创建的文件切换到对应目录,source switch-cuda.sh 11.3
查看当前版本,nvcc -V

北京人形旗下天工造物具身智能开源社区,聚焦具身天工与慧思开物两大平台
更多推荐
 2
2 0
0- 0


 已为社区贡献1条内容

所有评论(0)