Ubuntu上使用QT creator运行cuda程序
·
突发奇想想尝试一下QT界面中使用CUDA加速过的程序,然后查了一下资料,总结一下有以下几点吧
1、CUDA配置全部放在.pro文件中
2、main.cpp为主函数使用g++编译
3、kernel.cu为核函数使用nvcc编译
不多说上代码
以下为main.cpp代码
#include <QtCore/QCoreApplication>

extern "C"
void runCudaPart();

int main(int argc, char *argv[])
{
    runCudaPart();
}
以下为kernel.cu代码
// CUDA-C includes
#include <cuda.h>

#include <cuda_runtime.h>

    #include <stdio.h>

    extern "C"
//Adds two arrays
    void runCudaPart();


    __global__ void addAry( int * ary1, int * ary2 )
    {
    int indx = threadIdx.x;
    ary1[ indx ] += ary2[ indx ];
}


// Main cuda function

void runCudaPart() {

    int ary1[32];
    int ary2[32];
    int res[32];

    for( int i=0 ; i<32 ; i++ )
    {
        ary1[i] = i;
        ary2[i] = 2*i;
        res[i]=0;
    }

    int * d_ary1, *d_ary2;
    cudaMalloc((void**)&d_ary1, 32*sizeof(int));
    cudaMalloc((void**)&d_ary2, 32*sizeof(int));


    cudaMemcpy((void*)d_ary1, (void*)ary1, 32*sizeof(int), cudaMemcpyHostToDevice);
    cudaMemcpy((void*)d_ary2, (void*)ary2, 32*sizeof(int), cudaMemcpyHostToDevice);


    addAry<<<1,32>>>(d_ary1,d_ary2);

    cudaMemcpy((void*)res, (void*)d_ary1, 32*sizeof(int), cudaMemcpyDeviceToHost);
    for( int i=0 ; i<32 ; i++ )
        printf( "result[%d] = %d\n", i, res[i]);


    cudaFree(d_ary1);
    cudaFree(d_ary2);
}
以下为配置文件cudaQT.pro
QT       += core

QT       -= gui

TARGET = cudaQTS
CONFIG   += console
CONFIG   -= app_bundle

TEMPLATE = app


SOURCES += main.cpp


# This makes the .cu files appear in your project
OTHER_FILES +=  ./kernel.cu

# CUDA settings <-- may change depending on your system
CUDA_SOURCES += ./kernel.cu
CUDA_SDK = "/usr/local/cuda-7.5/"   # Path to cuda SDK install
CUDA_DIR = "/usr/local/cuda-7.5/"            # Path to cuda toolkit install

# DO NOT EDIT BEYOND THIS UNLESS YOU KNOW WHAT YOU ARE DOING....

SYSTEM_NAME = ubuntu         # Depending on your system either 'Win32', 'x64', or 'Win64'
SYSTEM_TYPE = 64            # '32' or '64', depending on your system
CUDA_ARCH = sm_50           # Type of CUDA architecture, for example 'compute_10', 'compute_11', 'sm_10'
NVCC_OPTIONS = --use_fast_math


# include paths
INCLUDEPATH += $$CUDA_DIR/include

# library directories
QMAKE_LIBDIR += $$CUDA_DIR/lib64/

CUDA_OBJECTS_DIR = ./


# Add the necessary libraries
CUDA_LIBS = -lcuda -lcudart

# The following makes sure all path names (which often include spaces) are put between quotation marks
CUDA_INC = $$join(INCLUDEPATH,'" -I"','-I"','"')
#LIBS += $$join(CUDA_LIBS,'.so ', '', '.so')
LIBS += $$CUDA_LIBS

# Configuration of the Cuda compiler
CONFIG(debug, debug|release) {
    # Debug mode
    cuda_d.input = CUDA_SOURCES
    cuda_d.output = $$CUDA_OBJECTS_DIR/${QMAKE_FILE_BASE}_cuda.o
    cuda_d.commands = $$CUDA_DIR/bin/nvcc -D_DEBUG $$NVCC_OPTIONS $$CUDA_INC $$NVCC_LIBS --machine $$SYSTEM_TYPE -arch=$$CUDA_ARCH -c -o ${QMAKE_FILE_OUT} ${QMAKE_FILE_NAME}
    cuda_d.dependency_type = TYPE_C
    QMAKE_EXTRA_COMPILERS += cuda_d
}
else {
    # Release mode
    cuda.input = CUDA_SOURCES
    cuda.output = $$CUDA_OBJECTS_DIR/${QMAKE_FILE_BASE}_cuda.o
    cuda.commands = $$CUDA_DIR/bin/nvcc $$NVCC_OPTIONS $$CUDA_INC $$NVCC_LIBS --machine $$SYSTEM_TYPE -arch=$$CUDA_ARCH -c -o ${QMAKE_FILE_OUT} ${QMAKE_FILE_NAME}
    cuda.dependency_type = TYPE_C
    QMAKE_EXTRA_COMPILERS += cuda
}
结果图,能编译并运行
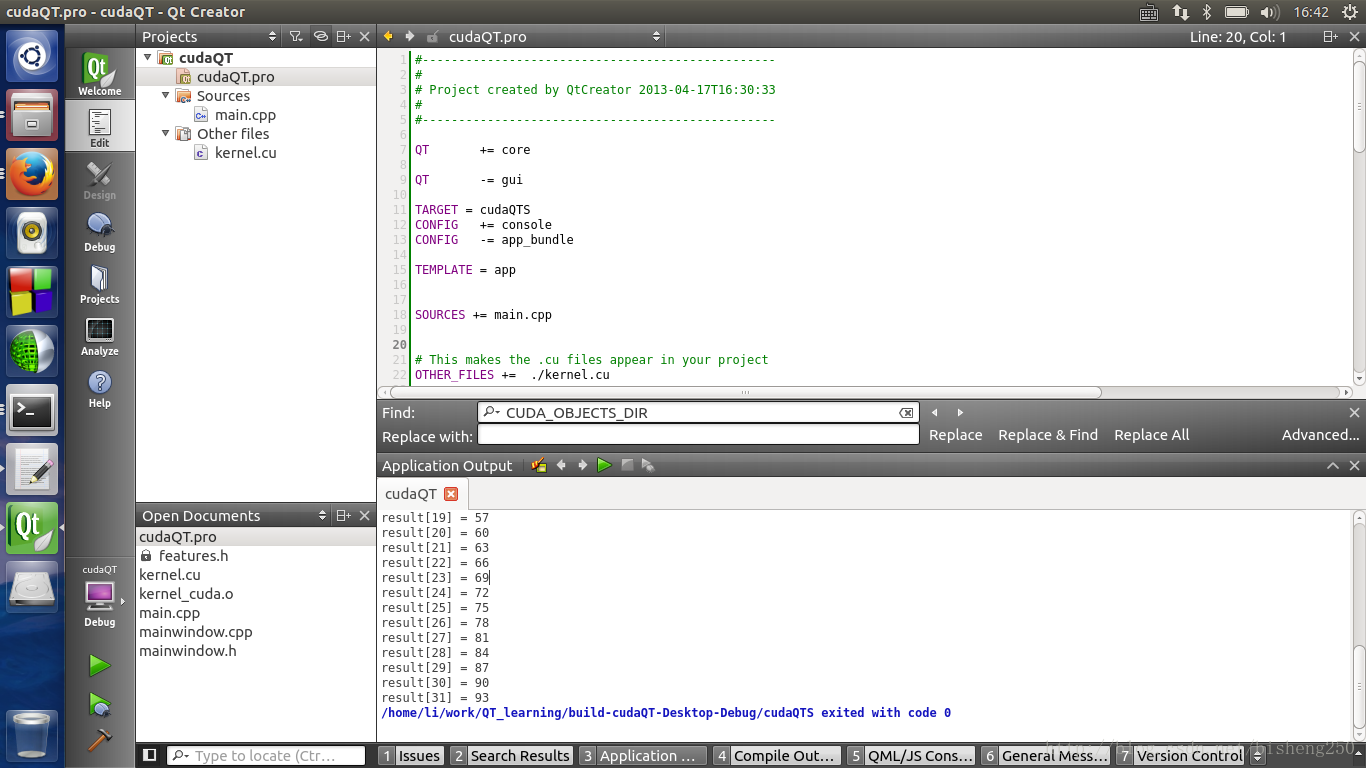
后续可以试试把一个大工程塞进来

北京人形旗下天工造物具身智能开源社区,聚焦具身天工与慧思开物两大平台
更多推荐
 9
9 0
0- 0


 已为社区贡献1条内容

所有评论(0)