Mid-360激光雷达运行Fast lio2使用教程
·
一、配置要求
终端要求:Ubuntu20.04 ROS1
硬件要求:Livox-mid360激光雷达+一分三线缆
二、Fast lio2环境搭建
在Github上找一个Fast lio2项目,这里我使用的是:
https://github.com/jiale67/Fast-lio2
安装过程:
注意:将下面出现的thirty_party是我自己安装第三方库文件的目录,可以替换成自己的目录。同理,catkin_ws是我自己的工作空间,也可替换成自己的。
1、安装Ceres 2.1.0
sudo apt-get -y install liblapack-dev libsuitesparse-dev libcxsparse3 libgflags-dev libgoogle-glog-dev libgtest-dev
wget -O ceres-solver.zip https://github.com/ceres-solver/ceres-solver/archive/refs/tags/2.1.0.zip
unzip -q ceres-solver.zip -d thirty_party
pushd thirty_party/ceres-solver-2.1.0
mkdir build
cd build
cmake -DBUILD_SHARED_LIBS=TRUE ..
make -j8
sudo make install
2、安装GTSAM
cd thirty_party/
git clone https://github.com/borglab/gtsam.git
mkdir build && cd build
cmake -D GTSAM_USE_SYSTEM_EIGEN=ON ..
make
sudo make install
3、安装 Livox SDK2
cd thirty_party/
git clone https://github.com/Livox-SDK/Livox-SDK2.git
cd Livox-SDK2
mkdir build
cd build && cmake ..
make
sudo make install4、安装Eigen 3.3.7(Ubuntu 20.04 已经安装)
wget -O eigen3.zip https://gitlab.com/libeigen/eigen/-/archive/3.3.7/eigen-3.3.7.zip
unzip -q eigen3.zip -d thirty_party
pushd thirty_party/eigen-3.3.7"
mkdir build
cd build
cmake -DBUILD_SHARED_LIBS=TRUE ..
sudo make install
sudo ln -s /usr/include/eigen3/Eigen /usr/include/Eigen
5、下载&编译Fast lio2
cd catkin_ws/src
git clone https://github.com/jiale67/Fast-lio2.git
catkin_make
三、IP配置
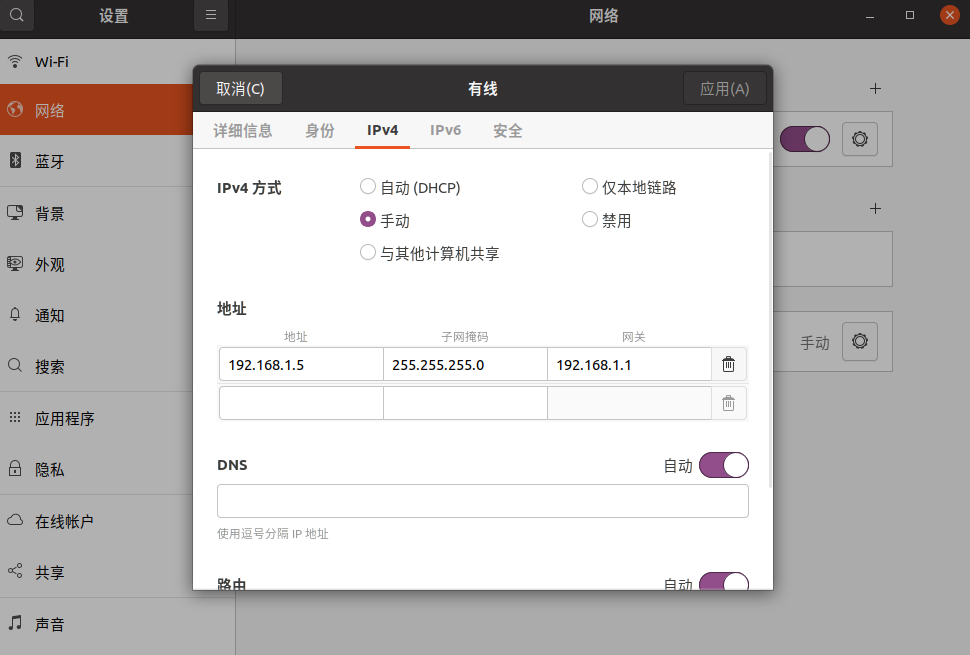
进入设置-网络-有线连接-选择IPv4-手动。配置:ip地址192.168.1.5,子网掩码255.255.255.0,网关192.168.1.1。
打开Fast-lio2/src/livox_ros_driver2/config/MID360_config.json文件:
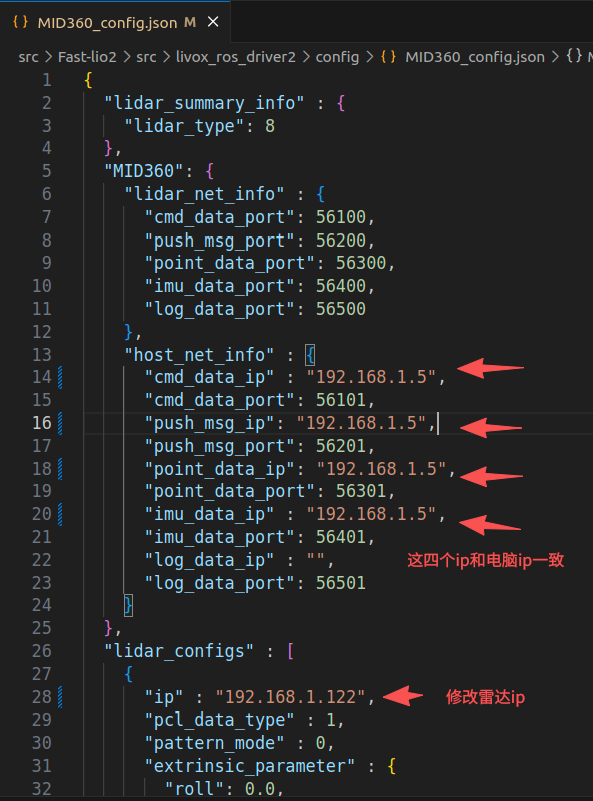
注意:雷达IP是192.168.1.1xx,最后两位xx是雷达SN码的最后两位。
四、测试运行
新开一个终端,运行:
cd catkin_ws/
source ./devel/setup.bash
roslaunch livox2pointcloud run_fast_lio.launch
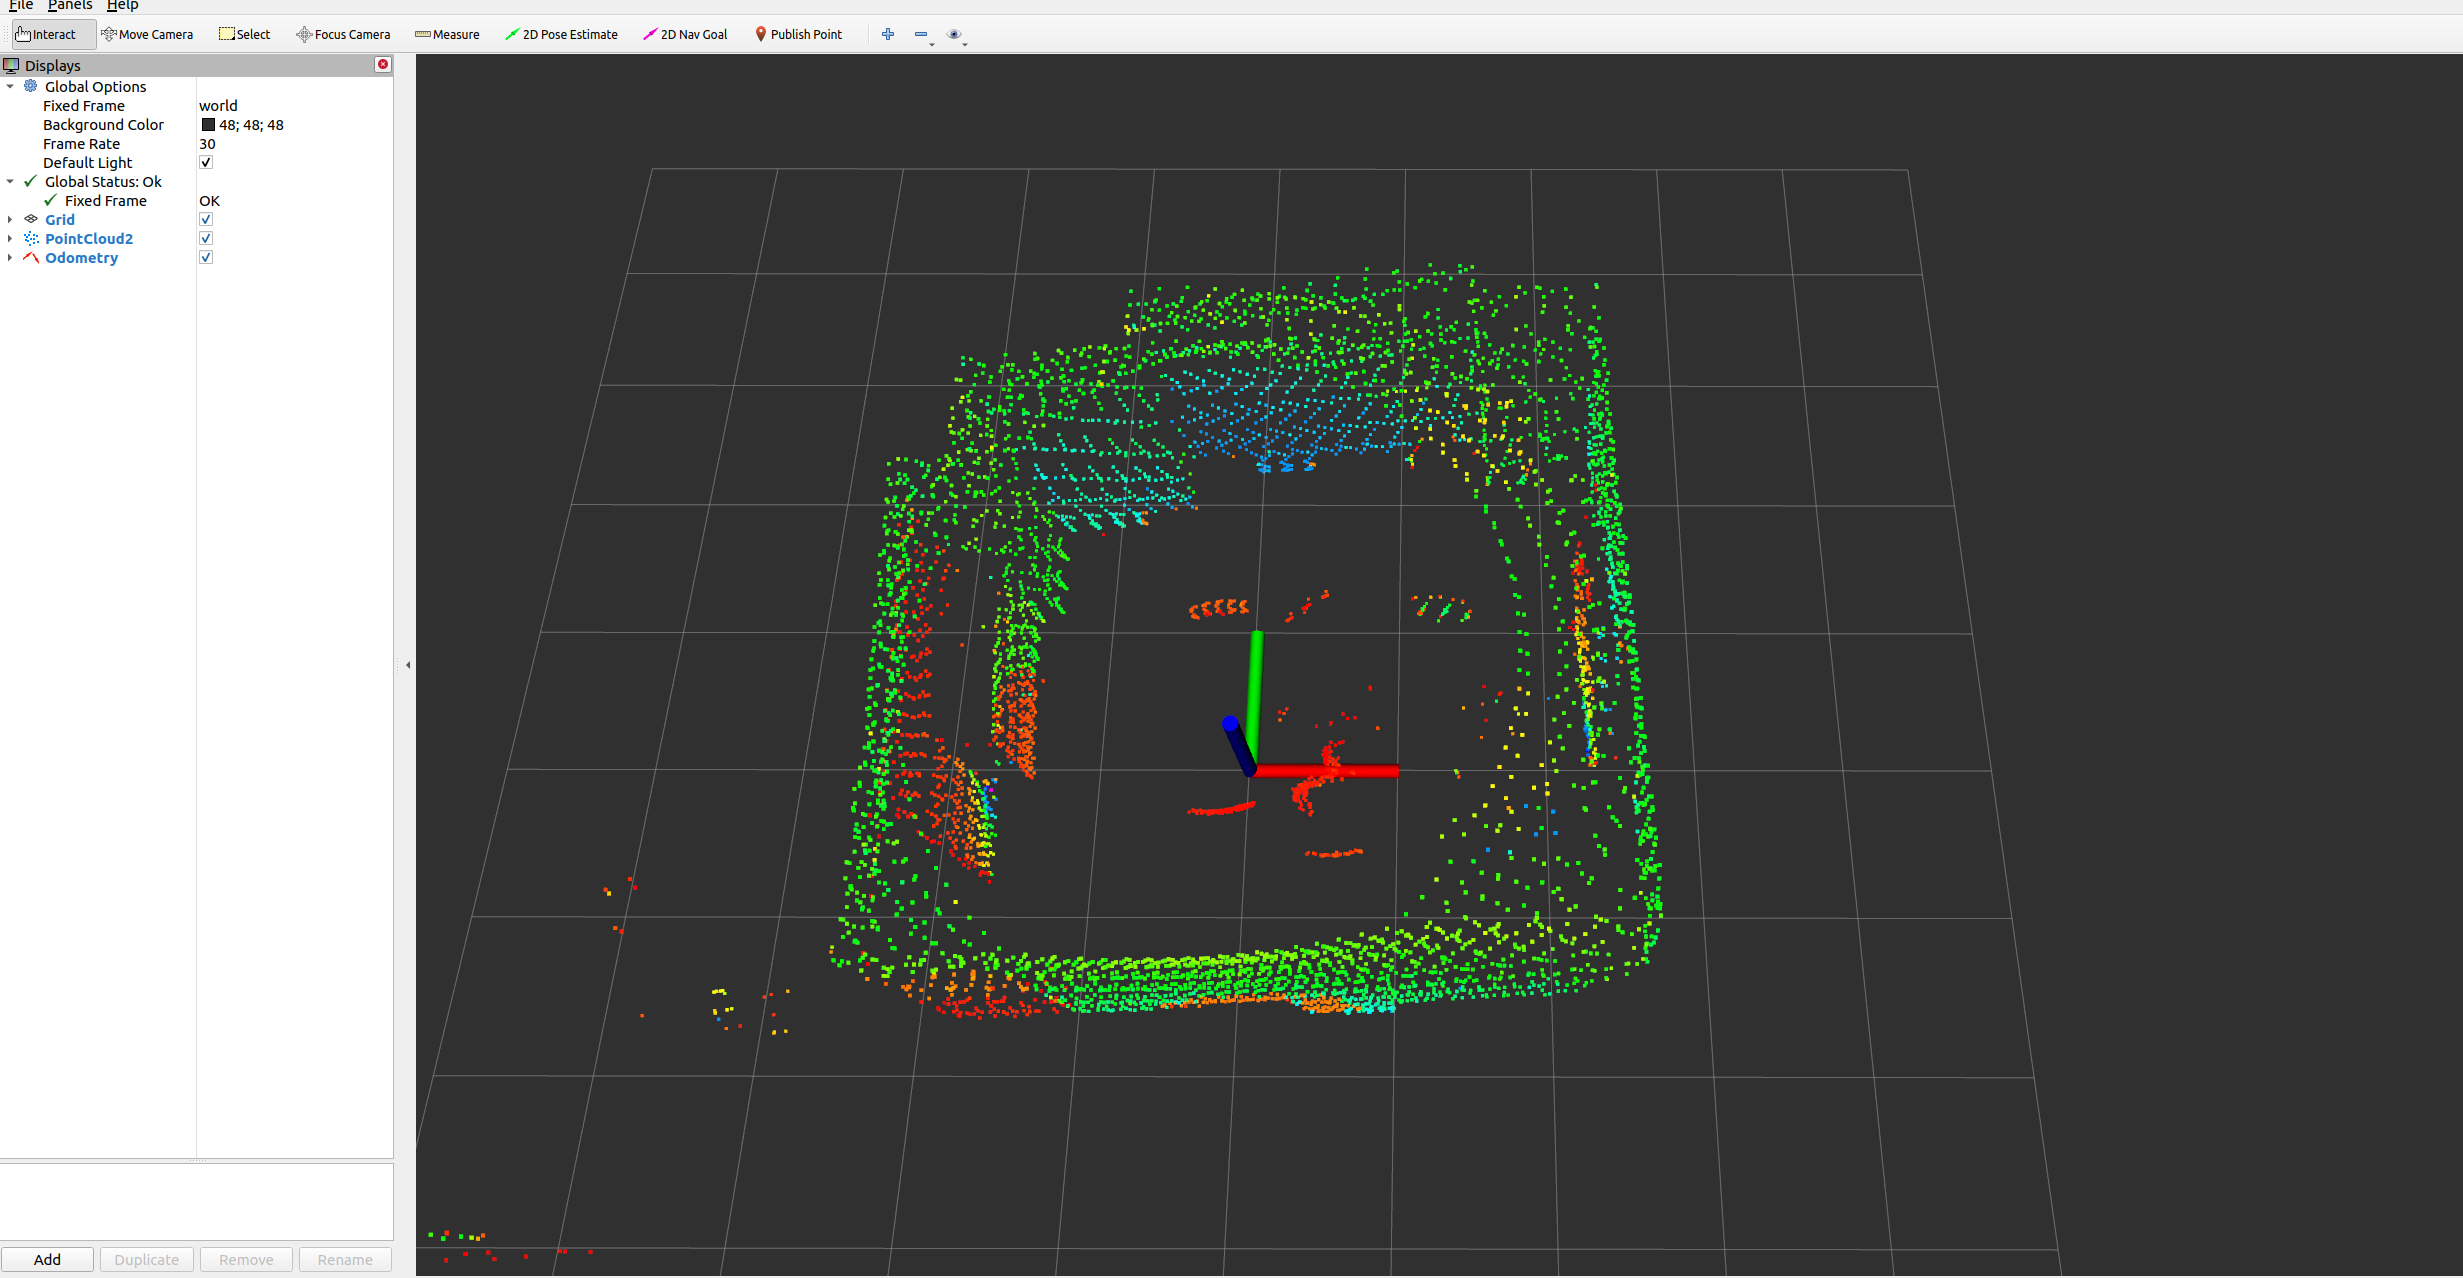
如图显示雷达点云和里程计坐标:

北京人形旗下天工造物具身智能开源社区,聚焦具身天工与慧思开物两大平台
更多推荐
 5
5 0
0- 0


 已为社区贡献1条内容

所有评论(0)