书生大模型实战营(第三期闯关大挑战)- 进阶岛 第四关 InternVL 多模态模型部署微调实践
准备InternVL模型
cd /root
mkdir -p model

# cp 模型

cp -r /root/share/new_models/OpenGVLab/InternVL2-2B /root/model/
准备环境
conda create --name lagent python=3.10 -y

# 激活虚拟环境(注意:后续的所有操作都需要在这个虚拟环境中进行)
conda activate lagent

# 安装一些必要的库
conda install pytorch==2.1.2 torchvision==0.16.2 torchaudio==2.1.2 pytorch-cuda=12.1 -c pytorch -c nvidia -y
# 安装其他依赖
apt install libaio-dev
pip install transformers==4.44.0
pip install streamlit==1.37.1
pip install lmdeploy[all]==0.5.3
-
安装xtuner
# 创建一个目录,用来存放源代码 mkdir -p /root/InternLM/code cd /root/InternLM/code git clone -b v0.1.23 https://github.com/InternLM/XTuner cd /root/InternLM/code/XTuner pip install -e '.[deepspeed]' -
安装验证
xtuner version

##命令

xtuner help
准备微调数据集
我们这里使用huggingface上的zhongshsh/CLoT-Oogiri-GO据集
下载地址https://huggingface.co/datasets?sort=trending&search=zhongshsh%2FCLoT-Oogiri-GO
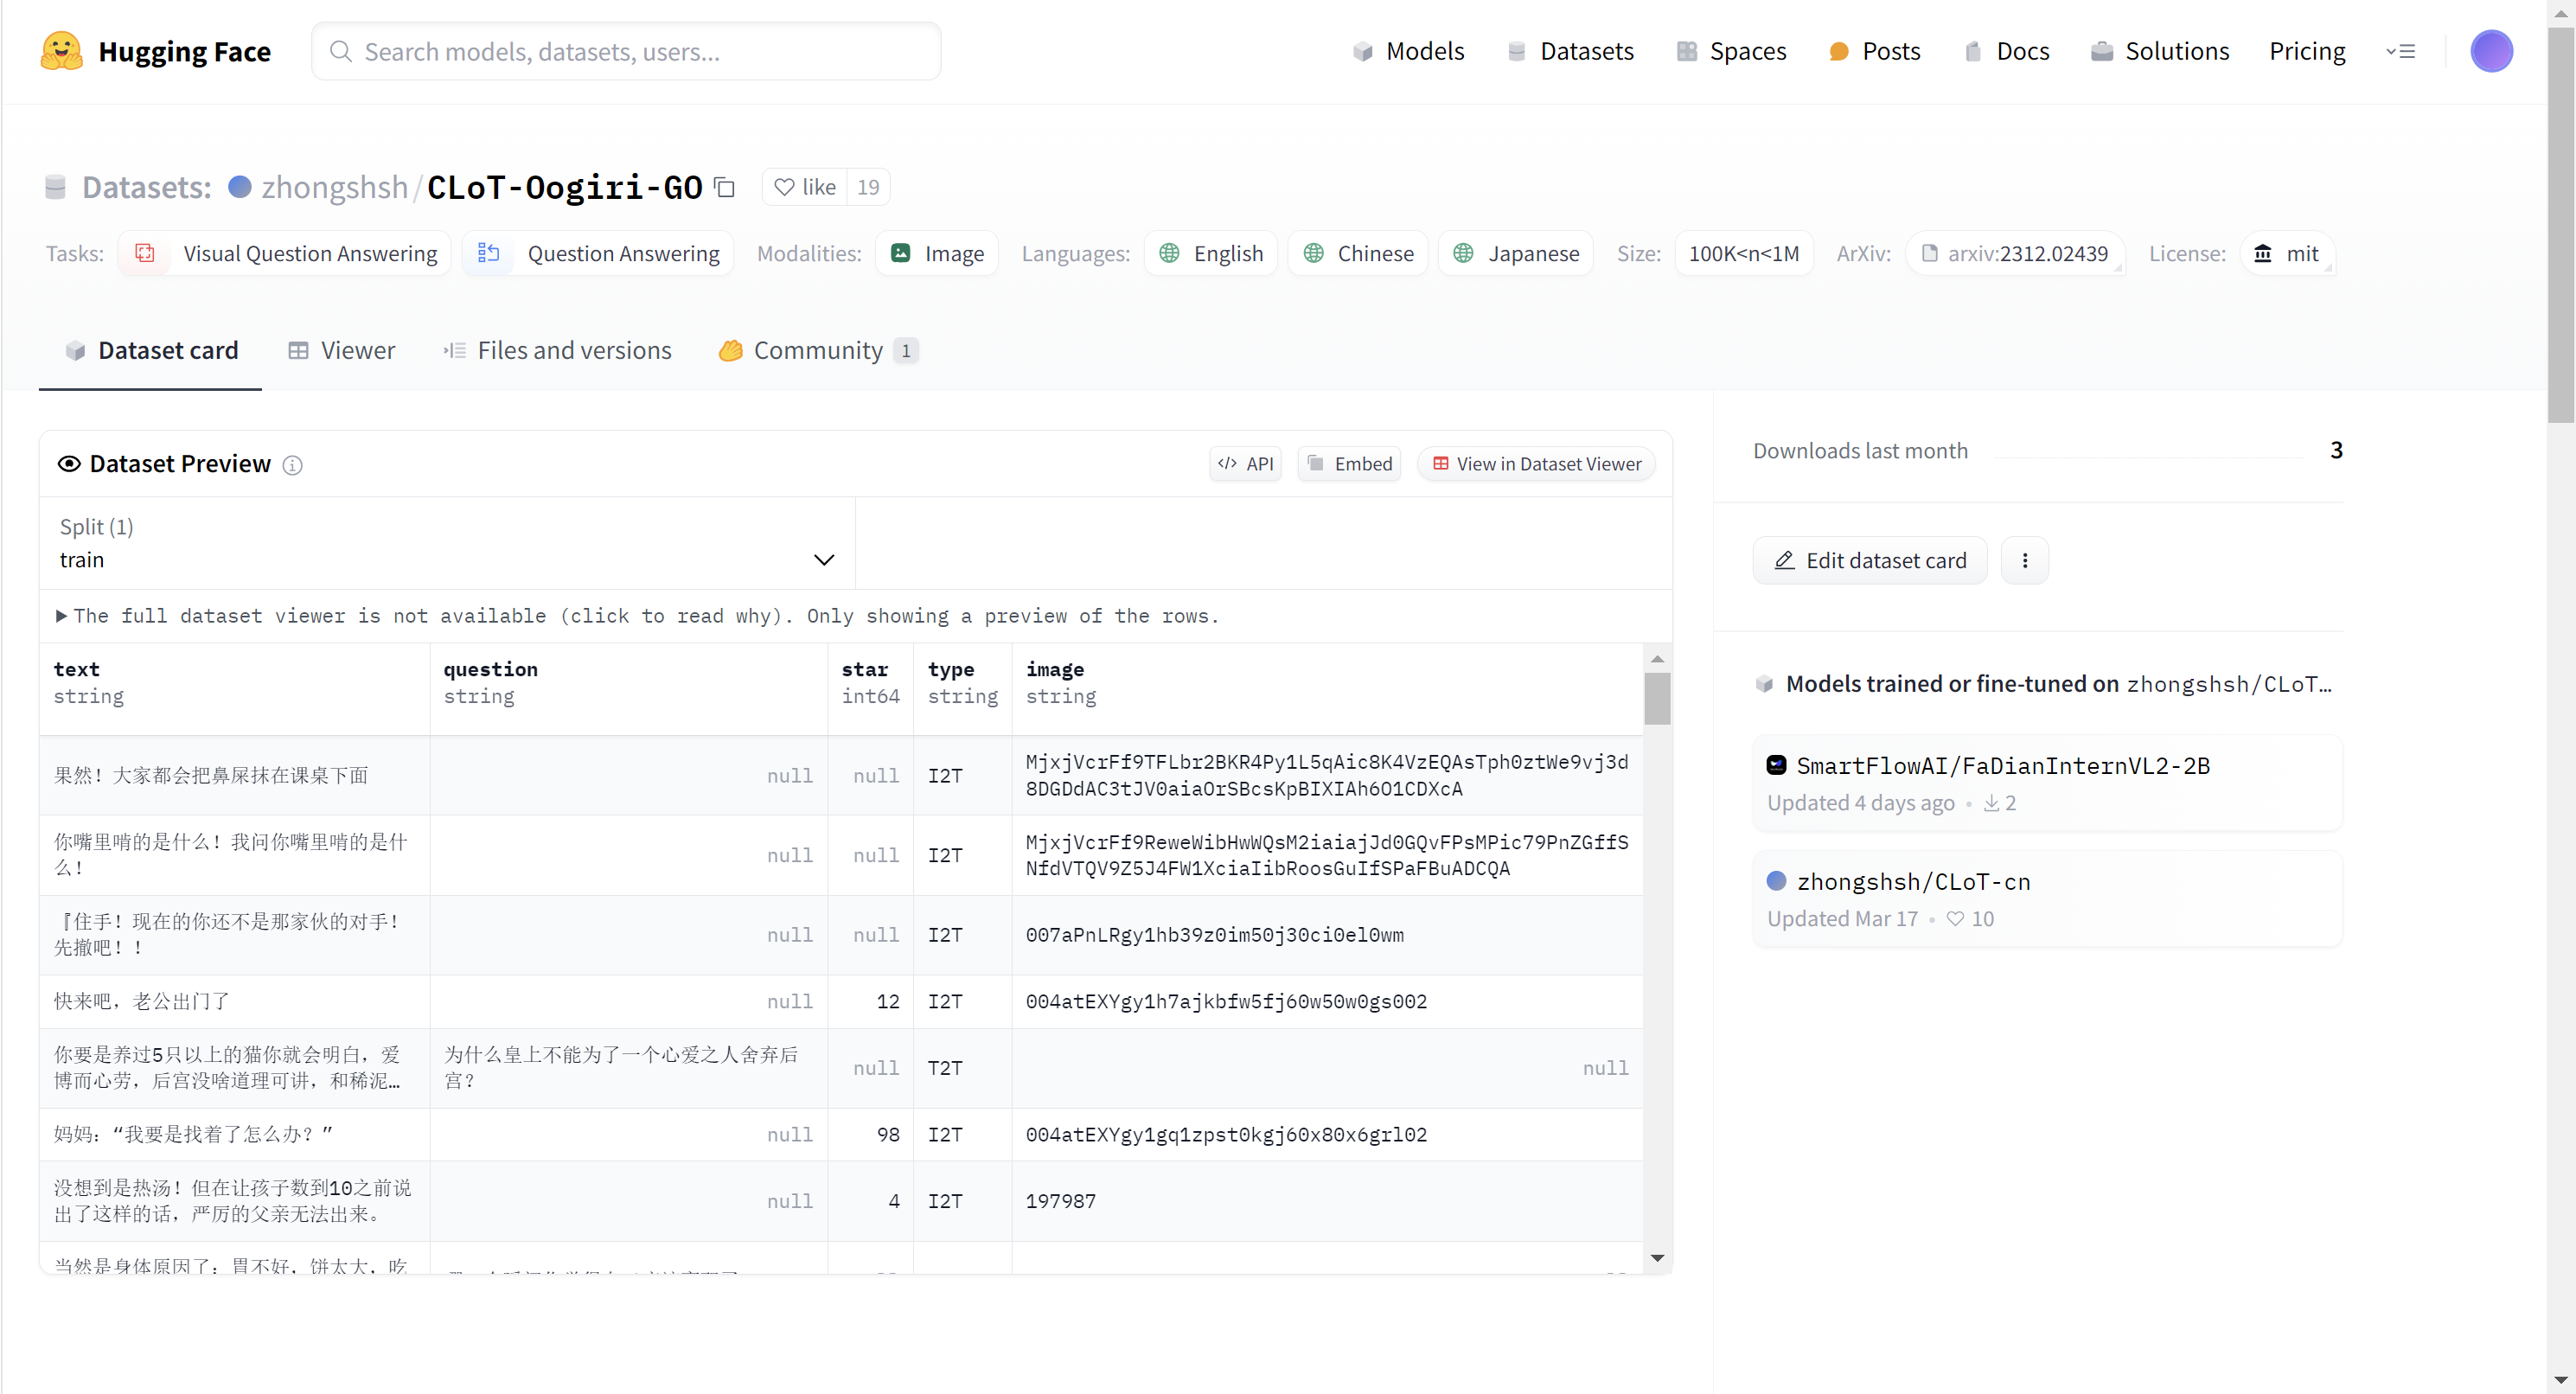
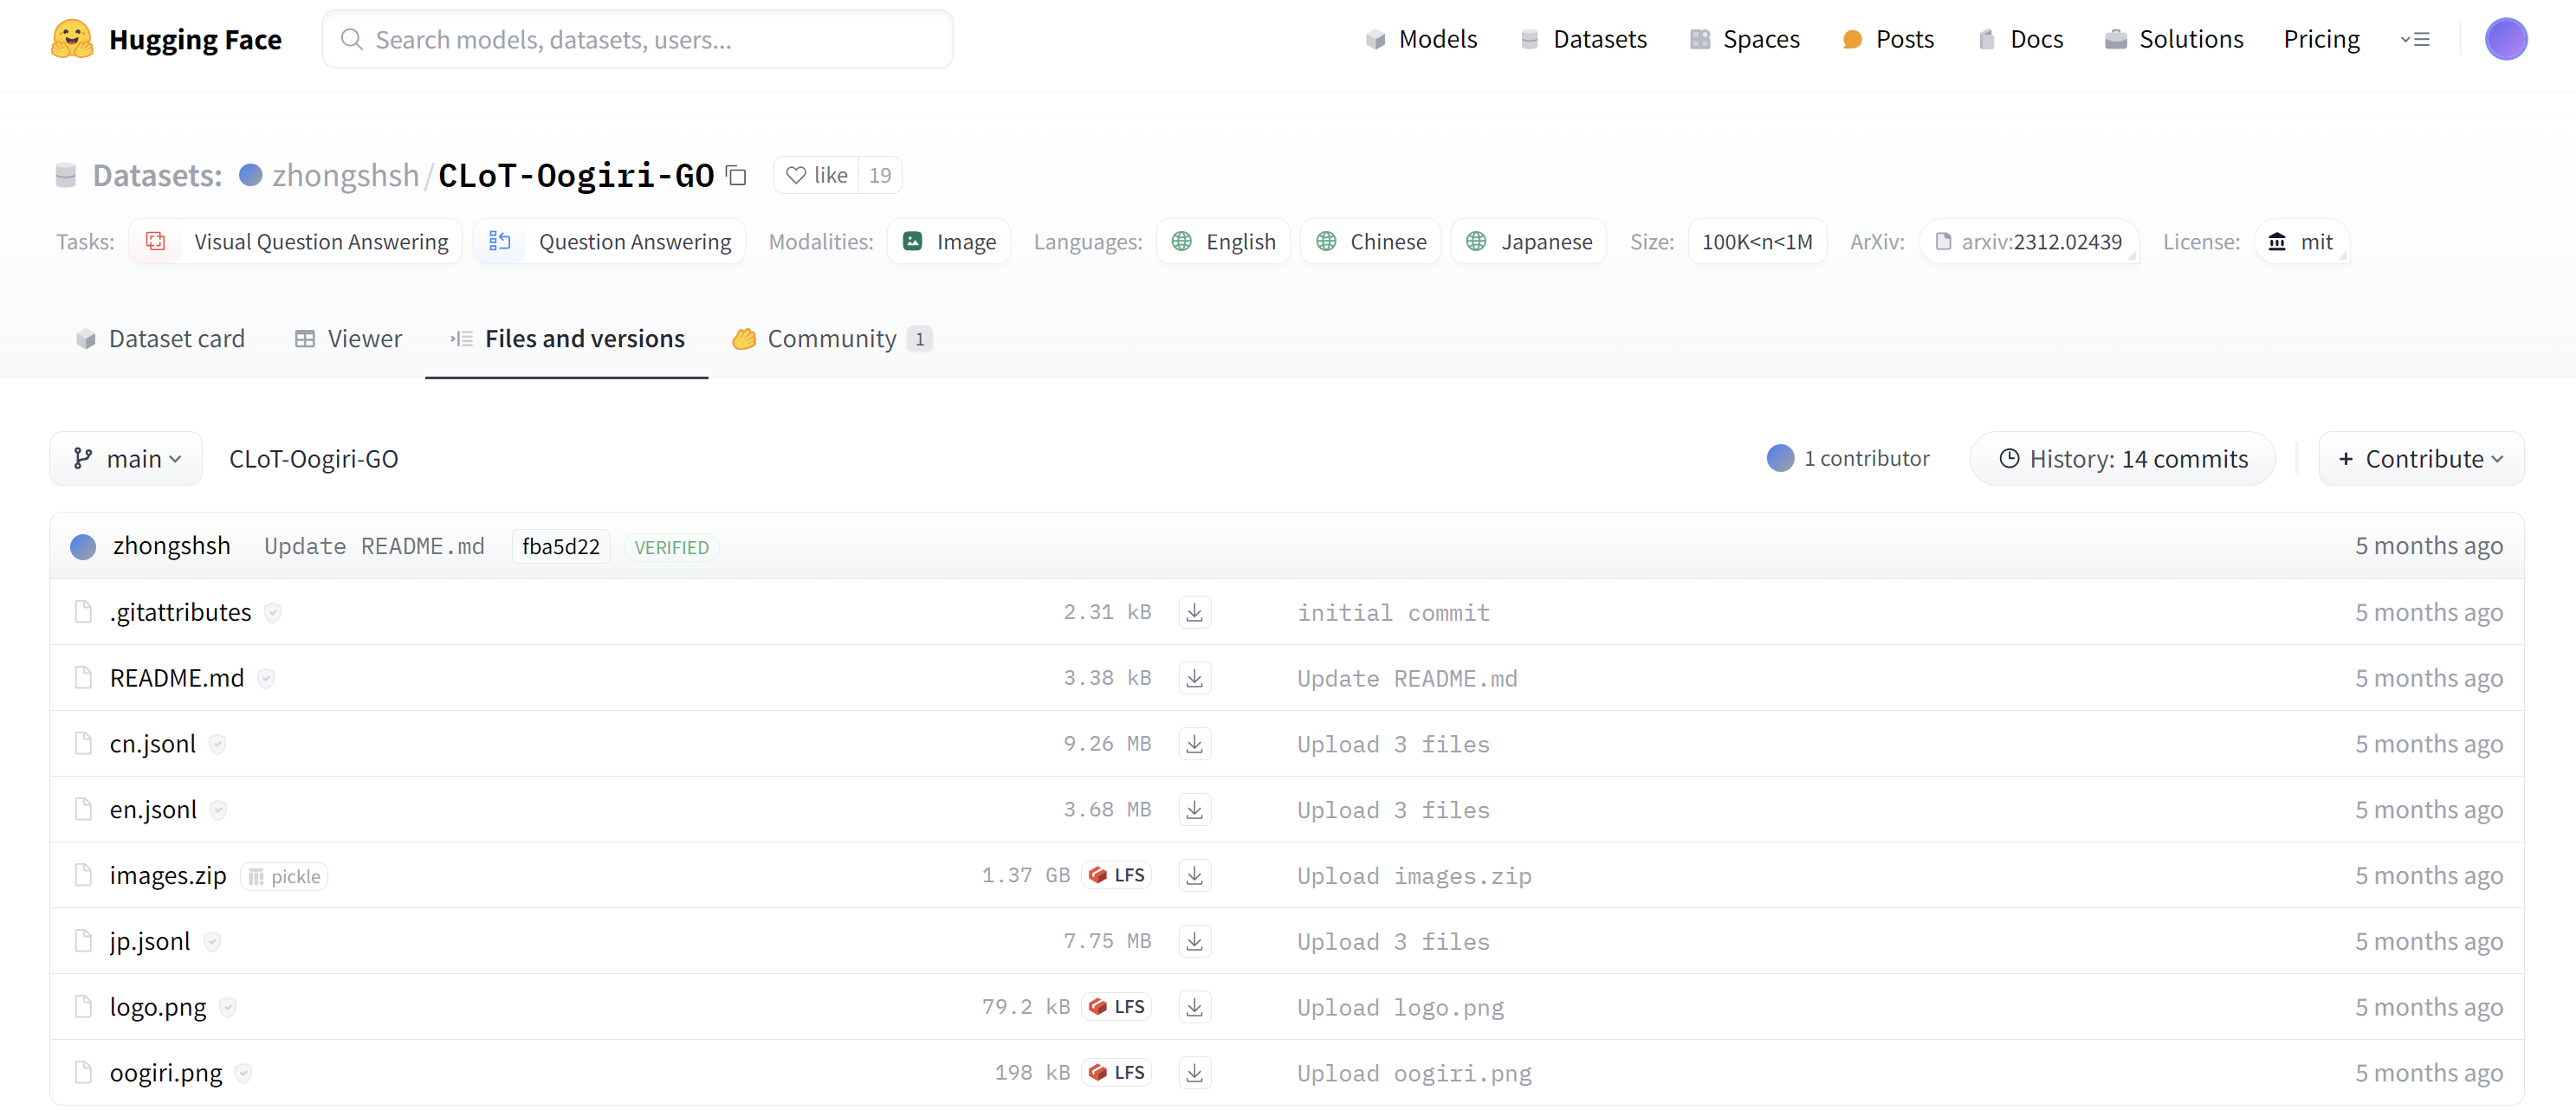
将以上数据集下载下来。
数据集我们从官网下载下来并进行去重,只保留中文数据等操作。并制作成XTuner需要的形式,目前书生浦语InternStudio算力平台 已经提供了去重后的数据集,我们直接拿过来使用即可。
## 首先让我们安装一下需要的包
pip install datasets matplotlib Pillow timm

## 让我们把数据集挪出来
cp -r /root/share/new_models/datasets/CLoT_cn_2000 /root/InternLM/datasets/
InternVL 推理部署攻略
我们使用LMDeploy部署并推理一张照片看看它多模态效果如何,编写推理代码test_lmdeploy.py
touch /root/InternLM/code/test_lmdeploy.py
cd /root/InternLM/code/
然后把以下代码拷贝进test_lmdeploy.py中。
from lmdeploy import pipeline
from lmdeploy.vl import load_image

pipe = pipeline('/root/model/InternVL2-2B')

image = load_image('/root/InternLM/datasets/ex_images/004atEXYgy1gpb3tsdolwj60y219fwkp02.jpg')
response = pipe(('请你根据这张图片,讲一个脑洞大开的梗', image))
print(response.text)
图片的内容
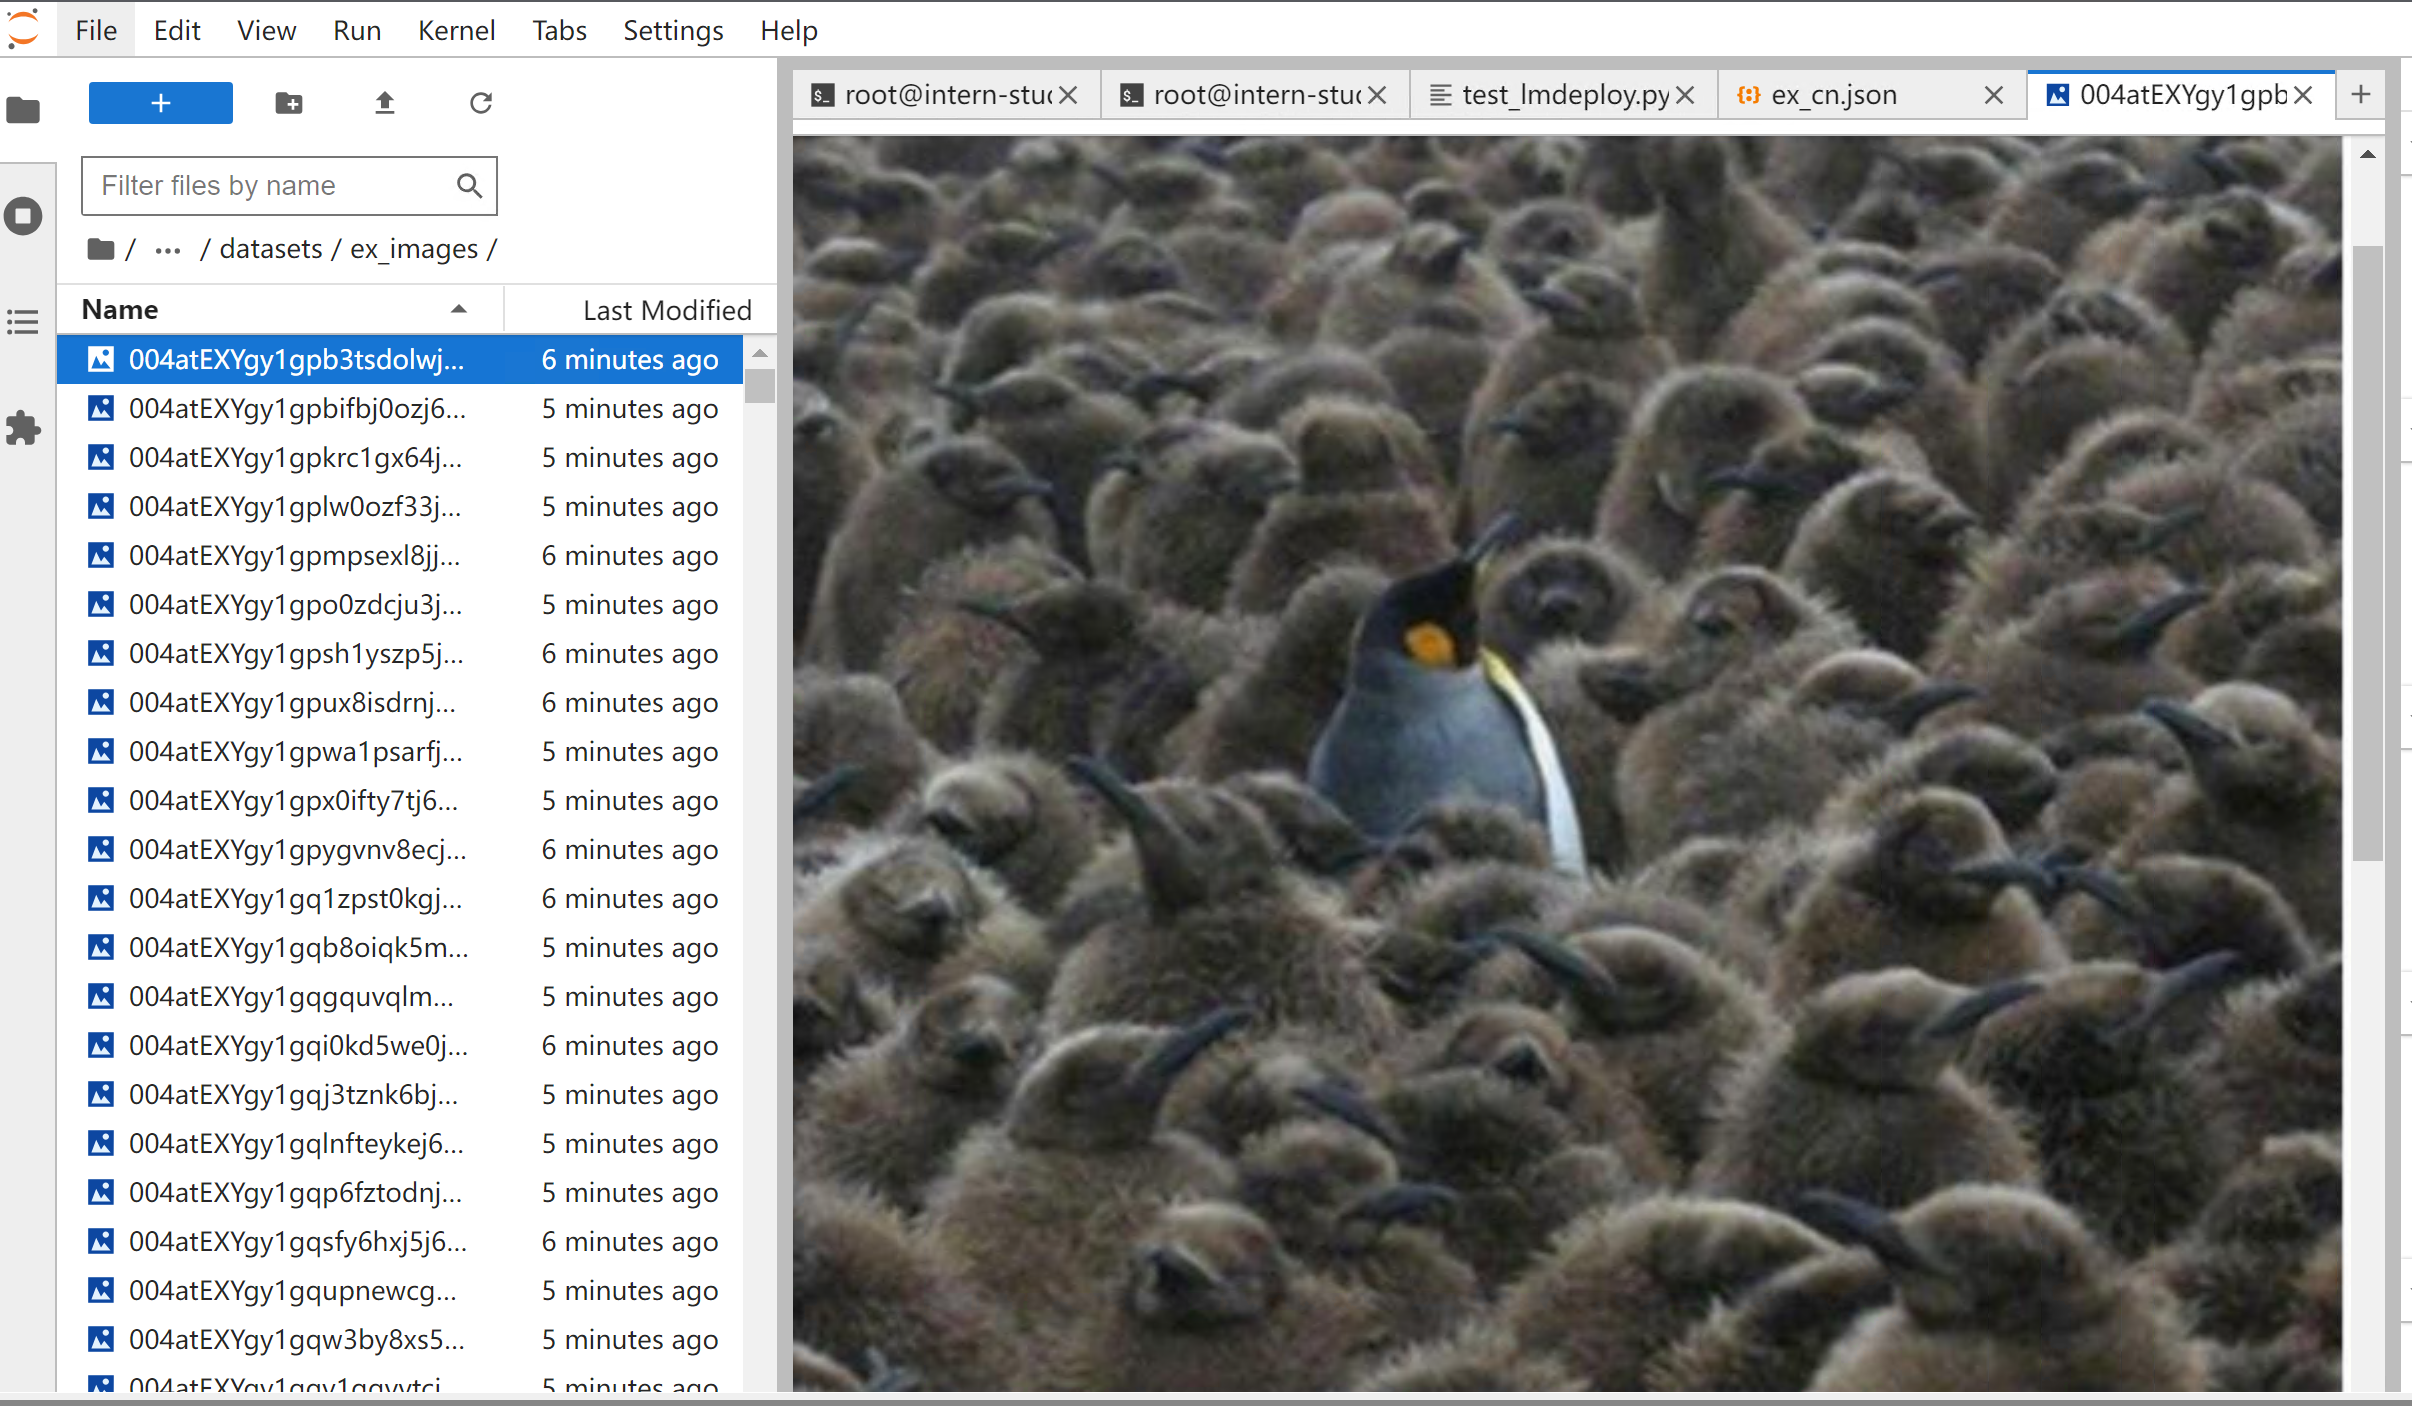
运行执行推理结果。
cd /root/InternLM/code/
python test_lmdeploy.py

以上是InternVL2-2B 多模态识别能力
InternVL 微调攻略
准备数据集
数据集格式为:
# 为了高效训练,请确保数据格式为:
{
    "id": "000000033471",
    "image": ["coco/train2017/000000033471.jpg"], # 如果是纯文本,则该字段为 None 或者不存在
    "conversations": [
      {
        "from": "human",
        "value": "<image>\nWhat are the colors of the bus in the image?"
      },
      {
        "from": "gpt",
        "value": "The bus in the image is white and red."
      }
    ]
  }
这里我们就用书生浦语准备好的数据集
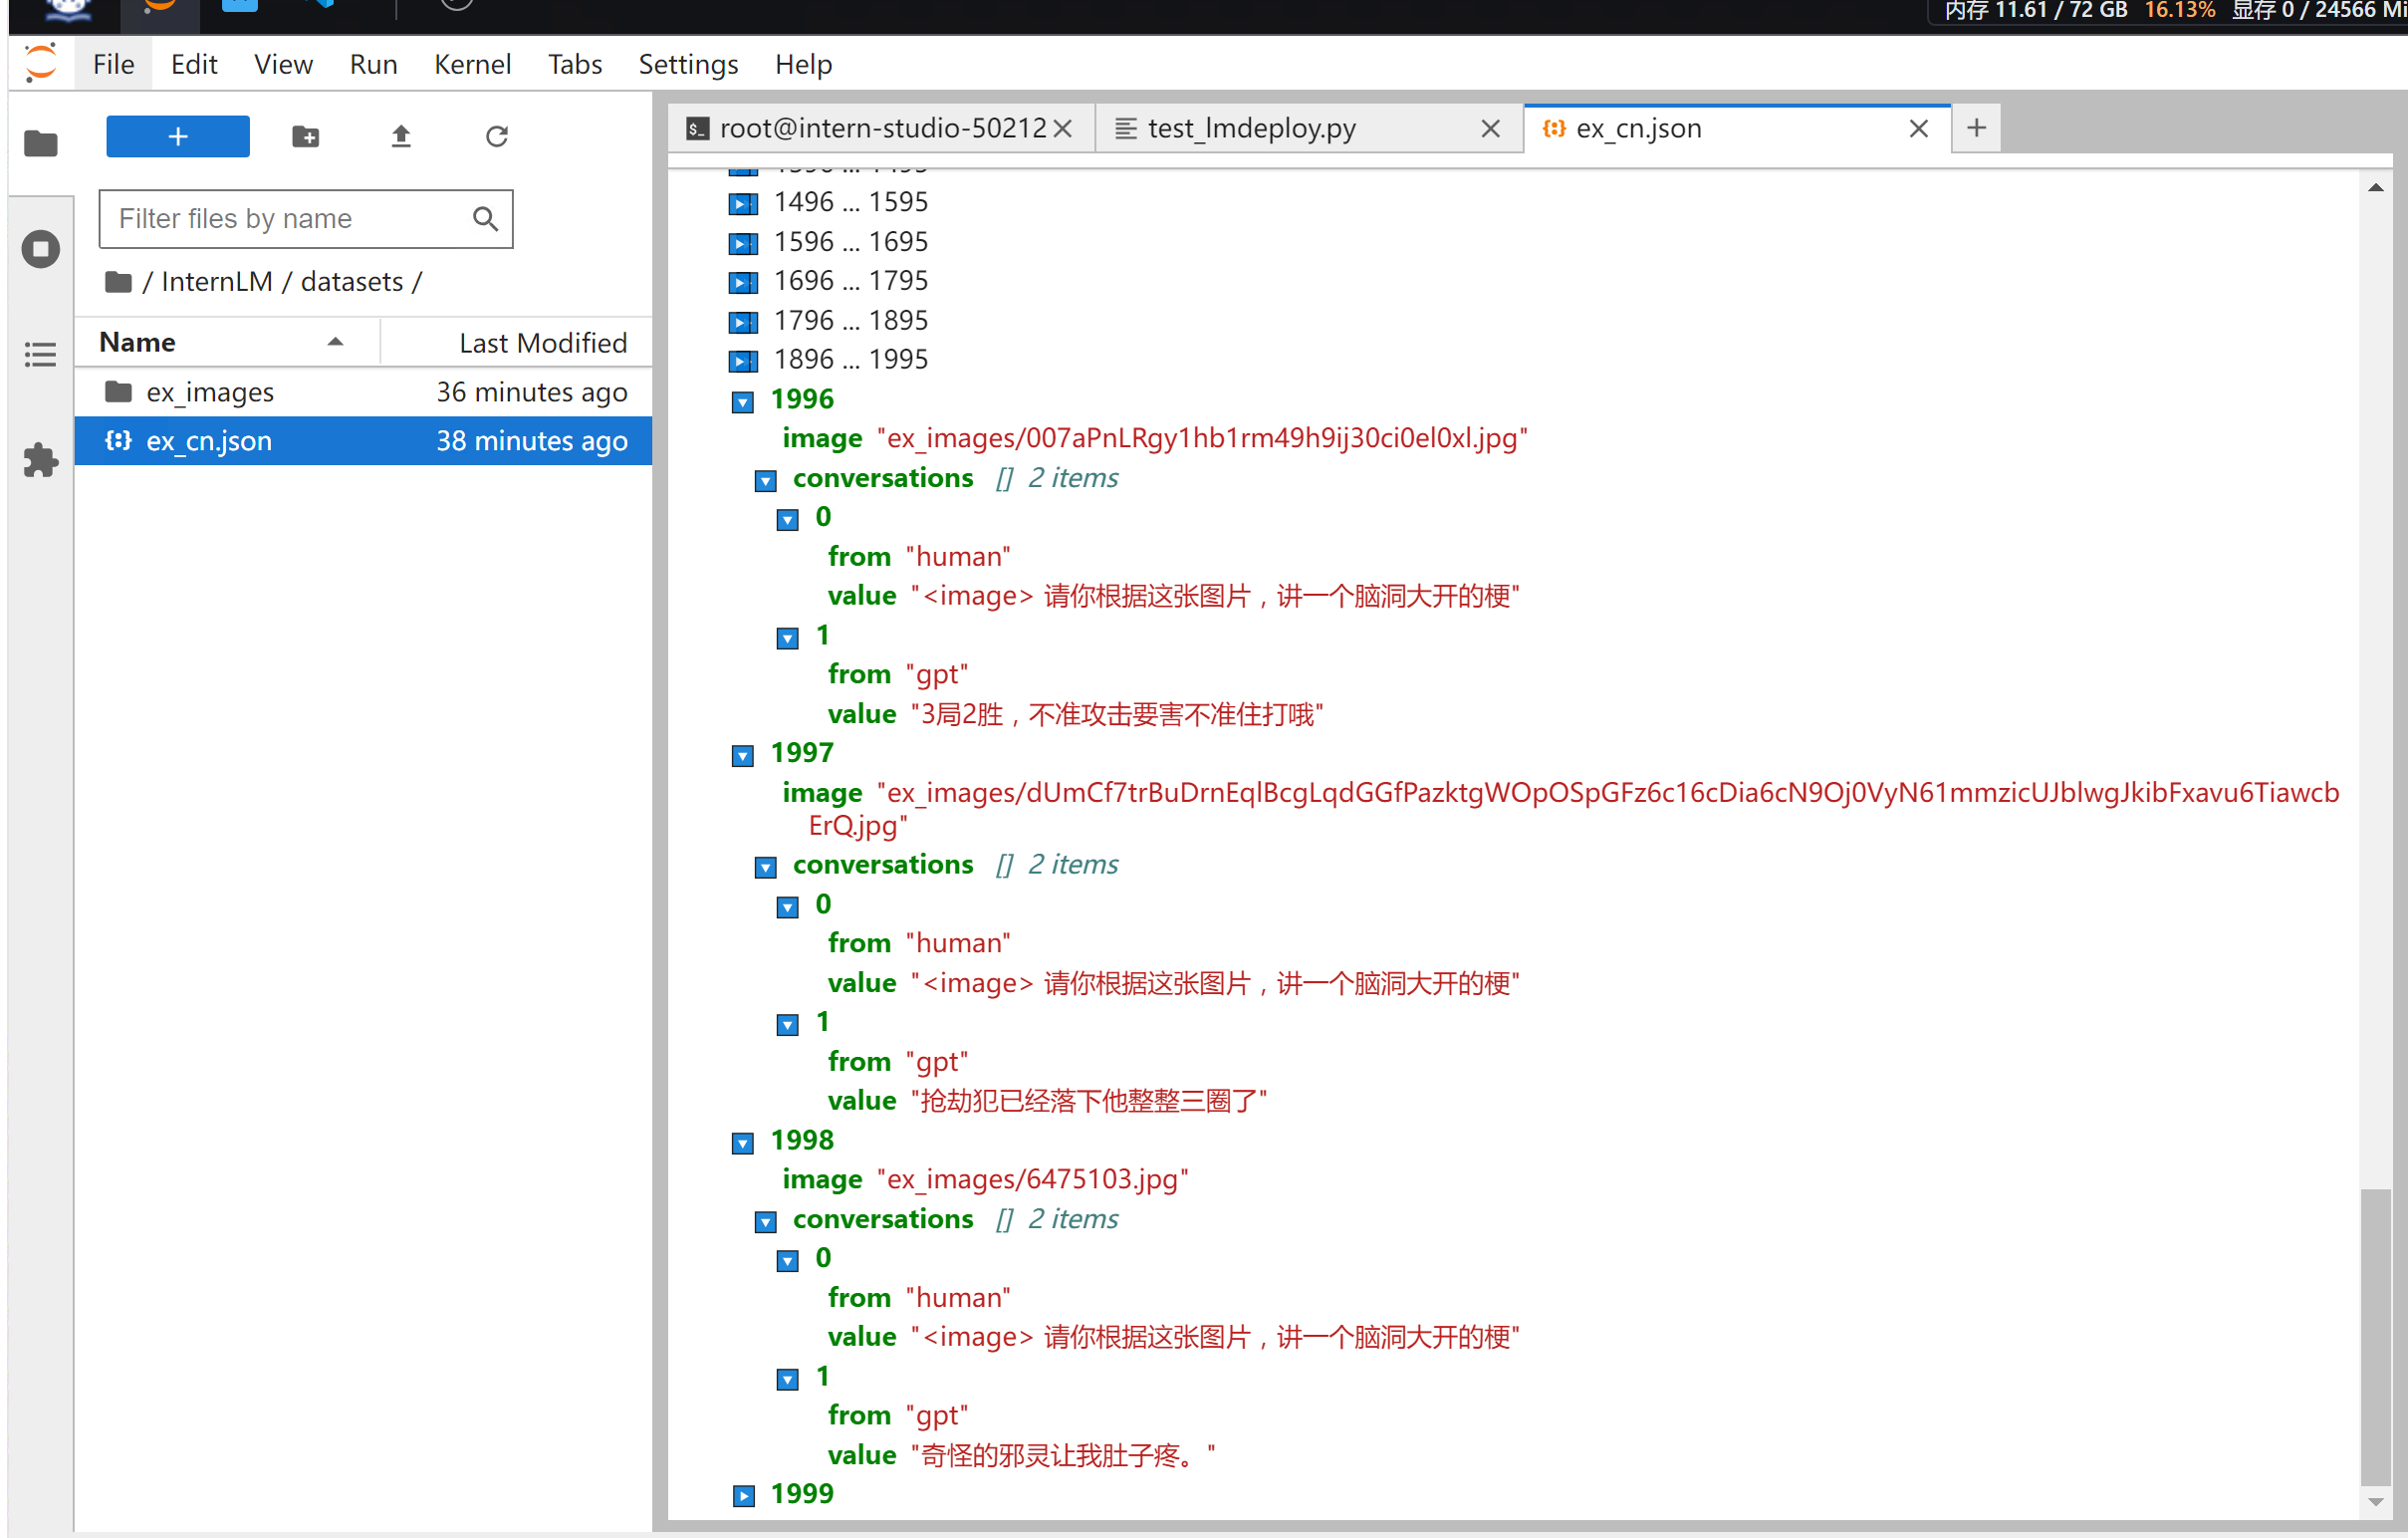
配置微调参数
让我们一起修改XTuner下 InternVL的config,文件在: /root/InternLM/code/XTuner/xtuner/configs/internvl/v2/internvl_v2_internlm2_2b_qlora_finetune.py
- 需要修改的部分
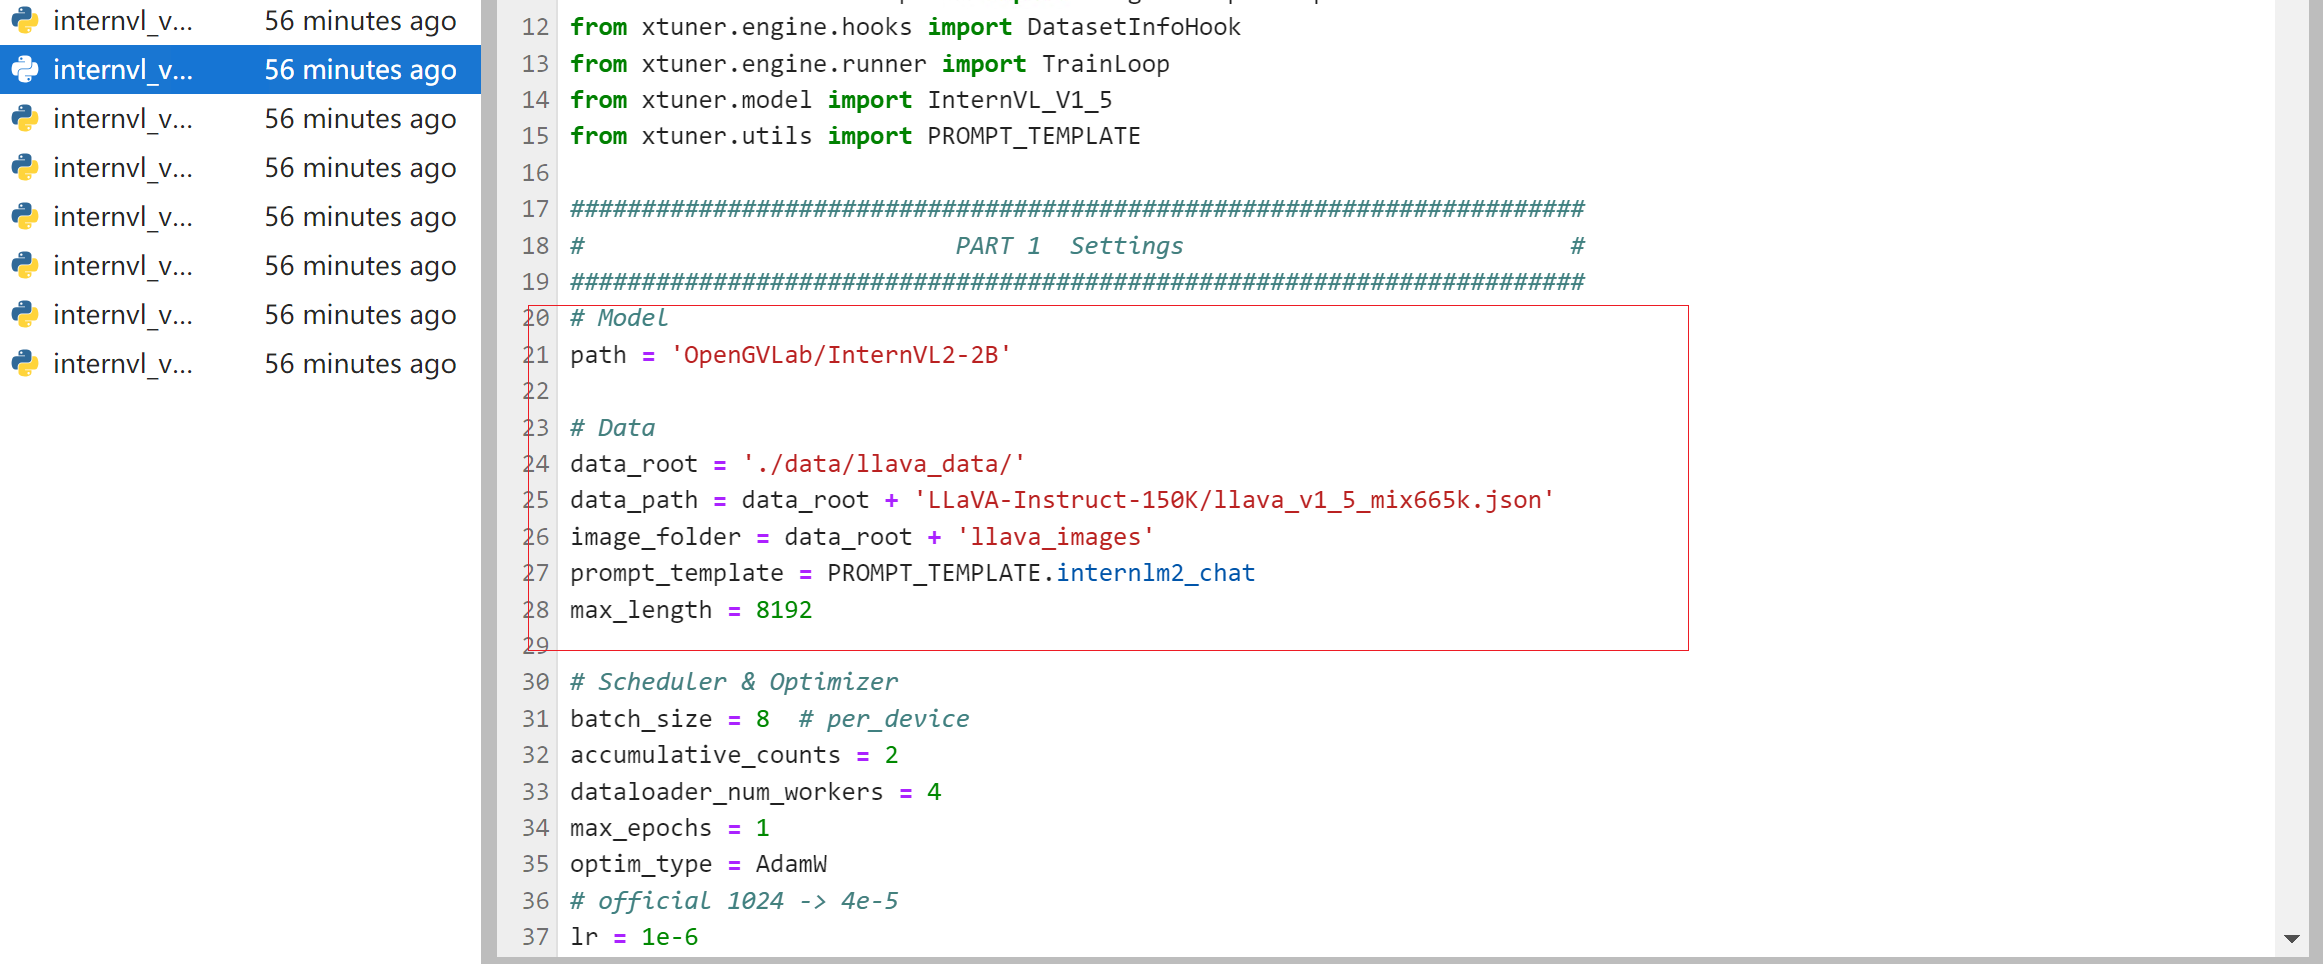
修改成
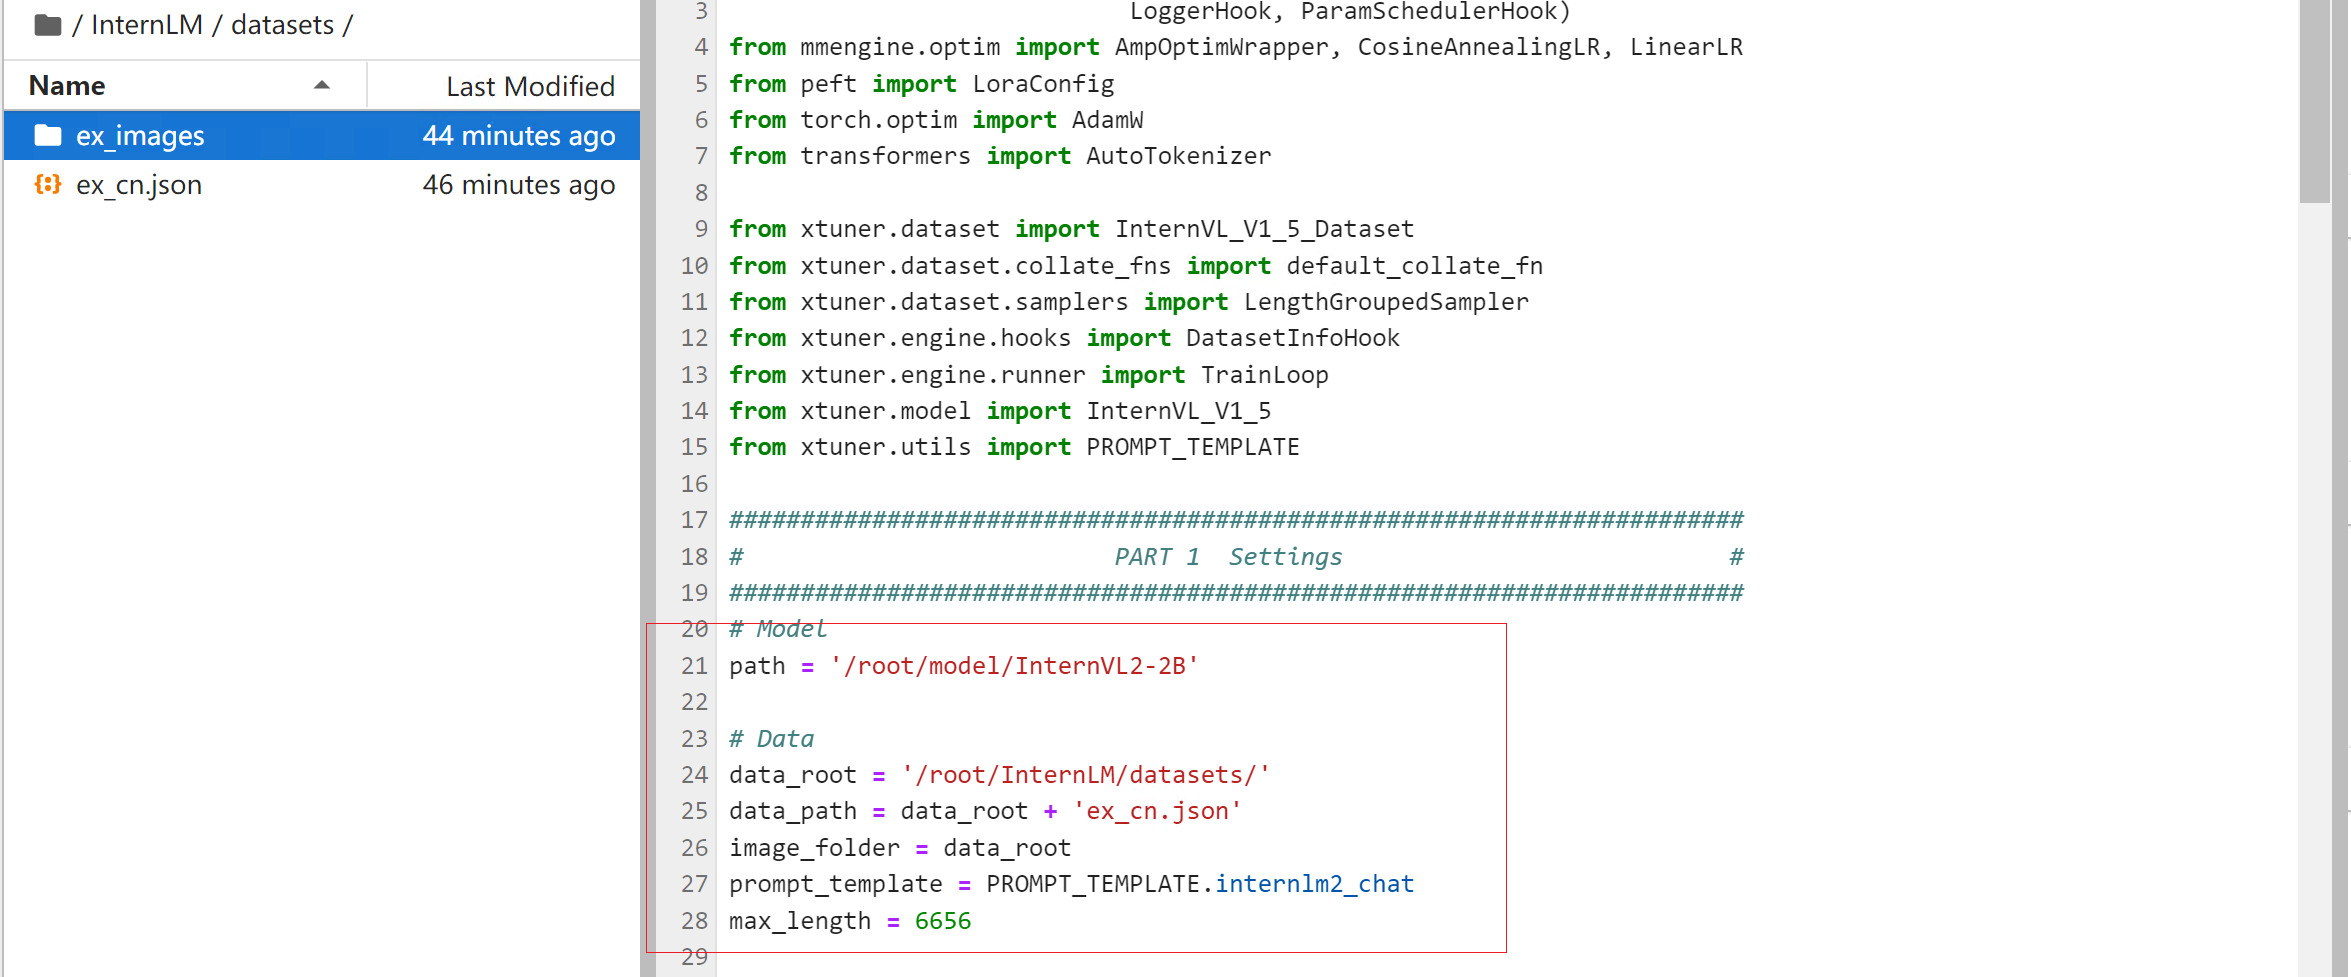
完整的训练代码
# Copyright (c) OpenMMLab. All rights reserved.
from mmengine.hooks import (CheckpointHook, DistSamplerSeedHook, IterTimerHook,
                            LoggerHook, ParamSchedulerHook)
from mmengine.optim import AmpOptimWrapper, CosineAnnealingLR, LinearLR
from peft import LoraConfig
from torch.optim import AdamW
from transformers import AutoTokenizer

from xtuner.dataset import InternVL_V1_5_Dataset
from xtuner.dataset.collate_fns import default_collate_fn
from xtuner.dataset.samplers import LengthGroupedSampler
from xtuner.engine.hooks import DatasetInfoHook
from xtuner.engine.runner import TrainLoop
from xtuner.model import InternVL_V1_5
from xtuner.utils import PROMPT_TEMPLATE

#######################################################################
#                          PART 1  Settings                           #
#######################################################################
# Model
path = '/root/model/InternVL2-2B'

# Data
data_root = '/root/InternLM/datasets/'
data_path = data_root + 'ex_cn.json'
image_folder = data_root
prompt_template = PROMPT_TEMPLATE.internlm2_chat
max_length = 6656

# Scheduler & Optimizer
batch_size = 4  # per_device
accumulative_counts = 4
dataloader_num_workers = 4
max_epochs = 6
optim_type = AdamW
# official 1024 -> 4e-5
lr = 2e-5
betas = (0.9, 0.999)
weight_decay = 0.05
max_norm = 1  # grad clip
warmup_ratio = 0.03

# Save
save_steps = 1000
save_total_limit = 1  # Maximum checkpoints to keep (-1 means unlimited)

#######################################################################
#            PART 2  Model & Tokenizer & Image Processor              #
#######################################################################
model = dict(
    type=InternVL_V1_5,
    model_path=path,
    freeze_llm=True,
    freeze_visual_encoder=True,
    quantization_llm=True,  # or False
    quantization_vit=False,  # or True and uncomment visual_encoder_lora
    # comment the following lines if you don't want to use Lora in llm
    llm_lora=dict(
        type=LoraConfig,
        r=128,
        lora_alpha=256,
        lora_dropout=0.05,
        target_modules=None,
        task_type='CAUSAL_LM'),
    # uncomment the following lines if you don't want to use Lora in visual encoder # noqa
    # visual_encoder_lora=dict(
    #     type=LoraConfig, r=64, lora_alpha=16, lora_dropout=0.05,
    #     target_modules=['attn.qkv', 'attn.proj', 'mlp.fc1', 'mlp.fc2'])
)

#######################################################################
#                      PART 3  Dataset & Dataloader                   #
#######################################################################
llava_dataset = dict(
    type=InternVL_V1_5_Dataset,
    model_path=path,
    data_paths=data_path,
    image_folders=image_folder,
    template=prompt_template,
    max_length=max_length)

train_dataloader = dict(
    batch_size=batch_size,
    num_workers=dataloader_num_workers,
    dataset=llava_dataset,
    sampler=dict(
        type=LengthGroupedSampler,
        length_property='modality_length',
        per_device_batch_size=batch_size * accumulative_counts),
    collate_fn=dict(type=default_collate_fn))

#######################################################################
#                    PART 4  Scheduler & Optimizer                    #
#######################################################################
# optimizer
optim_wrapper = dict(
    type=AmpOptimWrapper,
    optimizer=dict(
        type=optim_type, lr=lr, betas=betas, weight_decay=weight_decay),
    clip_grad=dict(max_norm=max_norm, error_if_nonfinite=False),
    accumulative_counts=accumulative_counts,
    loss_scale='dynamic',
    dtype='float16')

# learning policy
# More information: https://github.com/open-mmlab/mmengine/blob/main/docs/en/tutorials/param_scheduler.md  # noqa: E501
param_scheduler = [
    dict(
        type=LinearLR,
        start_factor=1e-5,
        by_epoch=True,
        begin=0,
        end=warmup_ratio * max_epochs,
        convert_to_iter_based=True),
    dict(
        type=CosineAnnealingLR,
        eta_min=0.0,
        by_epoch=True,
        begin=warmup_ratio * max_epochs,
        end=max_epochs,
        convert_to_iter_based=True)
]

# train, val, test setting
train_cfg = dict(type=TrainLoop, max_epochs=max_epochs)

#######################################################################
#                           PART 5  Runtime                           #
#######################################################################
# Log the dialogue periodically during the training process, optional
tokenizer = dict(
    type=AutoTokenizer.from_pretrained,
    pretrained_model_name_or_path=path,
    trust_remote_code=True)

custom_hooks = [
    dict(type=DatasetInfoHook, tokenizer=tokenizer),
]

# configure default hooks
default_hooks = dict(
    # record the time of every iteration.
    timer=dict(type=IterTimerHook),
    # print log every 10 iterations.
    logger=dict(type=LoggerHook, log_metric_by_epoch=False, interval=10),
    # enable the parameter scheduler.
    param_scheduler=dict(type=ParamSchedulerHook),
    # save checkpoint per `save_steps`.
    checkpoint=dict(
        type=CheckpointHook,
        save_optimizer=False,
        by_epoch=False,
        interval=save_steps,
        max_keep_ckpts=save_total_limit),
    # set sampler seed in distributed evrionment.
    sampler_seed=dict(type=DistSamplerSeedHook),
)

# configure environment
env_cfg = dict(
    # whether to enable cudnn benchmark
    cudnn_benchmark=False,
    # set multi process parameters
    mp_cfg=dict(mp_start_method='fork', opencv_num_threads=0),
    # set distributed parameters
    dist_cfg=dict(backend='nccl'),
)

# set visualizer
visualizer = None

# set log level
log_level = 'INFO'

# load from which checkpoint
load_from = None

# whether to resume training from the loaded checkpoint
resume = False

# Defaults to use random seed and disable `deterministic`
randomness = dict(seed=None, deterministic=False)

# set log processor
log_processor = dict(by_epoch=False)
开始训练
cd /root/InternLM/code/XTuner

NPROC_PER_NODE=1 xtuner train /root/InternLM/code/XTuner/xtuner/configs/internvl/v2/internvl_v2_internlm2_2b_qlora_finetune.py  --work-dir /root/InternLM/work_dir/internvl_ft_run_8_filter  --deepspeed deepspeed_zero1
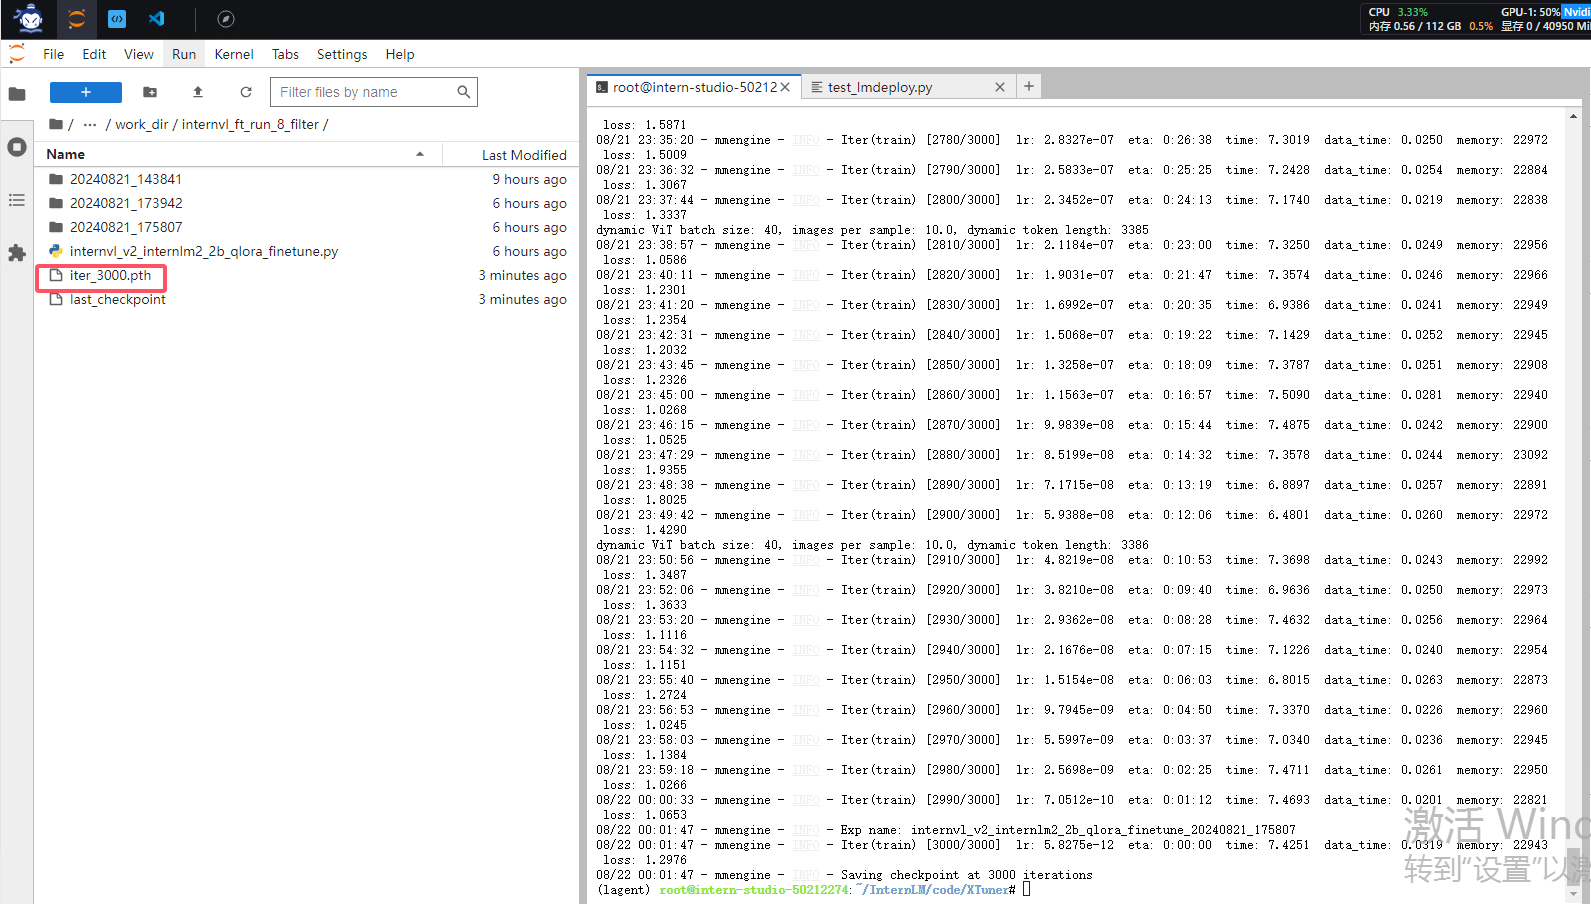
这个训练时间会比较长,我们这里用了 Nvidia A100 40GB显存的显卡做训练的资源情况如下

训练时间大概是6个小时10分钟。训练后的权重文件iter_3000.pth 287.4MB
合并权重&&模型转换
用官方脚本进行权重合并
cd /root/InternLM/code/XTuner
# transfer weights
python xtuner/configs/internvl/v1_5/convert_to_official.py xtuner/configs/internvl/v2/internvl_v2_internlm2_2b_qlora_finetune.py /root/InternLM/work_dir/internvl_ft_run_8_filter/iter_3000.pth /root/InternLM/InternVL2-2B/
最后我们的模型在:/root/InternLM/InternVL2-2B/,文件格式:
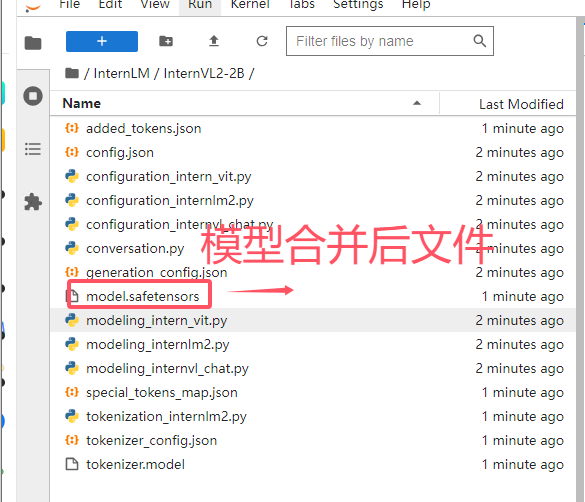
以上就模型微调后完整的模型了。
微调后测试
我们把下面的代码替换进test_lmdeploy.py中,然后跑一下效果。
from lmdeploy import pipeline
from lmdeploy.vl import load_image

pipe = pipeline('/root/model/InternVL2-2B')

image = load_image('/root/InternLM/datasets/ex_images/004atEXYgy1gpb3tsdolwj60y219fwkp02.jpg')
response = pipe(('请你根据这张图片,讲一个脑洞大开的梗', image))
print(response.text)
cd /root/InternLM/code

python3 test_lmdeploy.py
我们对比一下前后的内容,下面是原图
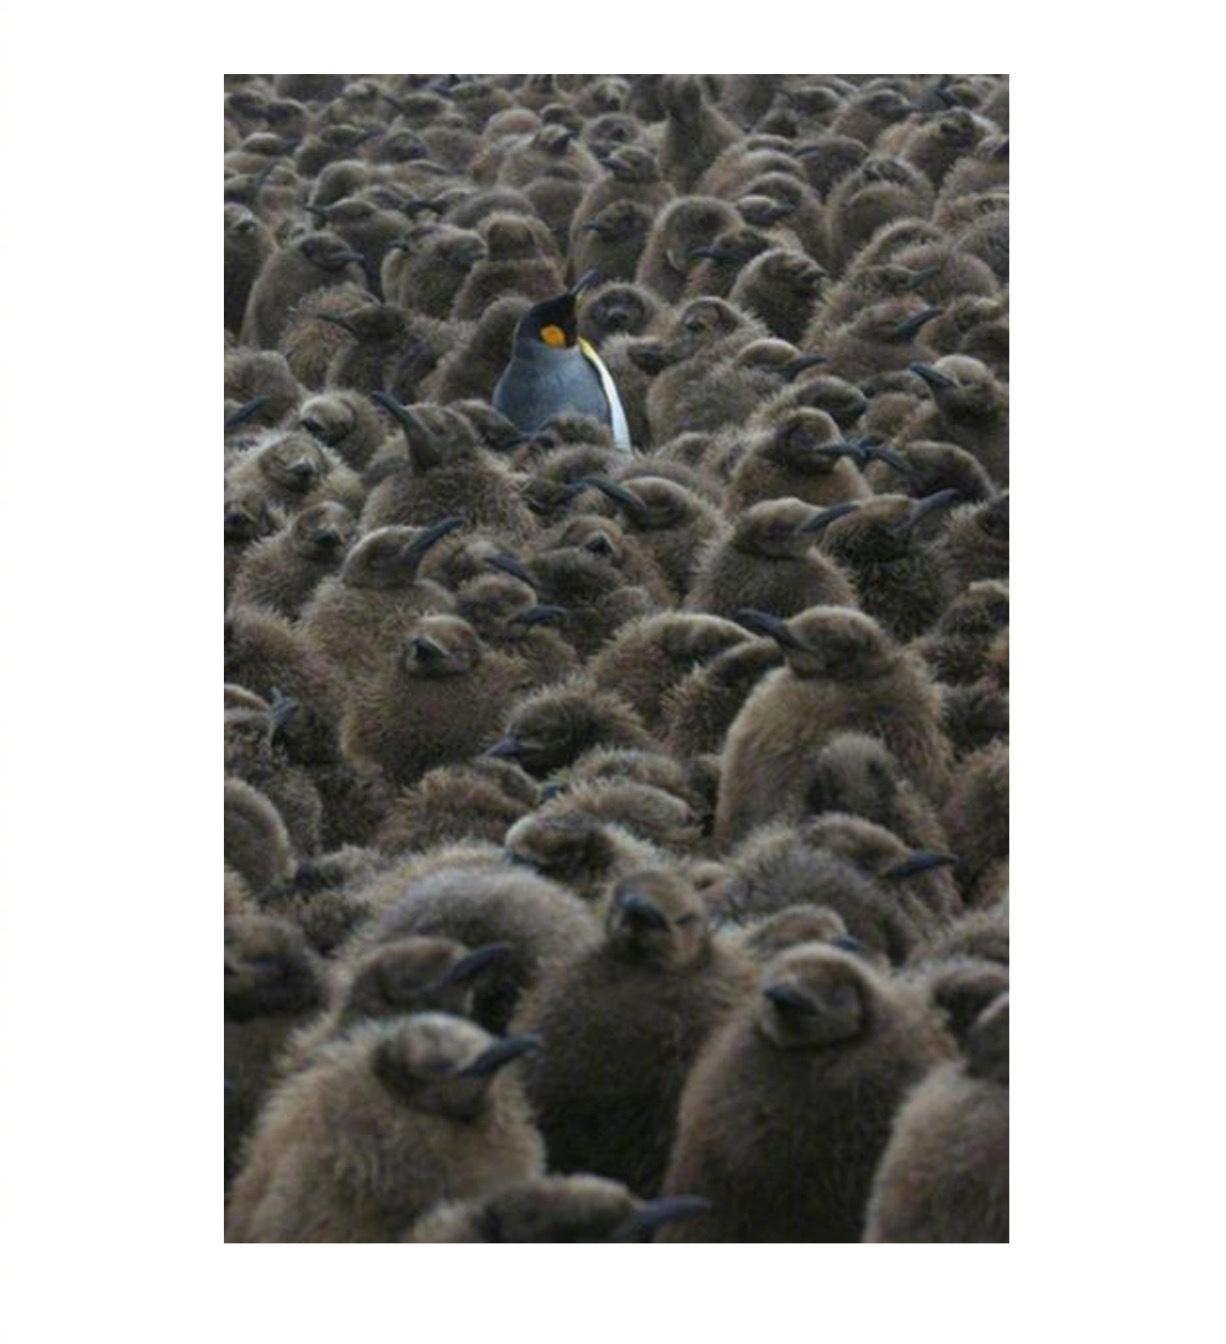
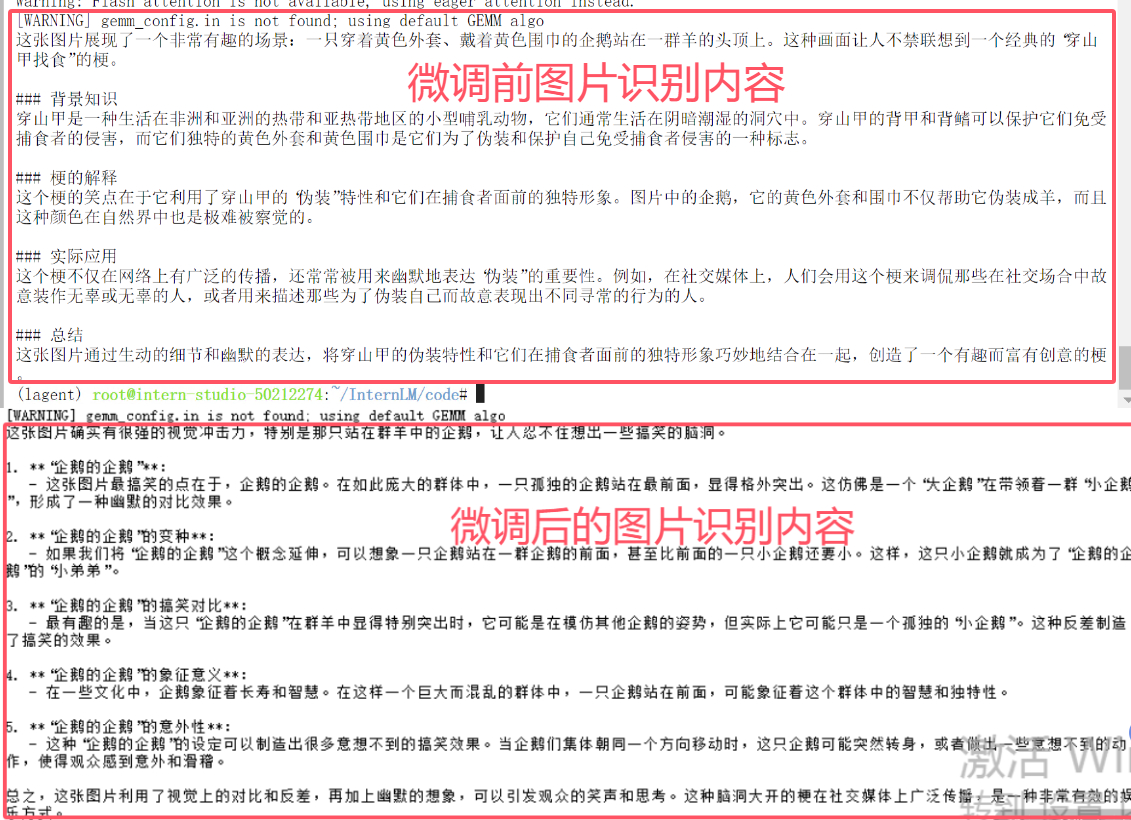
我们通过对比发现微调前模型老老实实的将图片内容识别说出来,而微调后的模型输出明细有变化。语气明显带有“梗”的味道。
感兴趣的小伙伴可以按照文档来操作一遍,尝试微调多模态大模型。当然这个教程的数据集是利用别人整理好的数据集。如果微调更好玩的模型,数据集的整理和处理必不可少。这块涉及到的知识点也比较多,后期在和大家分享数据集的制作这块吧。

北京人形旗下天工造物具身智能开源社区,聚焦具身天工与慧思开物两大平台
更多推荐
 8
8 0
0- 0


 已为社区贡献2条内容

所有评论(0)